5.登录功能
通过最基础的登录操作来完成登录处理
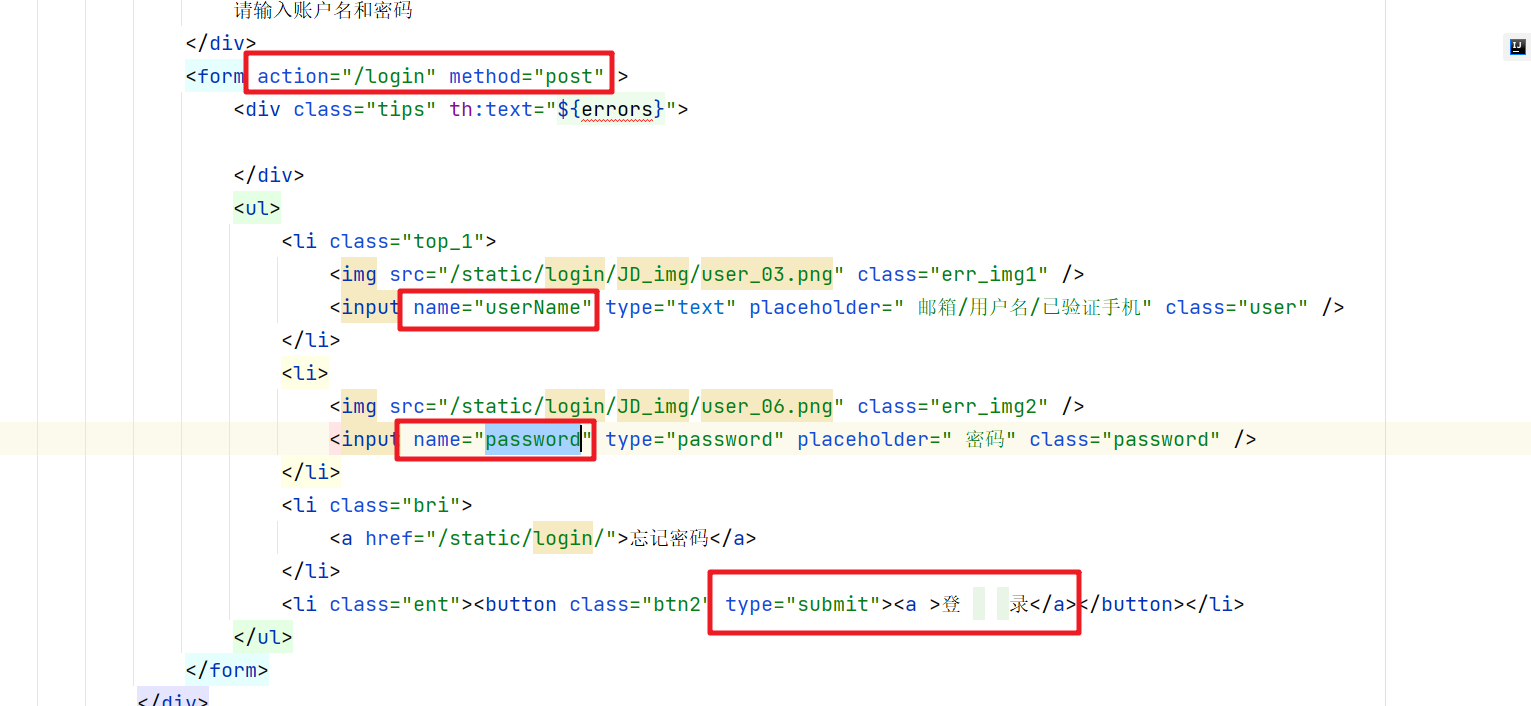
登录页面处理
认证服务的处理
    /**
     * 注册的方法
     * @return
     */
    @PostMapping("/login")
    public String login(LoginVo loginVo , RedirectAttributes redirectAttributes){
        R r = memberFeginService.login(loginVo);
        if(r.getCode() == 0){
            // 表示登录成功
            return "redirect:http://msb.mall.com/home";
        }

        redirectAttributes.addAttribute("errors",r.get("msg"));

        // 表示登录失败,重新跳转到登录页面
        return "redirect:http://msb.auth.com/login.html";


    }
会员中心的认证逻辑
    @RequestMapping("/login")
    public R login(@RequestBody MemberLoginVO vo){
        MemberEntity entity = memberService.login(vo);
        if(entity != null){
            return R.ok();
        }

        return R.error(BizCodeEnume.USERNAME_PHONE_VALID_EXCEPTION.getCode(),
                BizCodeEnume.USERNAME_PHONE_VALID_EXCEPTION.getMsg());
    }
service中的具体认证处理
    @Override
    public MemberEntity login(MemberLoginVO vo) {
        // 1.根据账号或者手机号来查询会员信息
        MemberEntity entity = this.getOne(new QueryWrapper<MemberEntity>()
                .eq("username", vo.getUserName())
                .or()
                .eq("mobile", vo.getUserName()));
        if(entity != null){
            // 2.如果账号或者手机号存在 然后根据密码加密后的校验来判断是否登录成功
            BCryptPasswordEncoder encoder = new BCryptPasswordEncoder();
            boolean matches = encoder.matches(vo.getPassword(), entity.getPassword());
            if(matches){
                // 表明登录成功
                return entity;
            }
        }
        return null;
    }
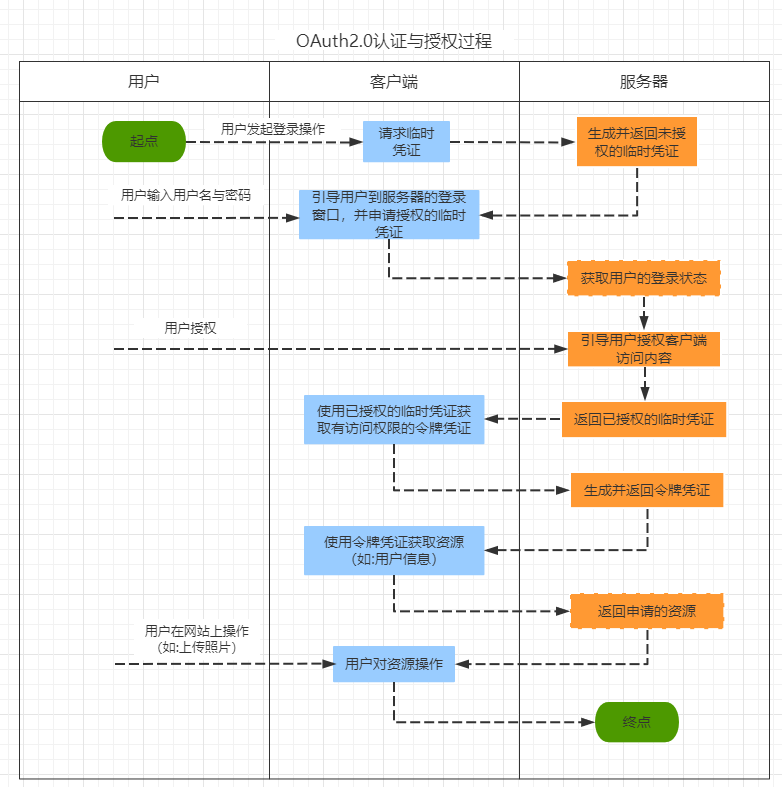
6.Auth2.0
OAuth2.0是OAuth协议的延续版本,但不向前兼容OAuth 1.0(即完全废止了OAuth1.0)。 OAuth
2.0关注客户端开发者的简易性。要么通过组织在资源拥有者和HTTP服务商之间的被批准的交互动作代表用户,要么允许第三方应用代表用户获得访问的权限。
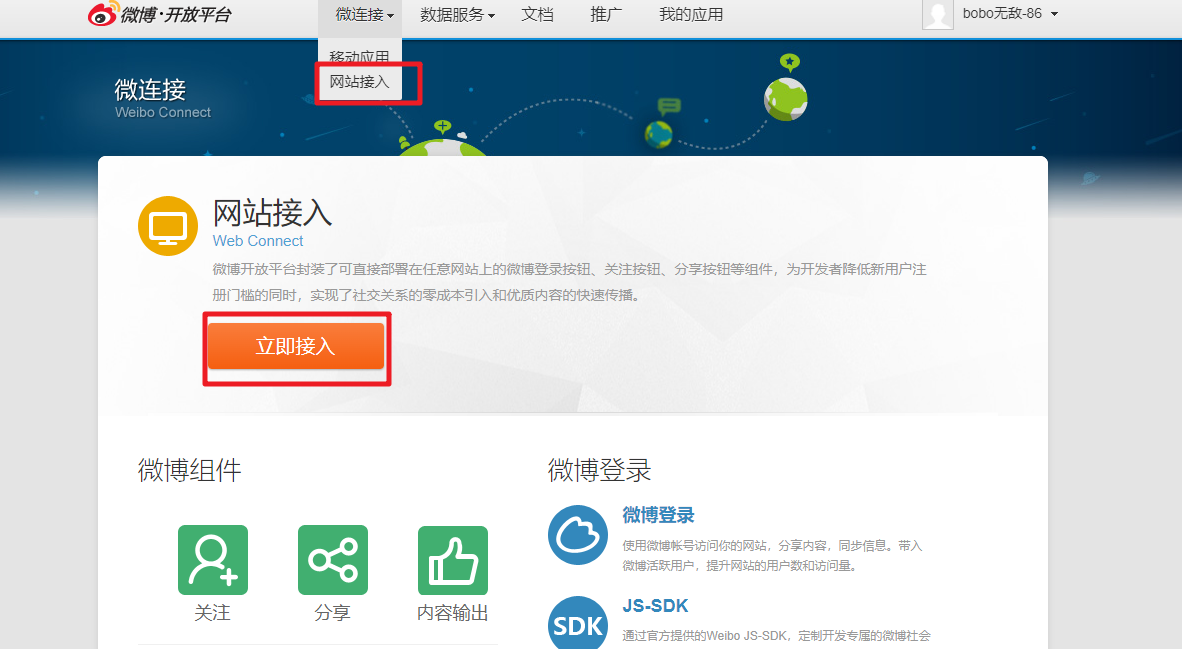
6.1 微博开放平台
地址:https://open.weibo.com/

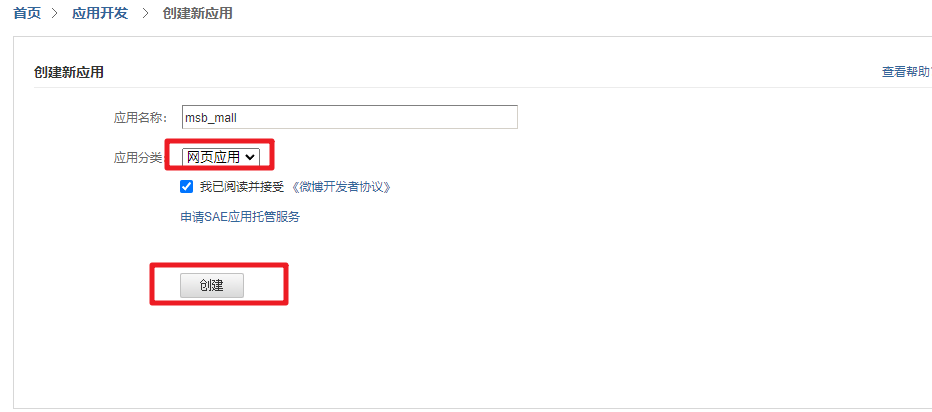
创建应用
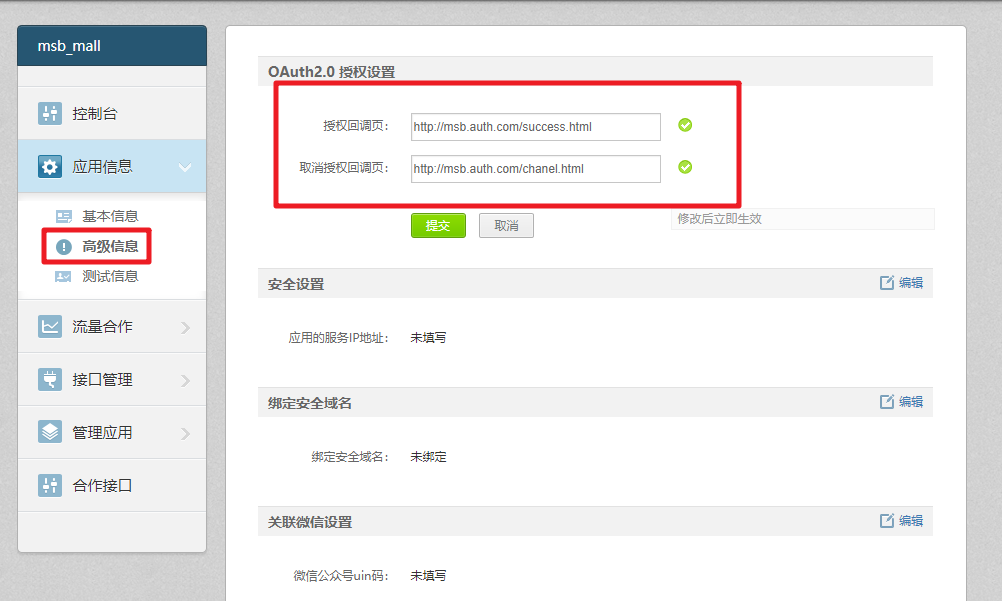
创建后的基本信息:

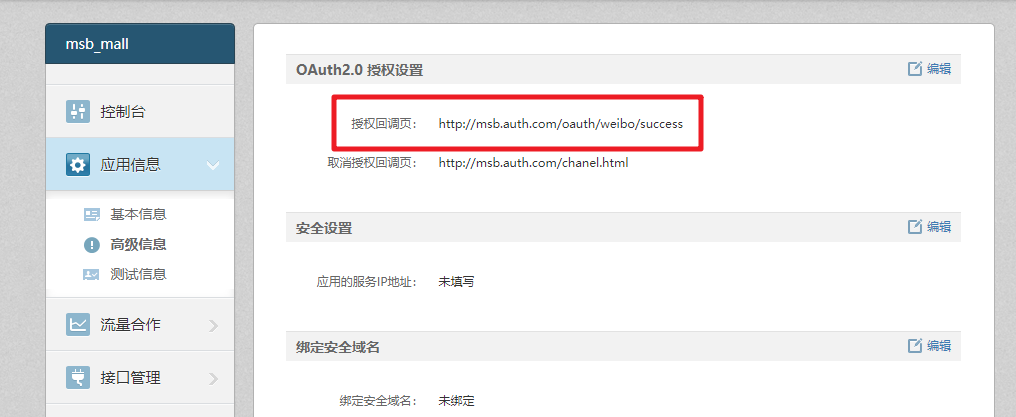
授权设置:
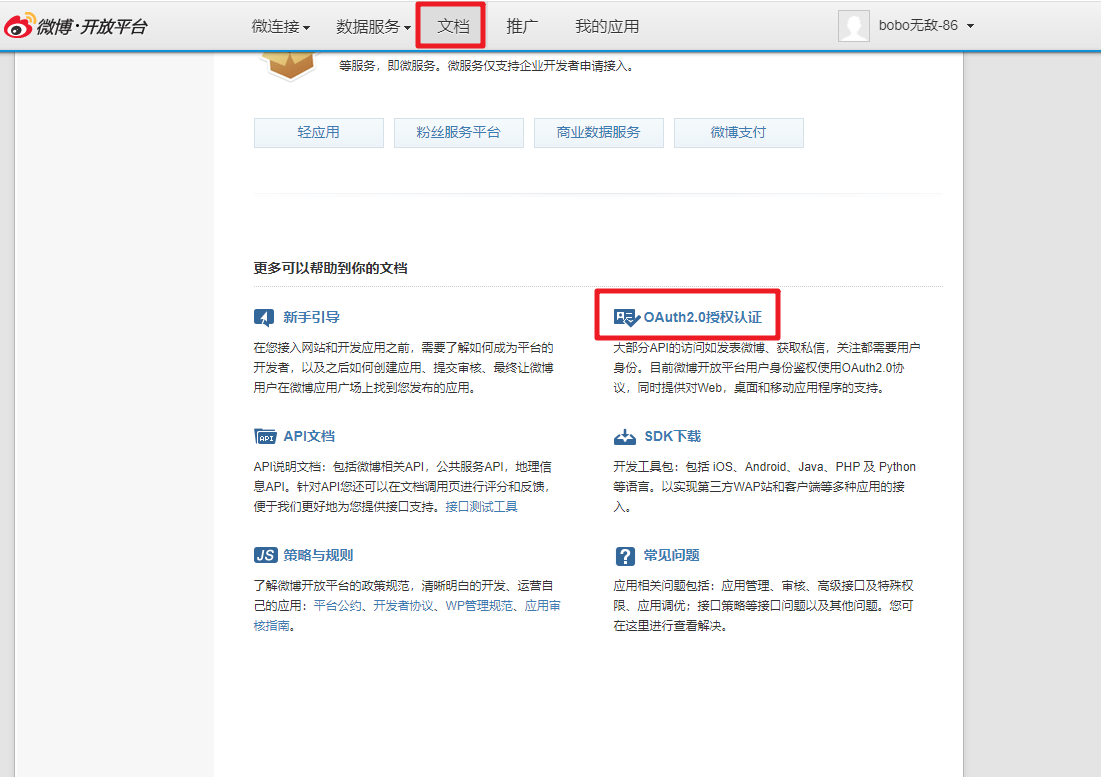
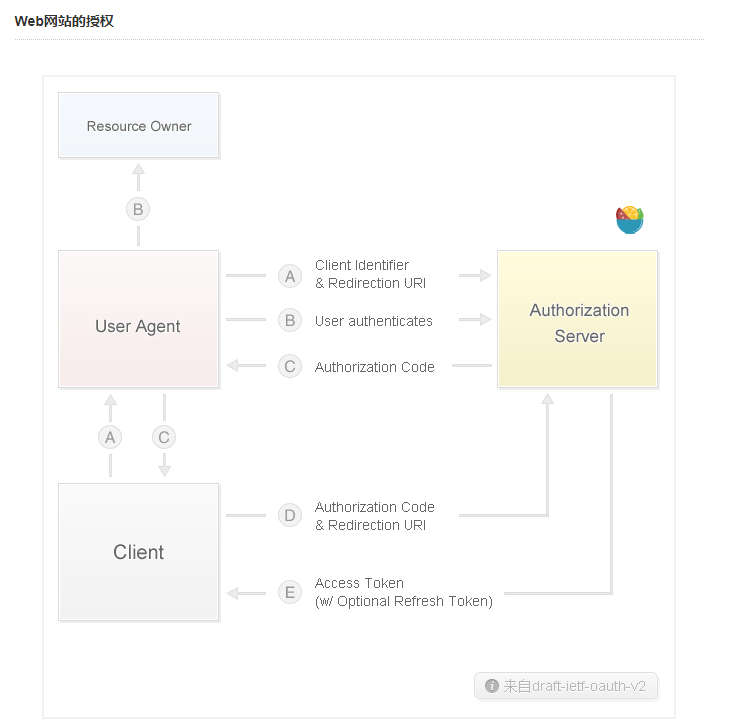
社交认证文档:
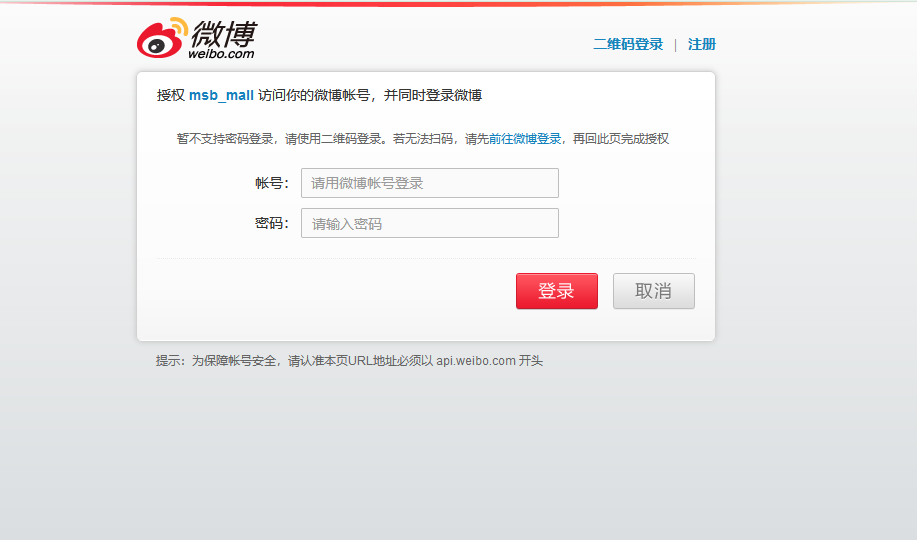
微博Web端授权的操作:
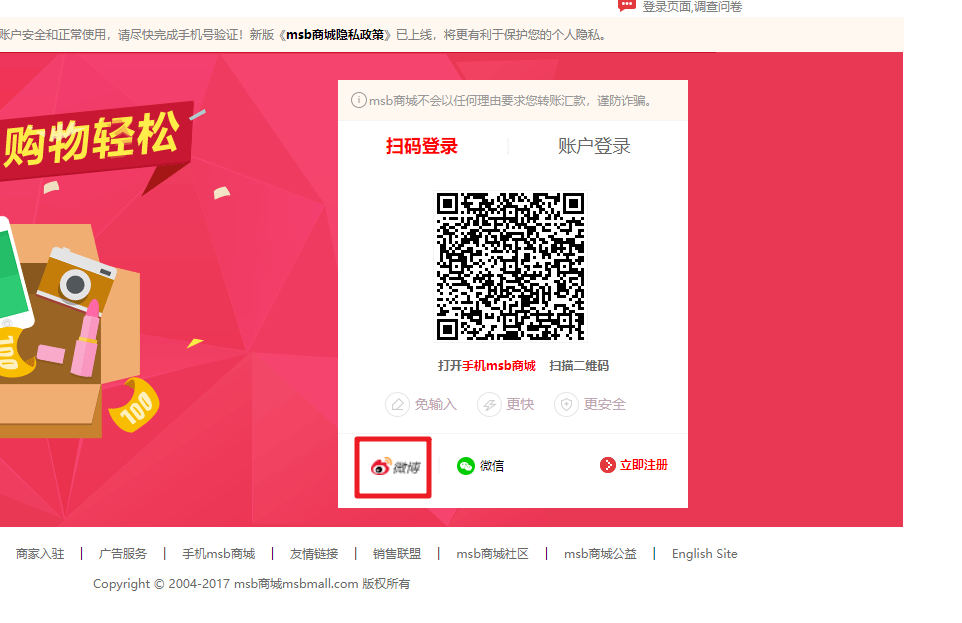
引导用户点击按钮跳转到对应的授权页面
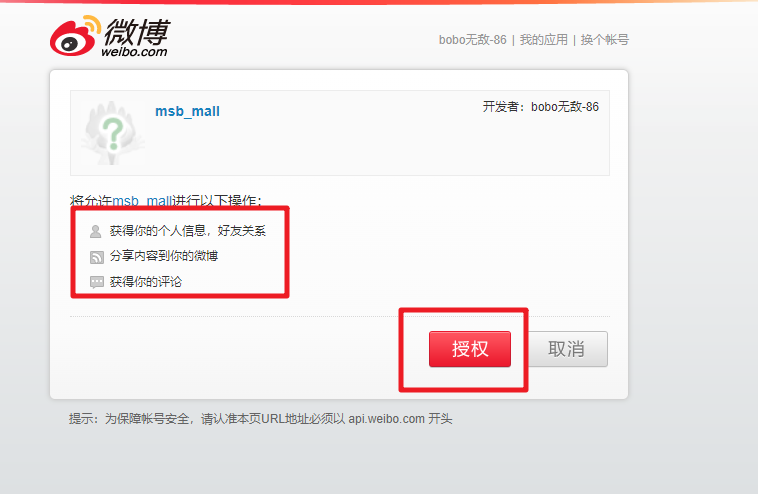
点击授权按钮后查看回调接口的code信息
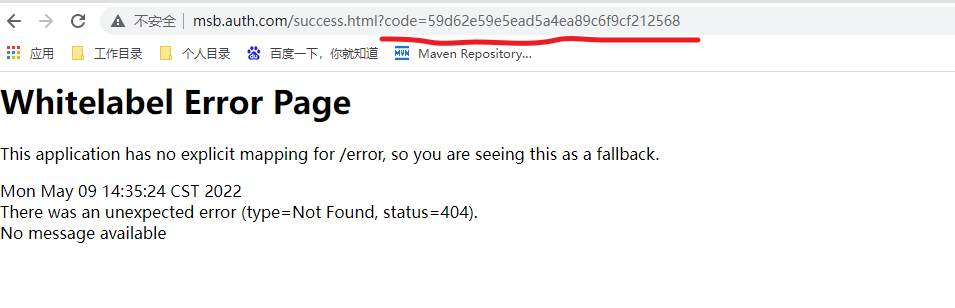
获取到了code信息:59d62e59e5ead5a4ea89c6f9cf212568
然后根据code信息我们可以去授权服务器获取对应的AccessToken。
https://api.weibo.com/oauth2/access_token?client_id=1093598037&client_secret=1085c8de04dee49e9bb110eaf2d3cf62&grant_type=authorization_code&redirect_uri=http://msb.auth.com/success.html&code=59d62e59e5ead5a4ea89c6f9cf212568
获取Token信息只支持POST方式提交

在PostMan中通过post方式提交成功获取到了对应的token信息
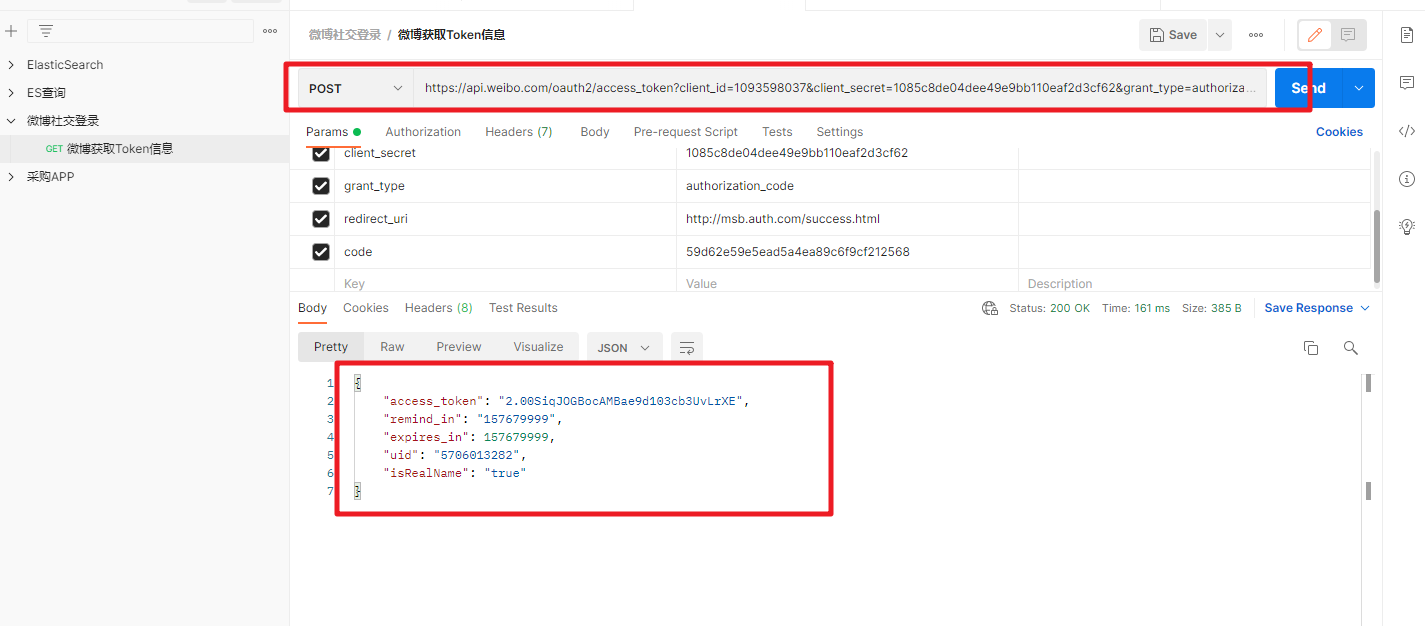
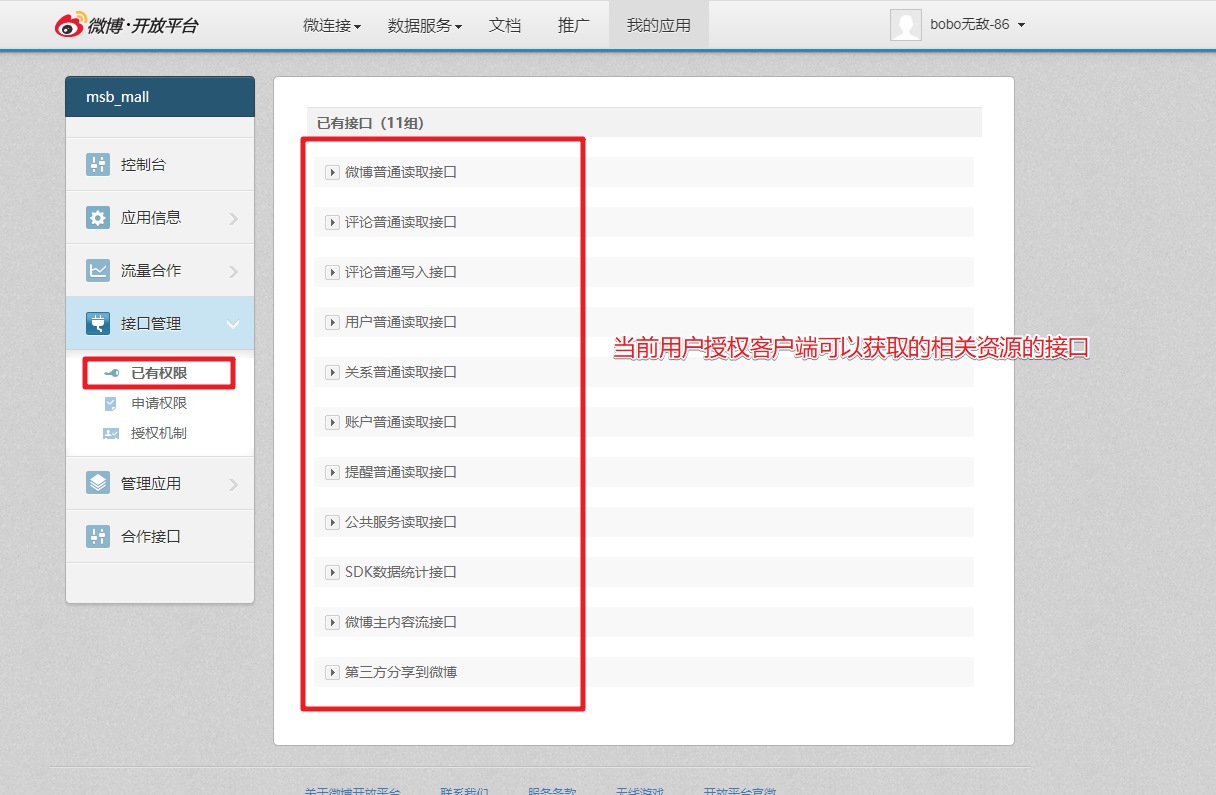
获取到了Token信息后我们就可以去资源服务器获取对象的信息
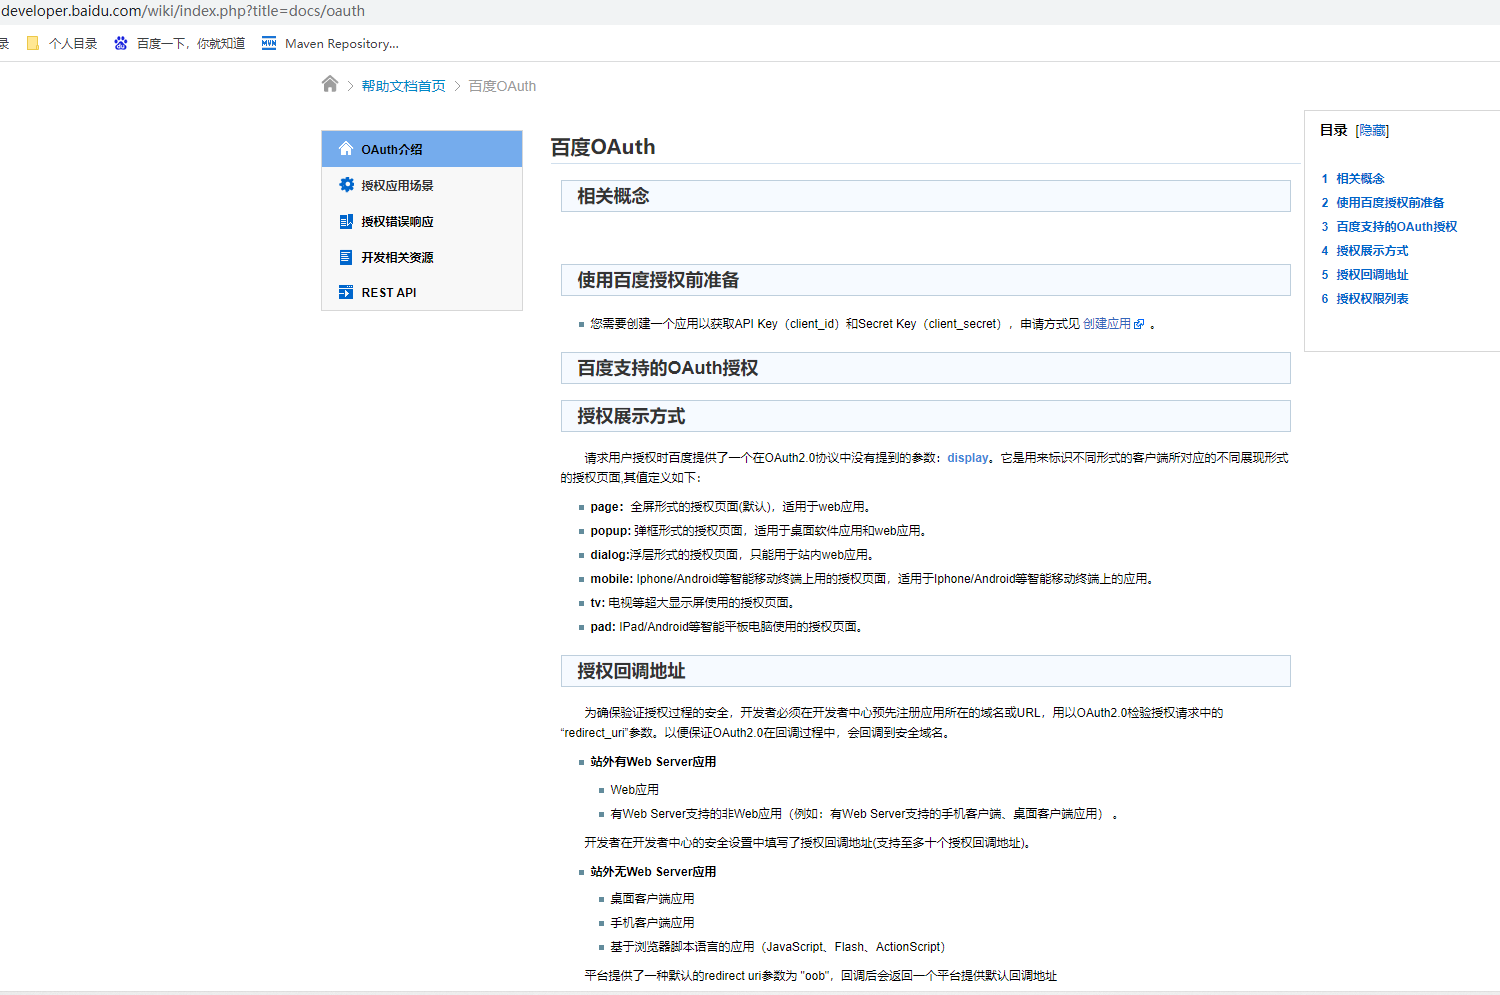
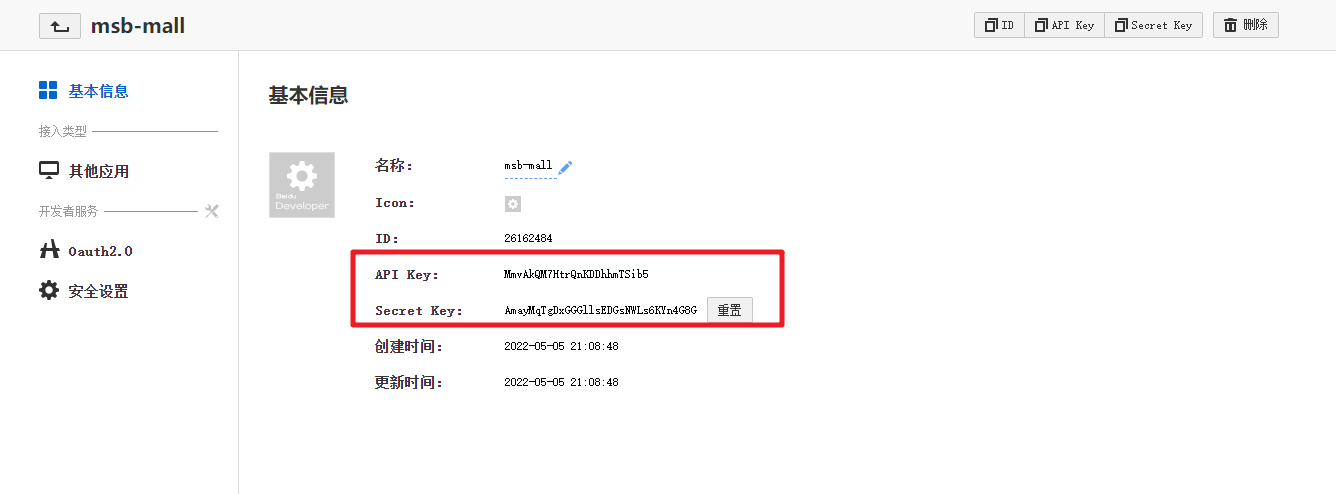
6.2 百度开放平台
地址:
Auth2.0操作:https://developer.baidu.com/wiki/index.php?title=docs/oauth
创建应用:http://developer.baidu.com/console#app/project
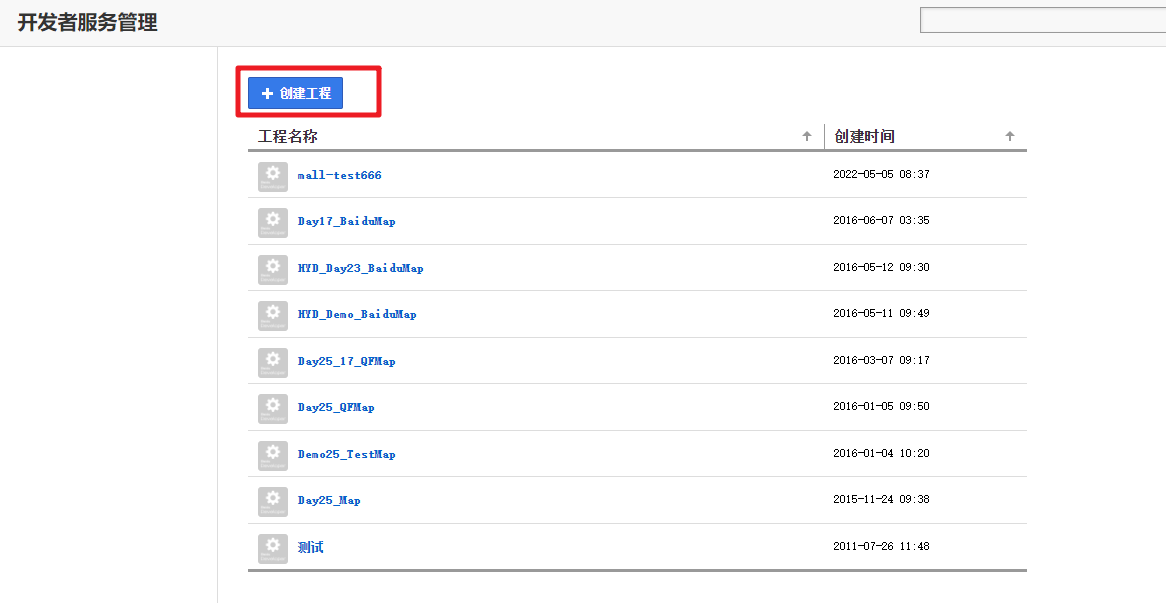

创建完成:
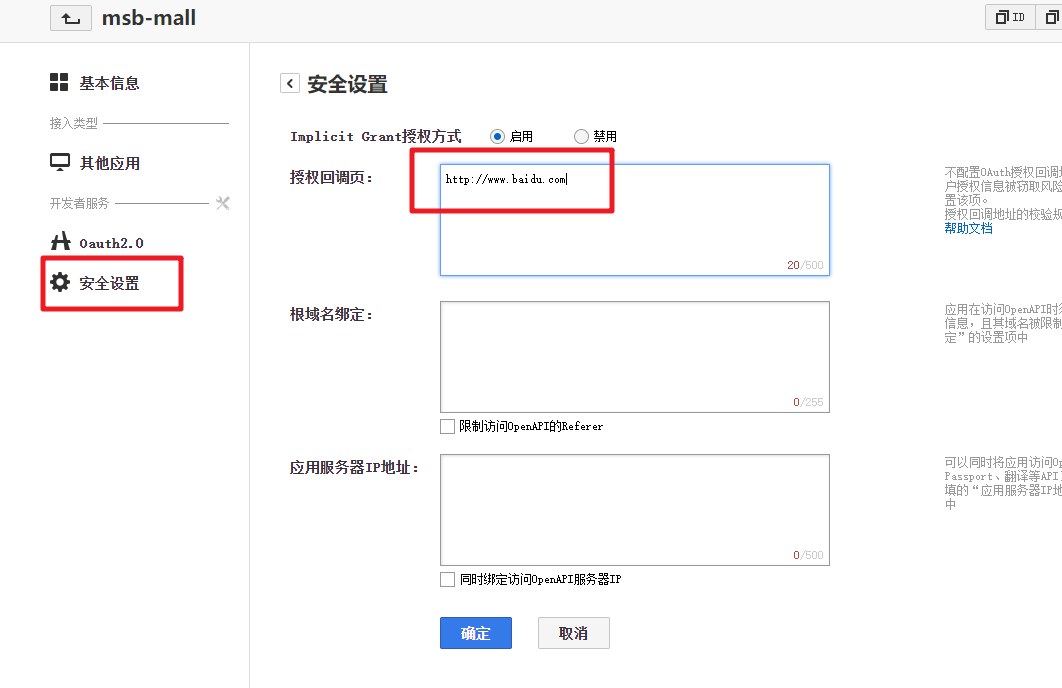
引导用户跳转到授权地址:
http://openapi.baidu.com/oauth/2.0/authorize?
	response_type=code&
	client_id=YOUR_CLIENT_ID&
	redirect_uri=YOUR_REGISTERED_REDIRECT_URI&
	scope=email&
	display=popup
地址修改为我们自己的:http://openapi.baidu.com/oauth/2.0/authorize?response_type=code&client_id=MmvAkQM7HtrQnKDDhhmTSib5&redirect_uri=http://www.baidu.com&display=popup
获取到的Code信息
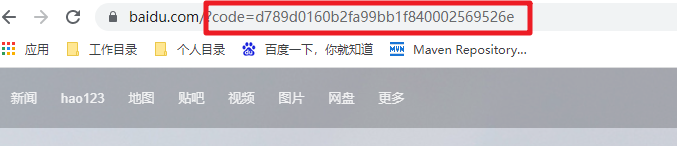
code:d789d0160b2fa99bb1f840002569526e
获取到对应的token信息
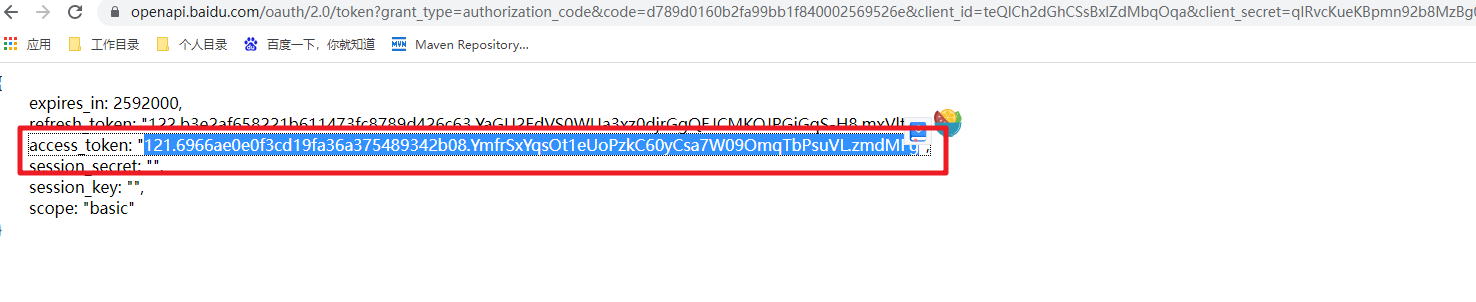
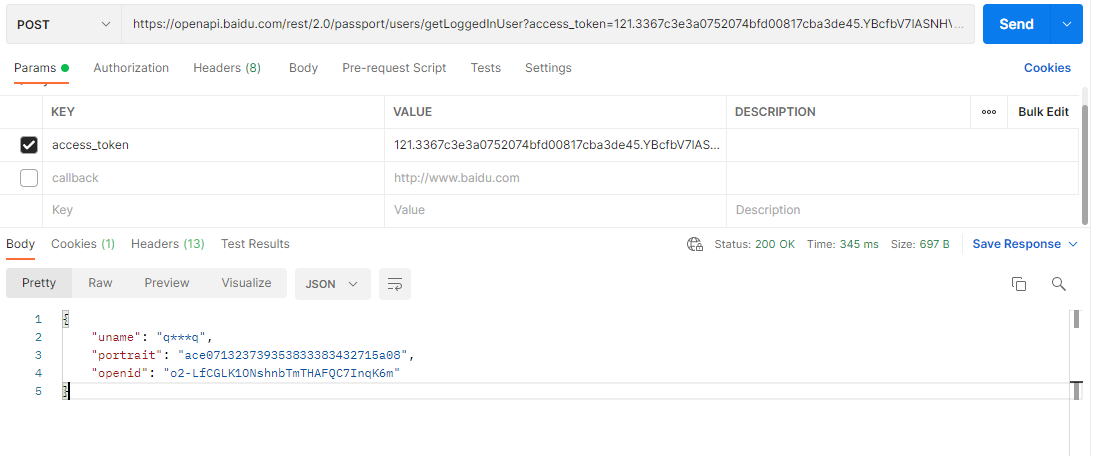
Token:121.6966ae0e0f3cd19fa36a375489342b08.YmfrSxYqsOt1eUoPzkC60yCsa7W09OmqTbPsuVL.zmdMFg
token访问地址:https://openapi.baidu.com/rest/2.0/passport/users/getLoggedInUser?access_token=121.6966ae0e0f3cd19fa36a375489342b08.YmfrSxYqsOt1eUoPzkC60yCsa7W09OmqTbPsuVL.zmdMFg
7.社交登录实现
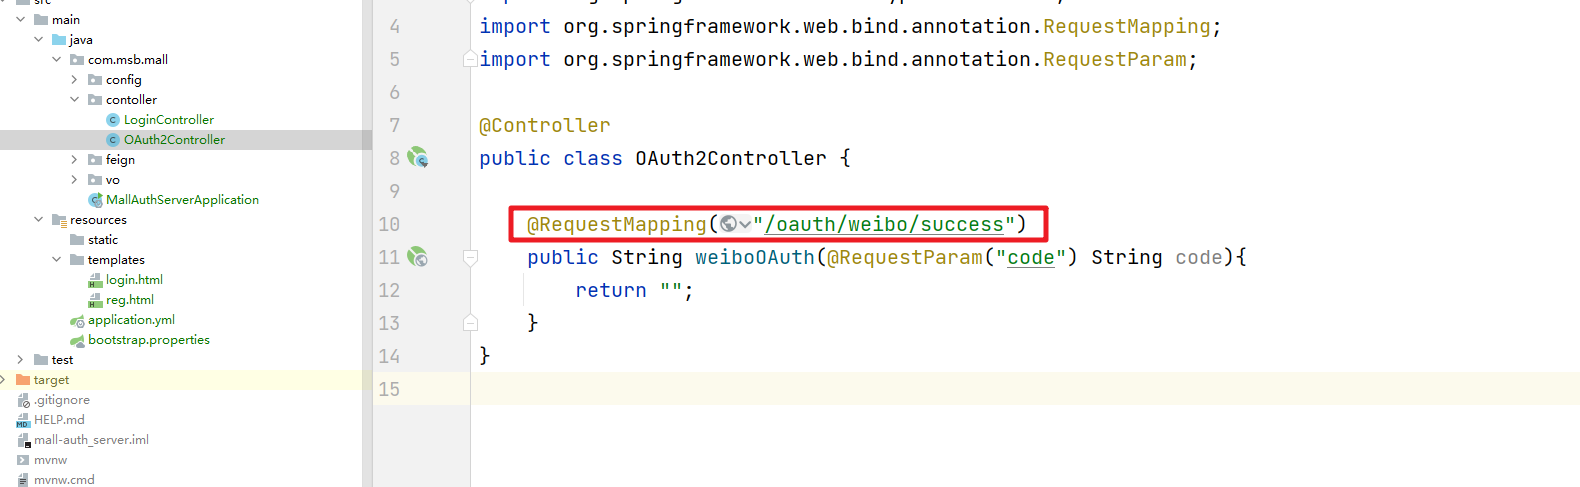
7.1 code处理
在后台服务中获取code并对应的获取Token信息
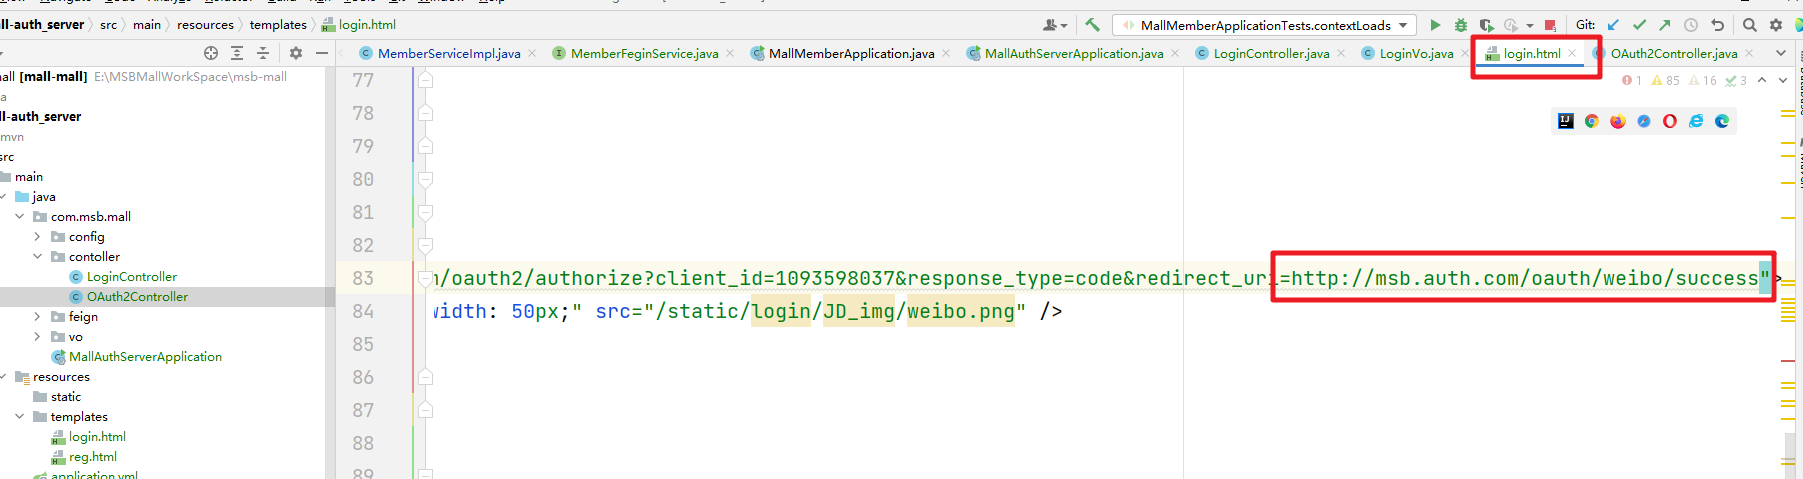
然后需要同步的调整引入的链接地址:
7.2 获取Token信息
根据上一步获取的code信息,我们可以获取对应的Token信息
    @RequestMapping("/oauth/weibo/success")
    public String weiboOAuth(@RequestParam("code") String code) throws Exception {
        Map<String,String> body = new HashMap<>();
        body.put("client_id","1093598037");
        body.put("client_secret","1085c8de04dee49e9bb110eaf2d3cf62");
        body.put("grant_type","authorization_code");
        body.put("redirect_uri","http://msb.auth.com/oauth/weibo/success");
        body.put("code",code);
        // 根据Code获取对应的Token信息
        HttpResponse post = HttpUtils.doPost("https://api.weibo.com"
                , "/oauth2/access_token"
                , "post"
                , new HashMap<>()
                , null
                , body
        );
        int statusCode = post.getStatusLine().getStatusCode();
        if(statusCode != 200){
            // 说明获取Token失败,就调回到登录页面
            return "redirect:http://msb.auth.com/login.html";
        }
        // 说明获取Token信息成功
        String json = EntityUtils.toString(post.getEntity());
        SocialUser socialUser = JSON.parseObject(json, SocialUser.class);
        // 注册成功就需要调整到商城的首页
        return "redirect:http://msb.mall.com/home.html";
    }
7.3 登录和注册
表结构中新增对应的
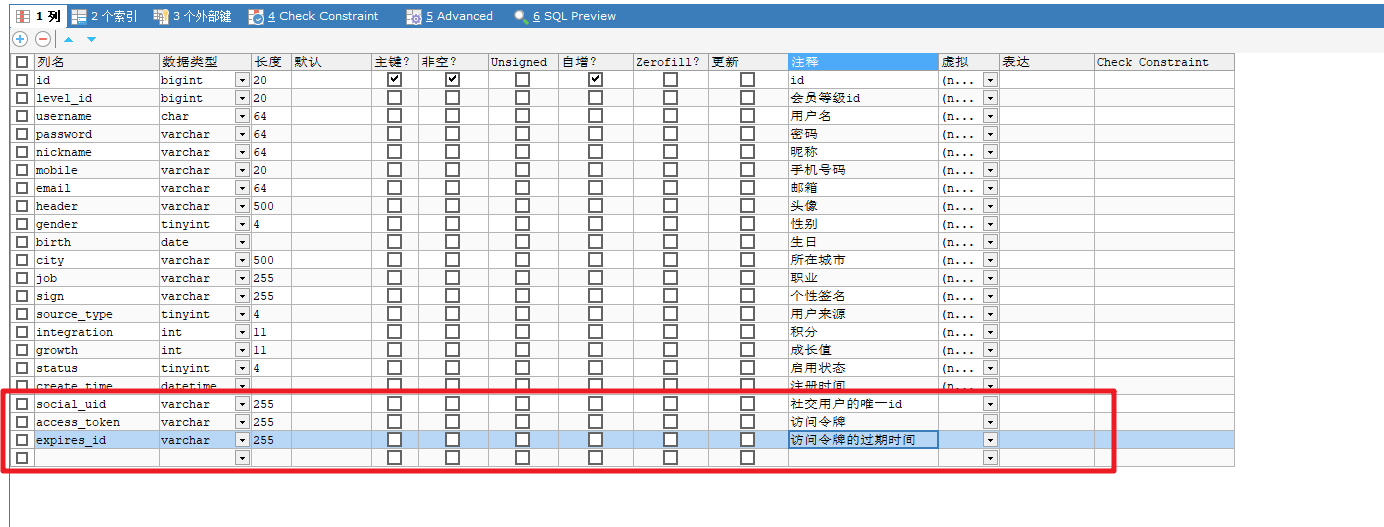
然后在对应的实体对象中添加对应的属性
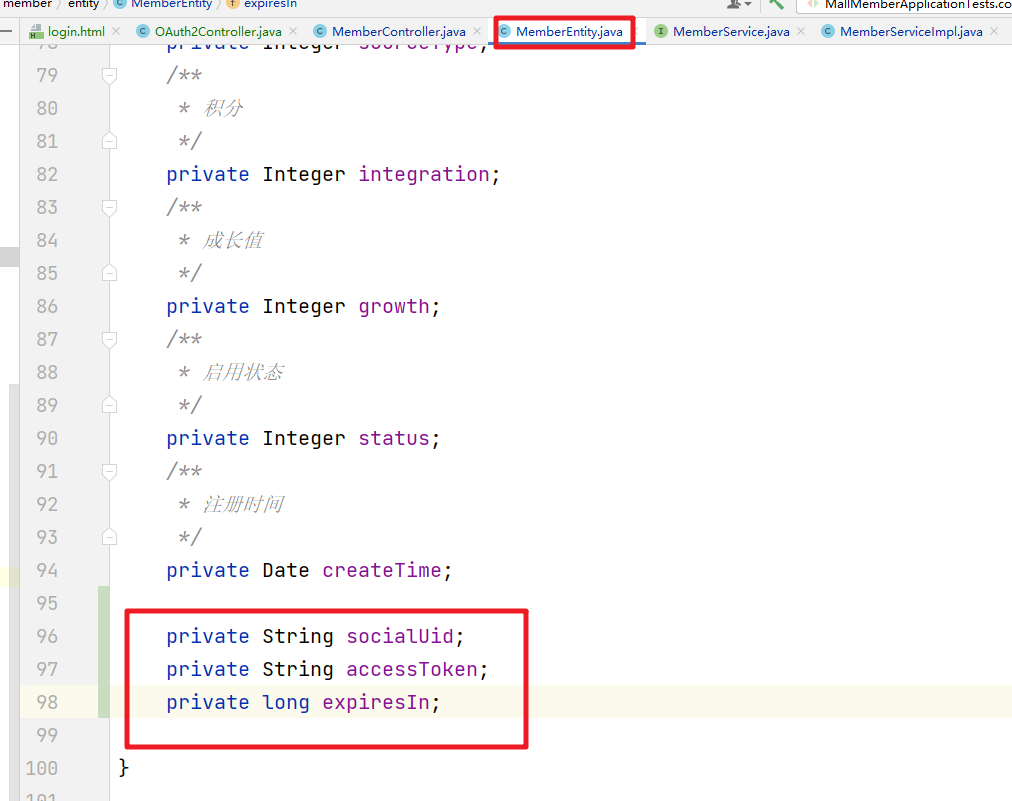
service中实现注册和登录的逻辑
    /**
     * 社交登录
     * @param vo
     * @return
     */
    @Override
    public MemberEntity login(SocialUser vo) {
        String uid = vo.getUid();
        // 如果该用户是第一次社交登录,那么需要注册
        // 如果不是第一次社交登录 那么就更新相关信息 登录功能
        MemberEntity memberEntity = this.getOne(new QueryWrapper<MemberEntity>().eq("social_uid", uid));
        if(memberEntity != null){
            // 说明当前用户已经注册过了 更新token和过期时间
            MemberEntity entity = new MemberEntity();
            entity.setId(memberEntity.getId());
            entity.setAccessToken(vo.getAccessToken());
            entity.setExpiresIn(vo.getExpiresIn());
            this.updateById(entity);
            // 在返回的登录用户信息中我们同步的也保存 token和过期时间
            memberEntity.setAccessToken(vo.getAccessToken());
            memberEntity.setExpiresIn(vo.getExpiresIn());
            return memberEntity;
        }
        // 表示用户是第一提交,那么我们就需要对应的来注册
        MemberEntity entity = new MemberEntity();
        entity.setAccessToken(vo.getAccessToken());
        entity.setExpiresIn(vo.getExpiresIn());
        entity.setSocialUid(vo.getUid());
        // 通过token调用微博开发的接口来获取用户的相关信息
        try {
            Map<String,String> querys = new HashMap<>();
            querys.put("access_token",vo.getAccessToken());
            querys.put("uid",vo.getUid());
            HttpResponse response = HttpUtils.doGet("https://api.weibo.com"
                    , "/2/users/show.json"
                    , "get"
                    , new HashMap<>()
                    , querys
            );
            if(response.getStatusLine().getStatusCode() == 200){
                String json = EntityUtils.toString(response.getEntity());
                JSONObject jsonObject = JSON.parseObject(json);
                String nickName = jsonObject.getString("screen_name");
                String gender = jsonObject.getString("gender");
                entity.setNickname(nickName);
                entity.setGender("m".equals(gender)?1:0);
            }
        }catch (Exception e){

        }
        // 注册用户信息
        this.save(entity);
        return entity;
    }
7.4 登录的串联
在Auth服务中我们需要通过Feign来调用MemberService中的相关服务来完成最后的串联
    @RequestMapping("/oauth/weibo/success")
    public String weiboOAuth(@RequestParam("code") String code) throws Exception {
        Map<String,String> body = new HashMap<>();
        body.put("client_id","1093598037");
        body.put("client_secret","1085c8de04dee49e9bb110eaf2d3cf62");
        body.put("grant_type","authorization_code");
        body.put("redirect_uri","http://msb.auth.com/oauth/weibo/success");
        body.put("code",code);
        // 根据Code获取对应的Token信息
        HttpResponse post = HttpUtils.doPost("https://api.weibo.com"
                , "/oauth2/access_token"
                , "post"
                , new HashMap<>()
                , null
                , body
        );
        int statusCode = post.getStatusLine().getStatusCode();
        if(statusCode != 200){
            // 说明获取Token失败,就调回到登录页面
            return "redirect:http://msb.auth.com/login.html";
        }
        // 说明获取Token信息成功
        String json = EntityUtils.toString(post.getEntity());
        SocialUser socialUser = JSON.parseObject(json, SocialUser.class);
        R r = memberFeginService.socialLogin(socialUser);
        if(r.getCode() != 0){
            // 登录错误
            return "redirect:http://msb.auth.com/login.html";
        }
        String entityJson = (String) r.get("entity");
        System.out.println("----------------->" + entityJson);
        // 注册成功就需要调整到商城的首页
        return "redirect:http://msb.mall.com/home";
    }
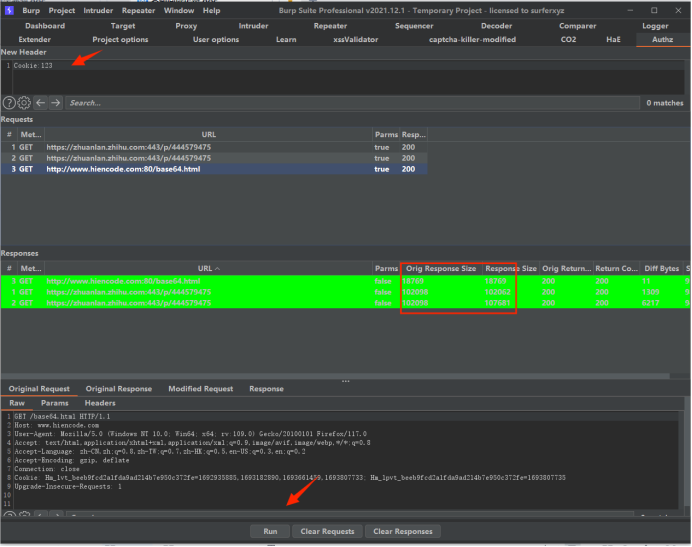
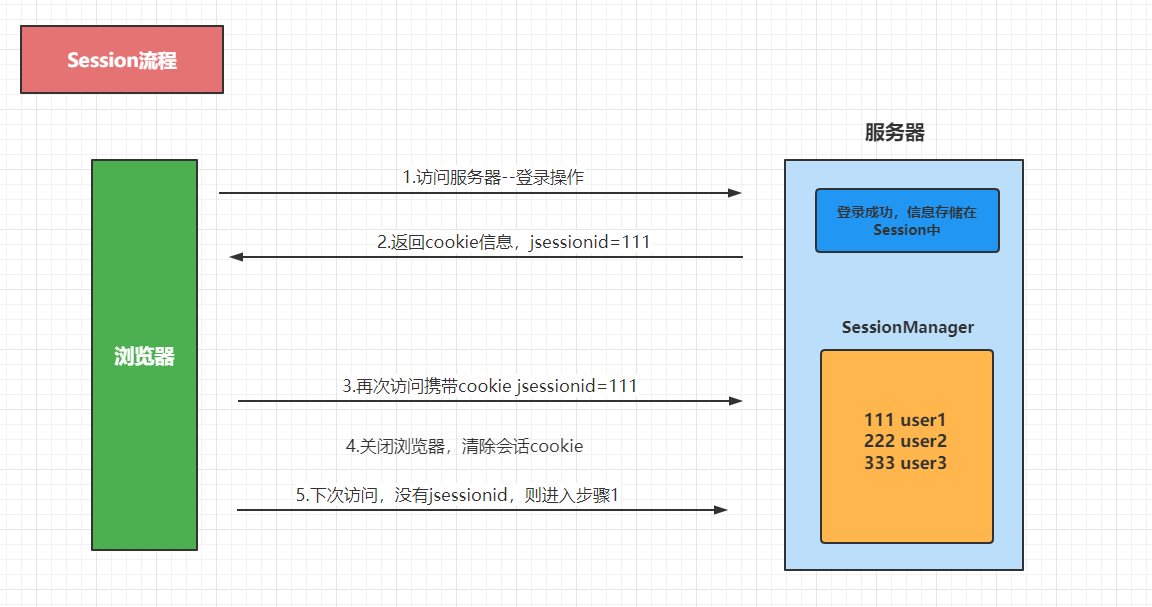
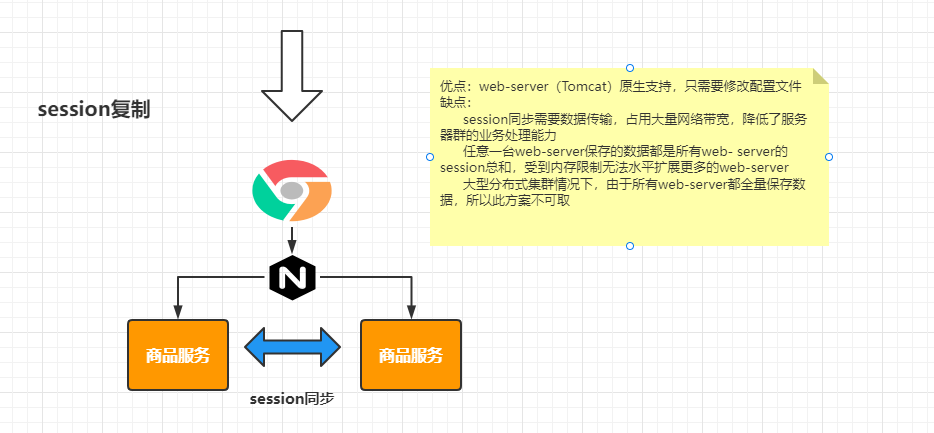
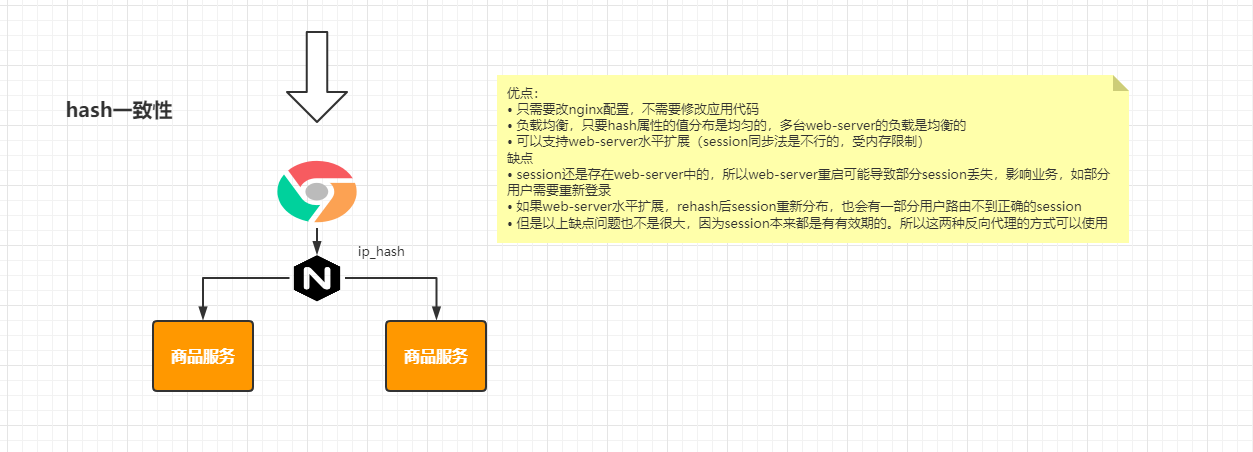
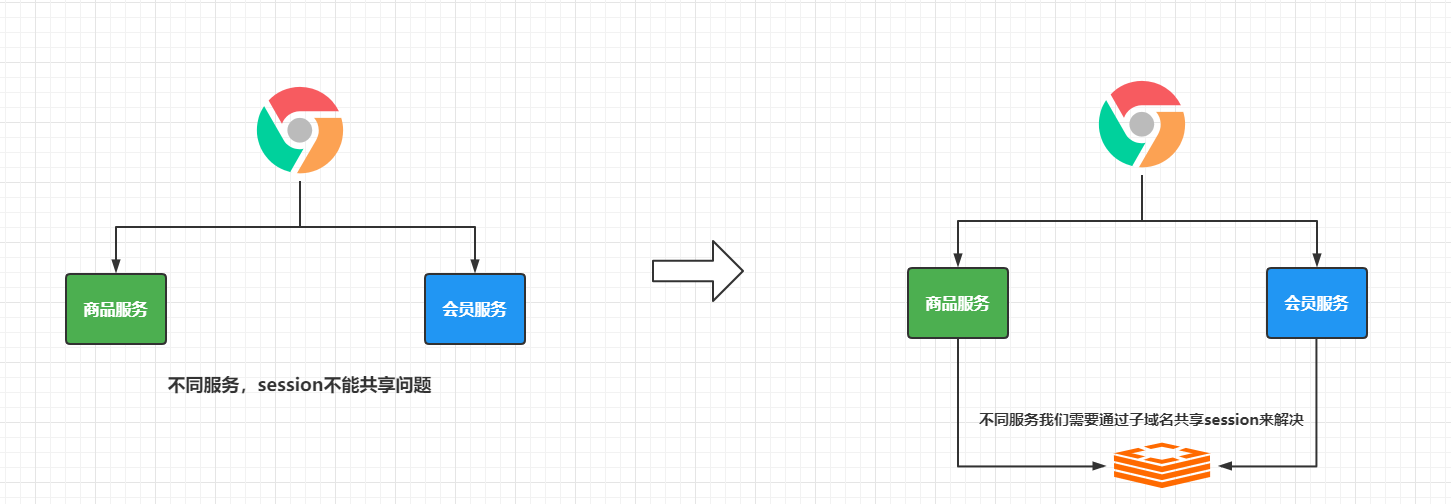
二、分布式session
1.session问题

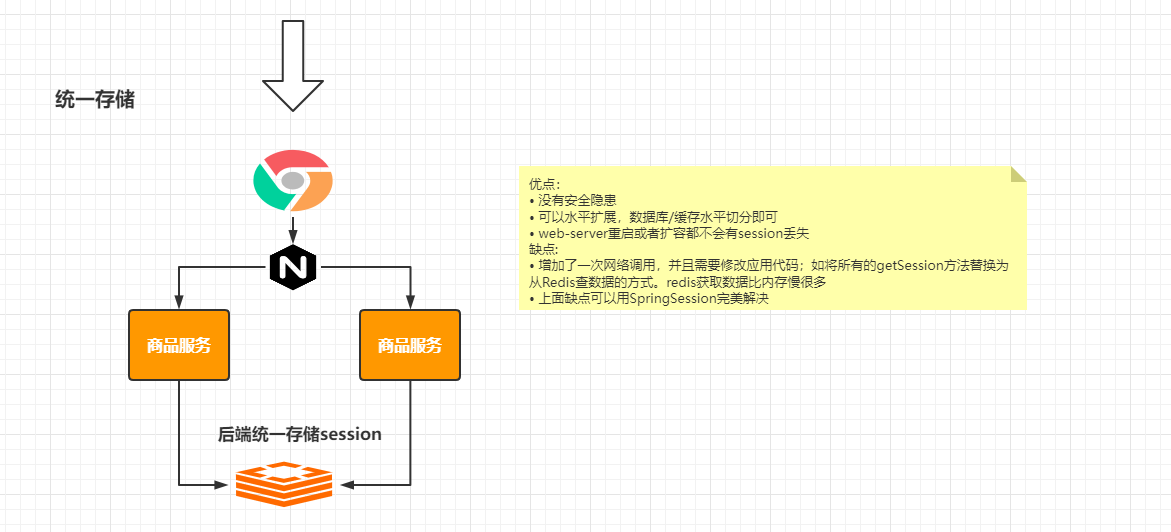
2.SpringSession整合
我们通过SpringSession来实现Session的共享,Session数据存储在Redis中
SpringSession的操作指南:
https://docs.spring.io/spring-session/docs/2.5.6/reference/html5/guides/boot-redis.html
导入相关的依赖
        <dependency>
            <groupId>org.springframework.session</groupId>
            <artifactId>spring-session-data-redis</artifactId>
        </dependency>
设置对应的配置
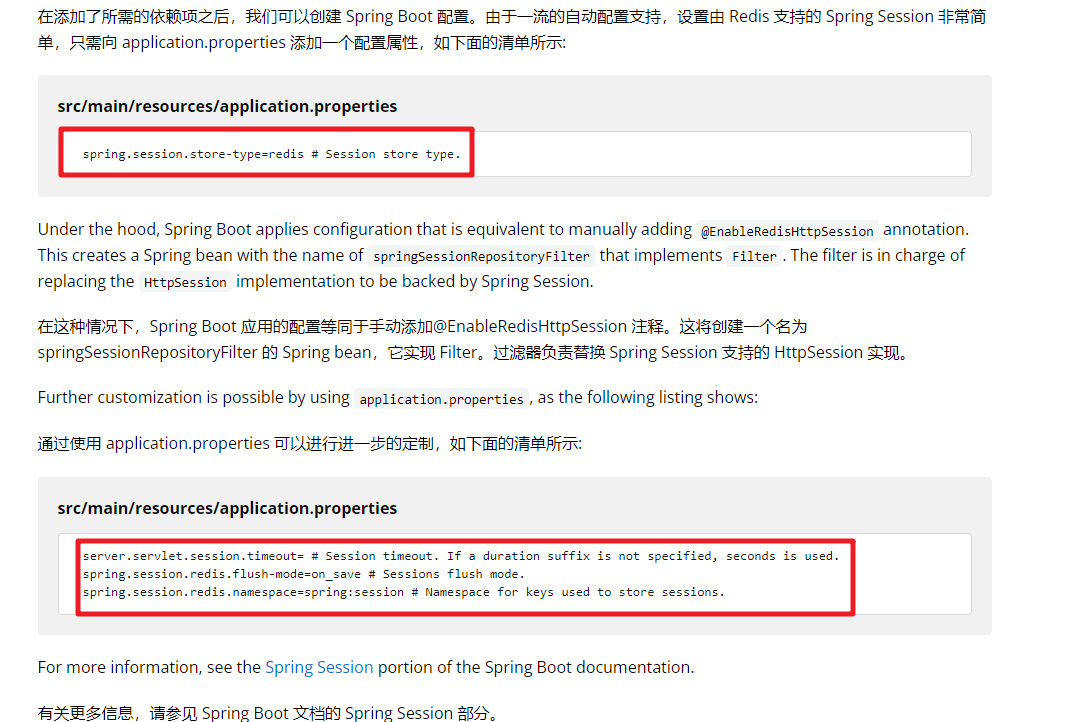
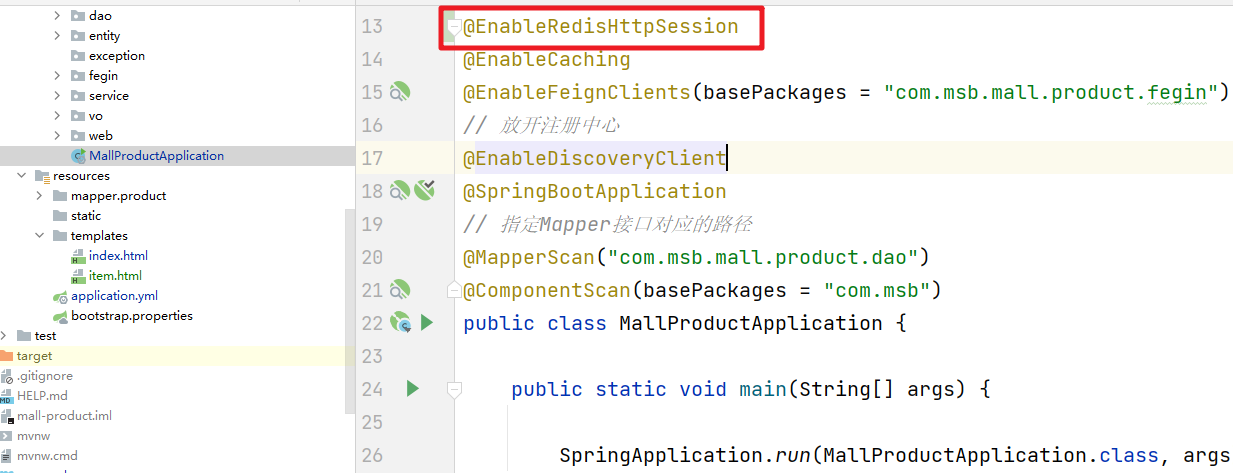
最后我们需要添加对有的注解,放开操作
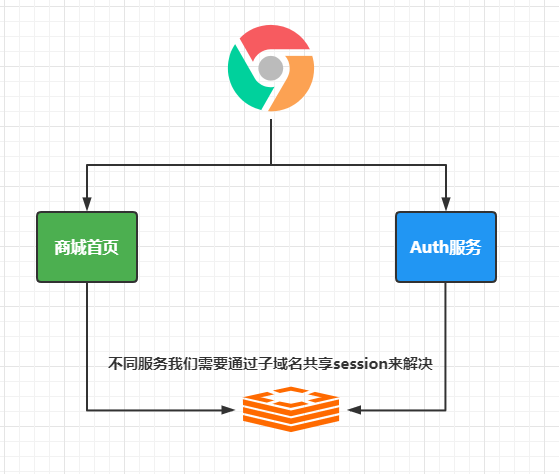
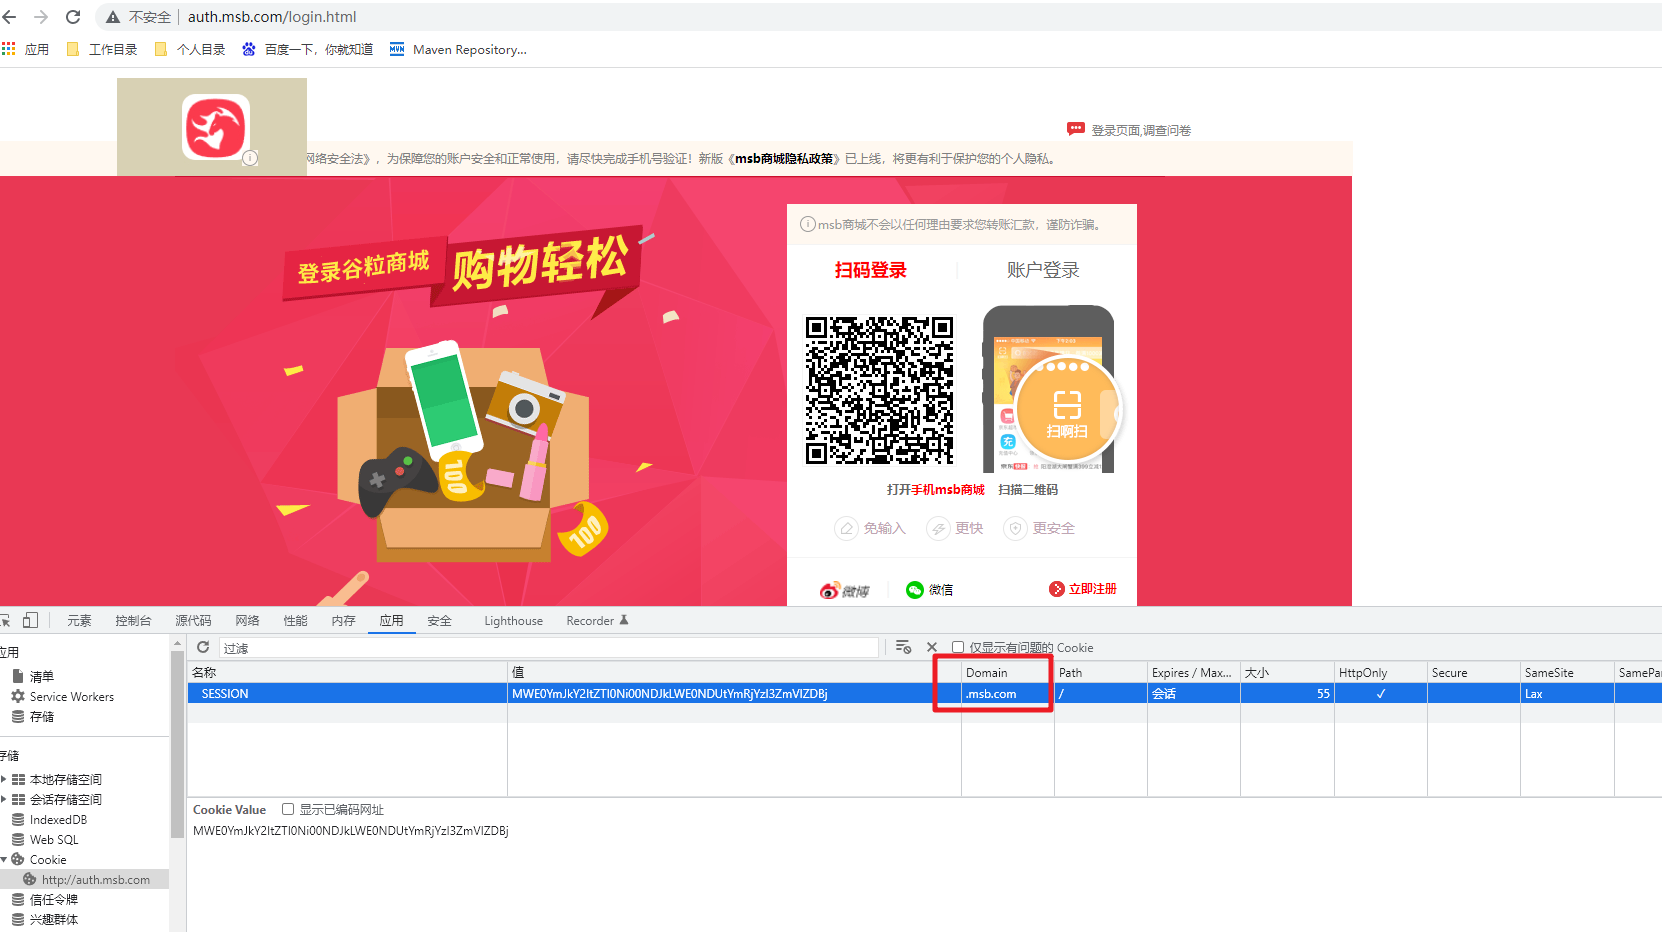
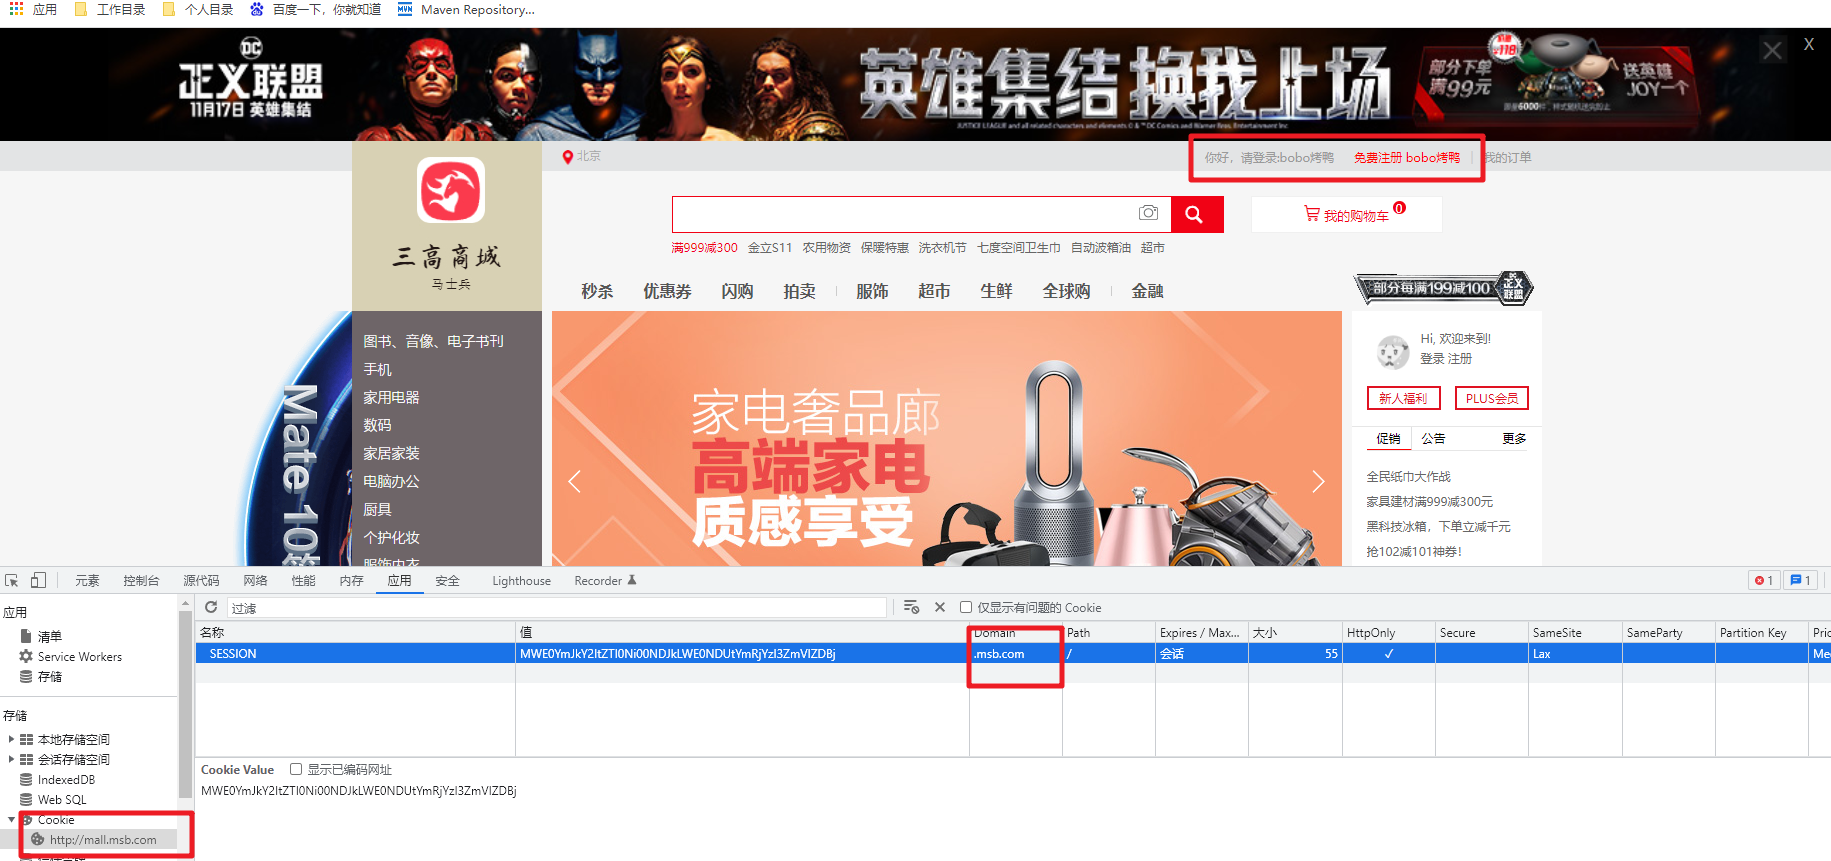
然后在Auth服务和商城首页都整合SpringSession后,我们再商城首页可以看到Session的数据,注意这儿是手动修改Cookie的域名
3.自定义Cookie
通过自定义Cookie实现session域名的调整
@Configuration
public class MySessionConfig {

    /**
     * 自定义Cookie的配置
     * @return
     */
    @Bean
    public CookieSerializer cookieSerializer(){
        DefaultCookieSerializer cookieSerializer = new DefaultCookieSerializer();
        cookieSerializer.setDomainName("msb.com"); // 设置session对应的一级域名
        cookieSerializer.setCookieName("msbsession");
        return cookieSerializer;
    }

    /**
     * 对存储在Redis中的数据指定序列化的方式
     * @return
     */
    @Bean
    public RedisSerializer<Object> redisSerializer(){
        return new GenericJackson2JsonRedisSerializer();
    }
}
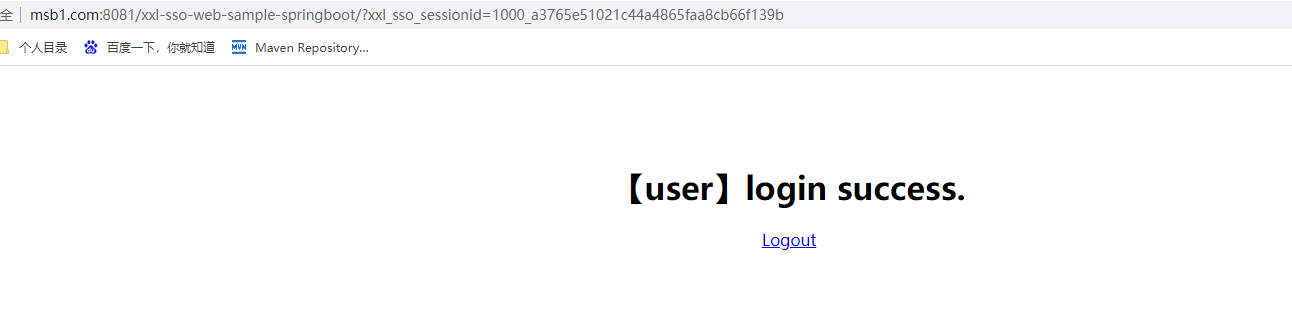
4.单点登录案例演示
xxl-sso案例代码地址:https://gitee.com/xuxueli0323/xxl-sso?_from=gitee_search
下载下来的代码解压缩后通过idea导入,然后修改server和simple中的属性文件,同时我们需要在host中设置对应的域名
127.0.0.1 ssoserver.com
127.0.0.1 msb1.com
127.0.0.1 msb2.com
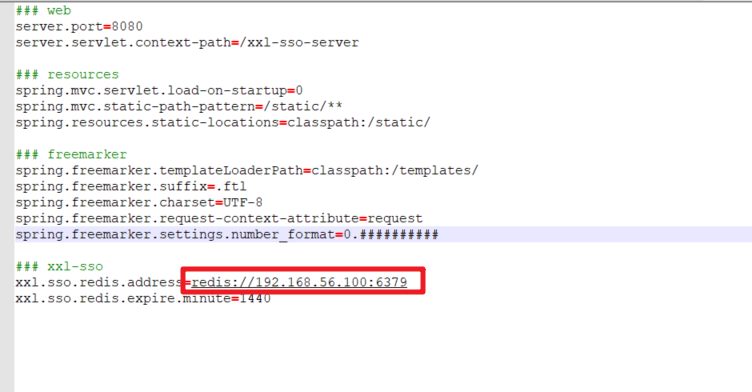
在server的配置文件中,修改Redis的服务地址
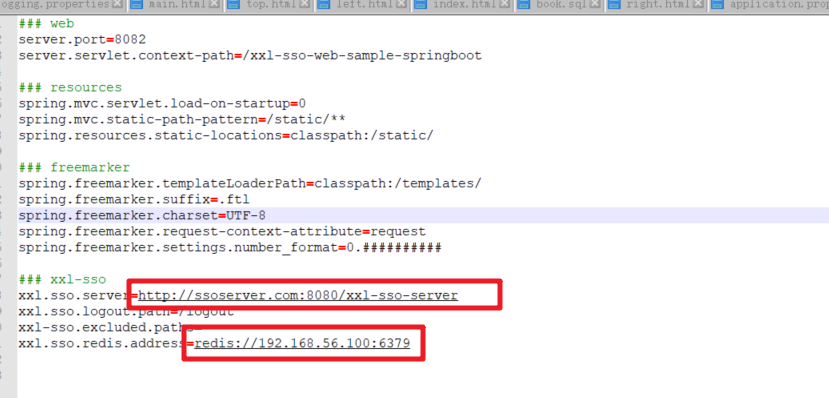
然后在simple中修改server的地址和redis服务的地址
然后分别启动服务测试即可