最近几个月都挺忙,忙着工作,忙着成长…
一直以来我认为在开发中首当其冲的肯定是需求、功能,然后才是UI细节;所以我自己一般不太会去深究一些看不明显的UI,不过这俩日同事提醒我文字有阴影效果,细看之下果然UI设计图中有进行标注…
嗯… 对于没接触过的技术,如果开发周期很充裕的话,我还是很愿意去研究,但是如果开发周期很短的话,我就比较反感未知的部分了… 不过有点尴尬的是 文字阴影效果 Android早就已经帮写好了,我们仅需调用几个属性即可…
- 前置了解
- 阴影实现
- 阴影测试
- 垂直偏移(shadowDx)
- 水平偏移(shadowDy)
- 阴影范围(shadowRadius)
- 源码兴趣
前置了解
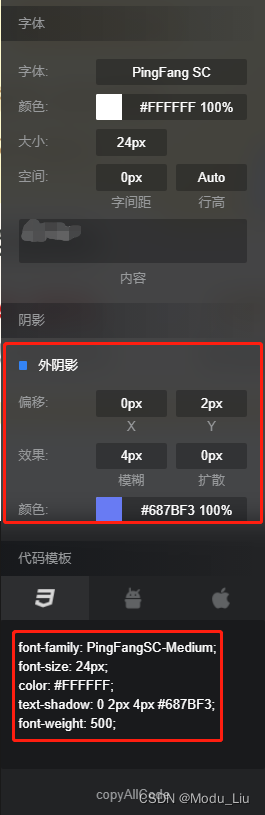
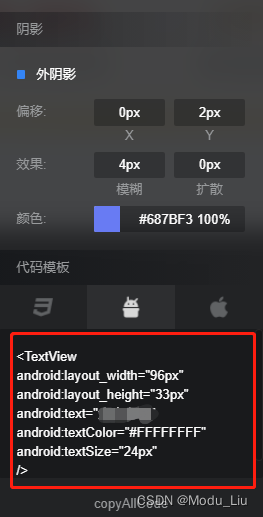
看一下UI提供的设计图(如果设计标注中没有标明阴影的偏移量、色值等数据可自行找UI要数值)
有的人可能看到有提供Android的伪代码,其实伪代码没有阴影的设置部分
阴影实现
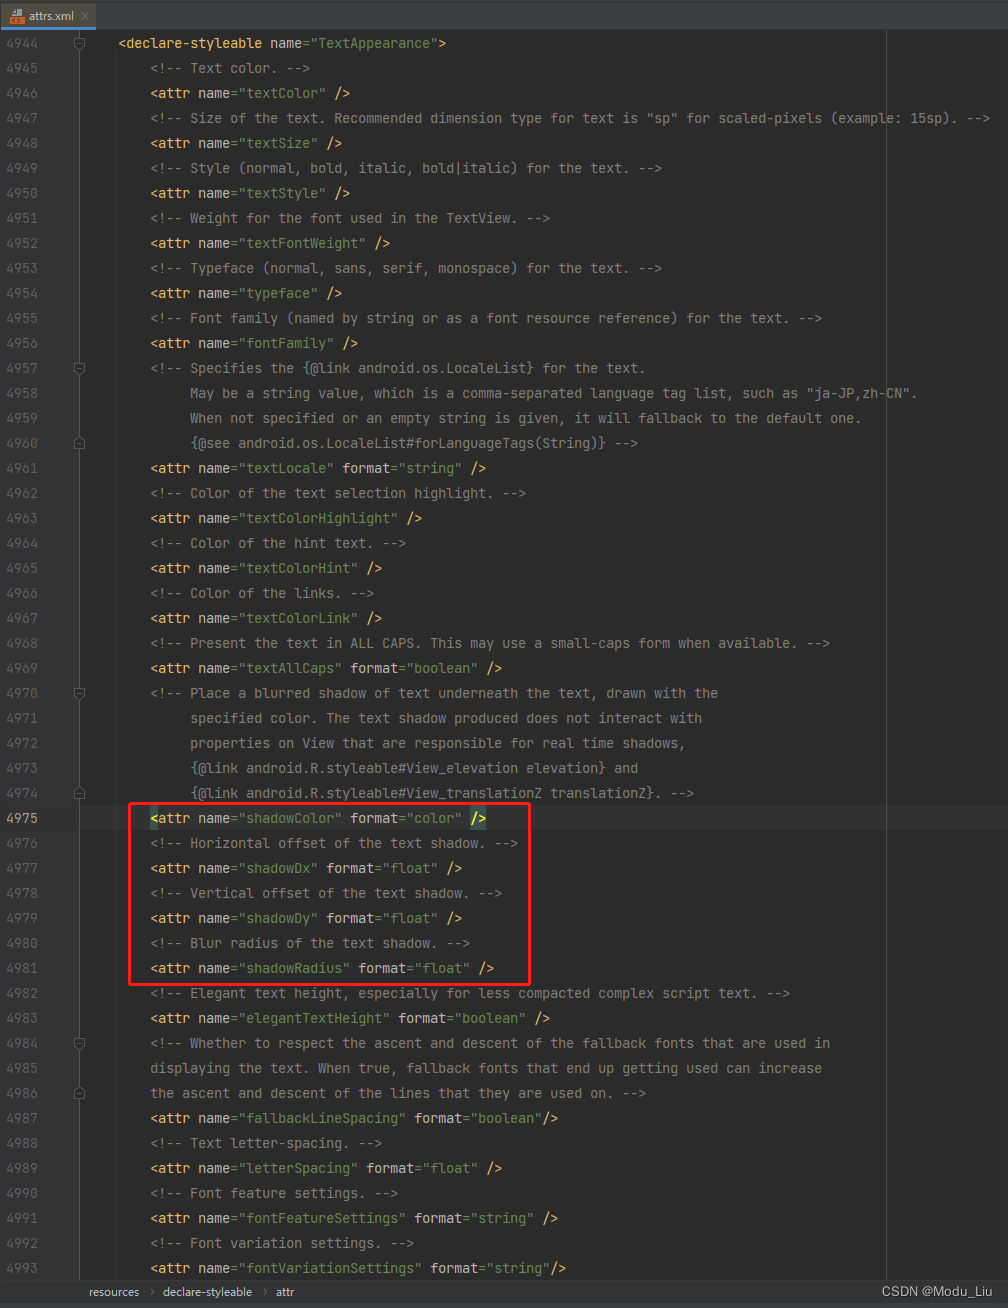
Android很早以前就提供了字体阴影的设置方式,关于如何设置文字的阴影效果,主要用到了以下四种阴影属性
android:shadowColor阴影颜色android:shadowDx阴影水平偏移量android:shadowDy阴影垂直偏移量android:shadowRadius阴影范围
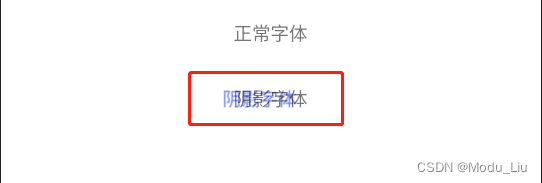
实现效果
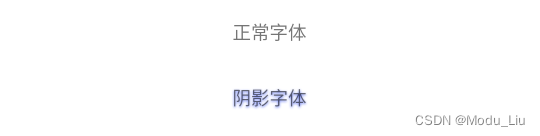
实现布局
Tip:在设计标注中一般都是采用的px(像素),可自行设置px或dp看看效果,哪个合适选哪个
<?xml version="1.0" encoding="utf-8"?>
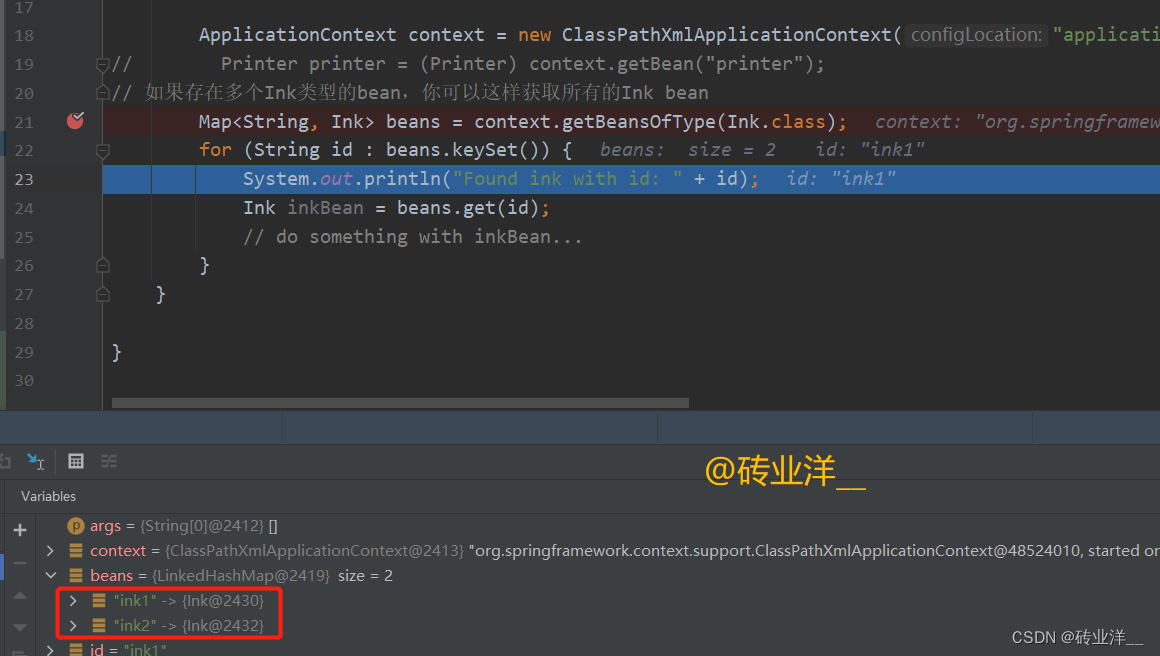
<LinearLayout xmlns:android="http://schemas.android.com/apk/res/android"
xmlns:app="http://schemas.android.com/apk/res-auto"
xmlns:tools="http://schemas.android.com/tools"
android:layout_width="match_parent"
android:orientation="vertical"
android:gravity="center_horizontal"
android:layout_height="match_parent"
tools:context=".MainActivity">
<TextView
android:layout_width="100dp"
android:layout_height="50dp"
android:gravity="center"
android:text="正常字体" />
<TextView
android:layout_width="100dp"
android:layout_height="50dp"
android:gravity="center"
android:shadowColor="#687BF3"
android:shadowDx="0"
android:shadowDy="2"
android:shadowRadius="4"
android:text="阴影字体" />
</LinearLayout>
Look Here:如果仅是为了实现字体阴影的效果,那么看到这里就够了,有兴趣、有时间的可以继续往下看~
如果字体阴影场景比较多的话,也可以在 values - style.xml 写个Style
<?xml version="1.0" encoding="utf-8"?>
<resources>

    <style name="shadowStyle">

        <item name="android:shadowColor">#687BF3</item>
        <item name="android:shadowRadius">4</item>
        <item name="android:shadowDx">0</item>
        <item name="android:shadowDy">2</item>

    </style>
</resources>
引用方式
    <TextView
        android:layout_width="100dp"
        android:layout_height="50dp"
        android:gravity="center"
        style="@style/shadowStyle"
        android:text="阴影字体" />
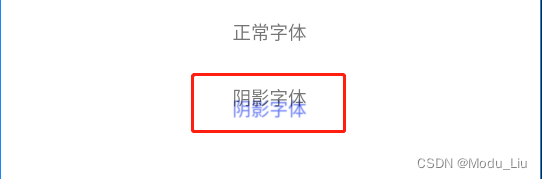
阴影测试
经测试,得结果:水平偏移默认向右,垂直偏移默认向下;偏移值可为正负,不同值显示偏移方向所有不同
垂直偏移(shadowDx)
xml 片段
    <TextView
        android:layout_width="100dp"
        android:layout_height="50dp"
        android:gravity="center"
        android:shadowColor="#687BF3"
        android:shadowDx="0"
        android:shadowDy="22"
        android:shadowRadius="1"
        android:text="阴影字体" />
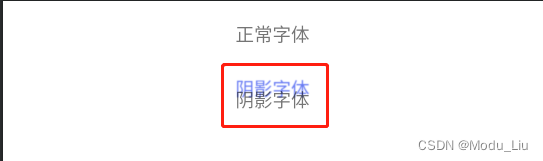
经过测试,可设垂直偏移负值,显示向上
xml 片段
    <TextView
        android:layout_width="100dp"
        android:layout_height="50dp"
        android:gravity="center"
        android:shadowColor="#687BF3"
        android:shadowDx="0"
        android:shadowDy="-22"
        android:shadowRadius="1"
        android:text="阴影字体" />
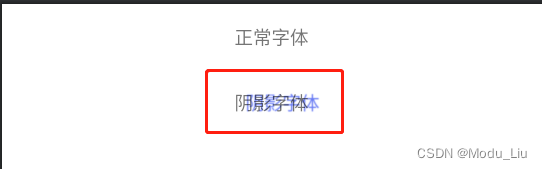
水平偏移(shadowDy)
xml 片段
    <TextView
        android:layout_width="100dp"
        android:layout_height="50dp"
        android:gravity="center"
        android:shadowColor="#687BF3"
        android:shadowDx="22"
        android:shadowDy="0"
        android:shadowRadius="1"
        android:text="阴影字体" />
经过测试,可设水平偏移负值,显示向左
xml 片段
    <TextView
        android:layout_width="100dp"
        android:layout_height="50dp"
        android:gravity="center"
        android:shadowColor="#687BF3"
        android:shadowDx="-22"
        android:shadowDy="0"
        android:shadowRadius="1"
        android:text="阴影字体" />
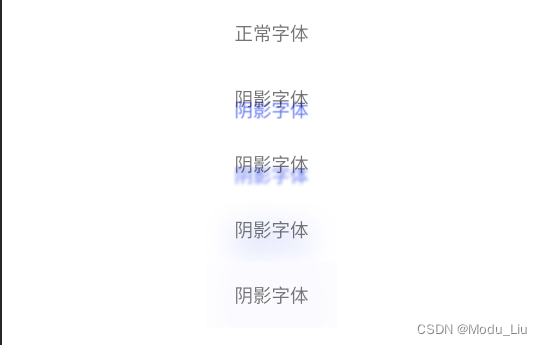
阴影范围(shadowRadius)
经测试,得结果:随着 shadowRadius 设置的越大,阴影效果也越大,但是也会越模糊
Tip:shadowRadius:0 - 1 - 5 - 50 - 500 显示效果
xml 片段
<?xml version="1.0" encoding="utf-8"?>
<LinearLayout xmlns:android="http://schemas.android.com/apk/res/android"
    xmlns:app="http://schemas.android.com/apk/res-auto"
    xmlns:tools="http://schemas.android.com/tools"
    android:layout_width="match_parent"
    android:layout_height="match_parent"
    android:gravity="center_horizontal"
    android:orientation="vertical"
    tools:context=".MainActivity">

    <TextView
        android:layout_width="100dp"
        android:layout_height="50dp"
        android:gravity="center"
        android:text="正常字体" />

    <TextView
        android:layout_width="100dp"
        android:layout_height="50dp"
        android:gravity="center"
        android:shadowColor="#687BF3"
        android:shadowDx="0"
        android:shadowDy="22"
        android:shadowRadius="1"
        android:text="阴影字体" />

    <TextView
        android:layout_width="100dp"
        android:layout_height="50dp"
        android:gravity="center"
        android:shadowColor="#687BF3"
        android:shadowDx="0"
        android:shadowDy="22"
        android:shadowRadius="5"
        android:text="阴影字体" />

    <TextView
        android:layout_width="100dp"
        android:layout_height="50dp"
        android:gravity="center"
        android:shadowColor="#687BF3"
        android:shadowDx="0"
        android:shadowDy="22"
        android:shadowRadius="52"
        android:text="阴影字体" />


    <TextView
        android:layout_width="100dp"
        android:layout_height="50dp"
        android:gravity="center"
        android:shadowColor="#687BF3"
        android:shadowDx="0"
        android:shadowDy="22"
        android:shadowRadius="522"
        android:text="阴影字体" />
</LinearLayout>
源码兴趣
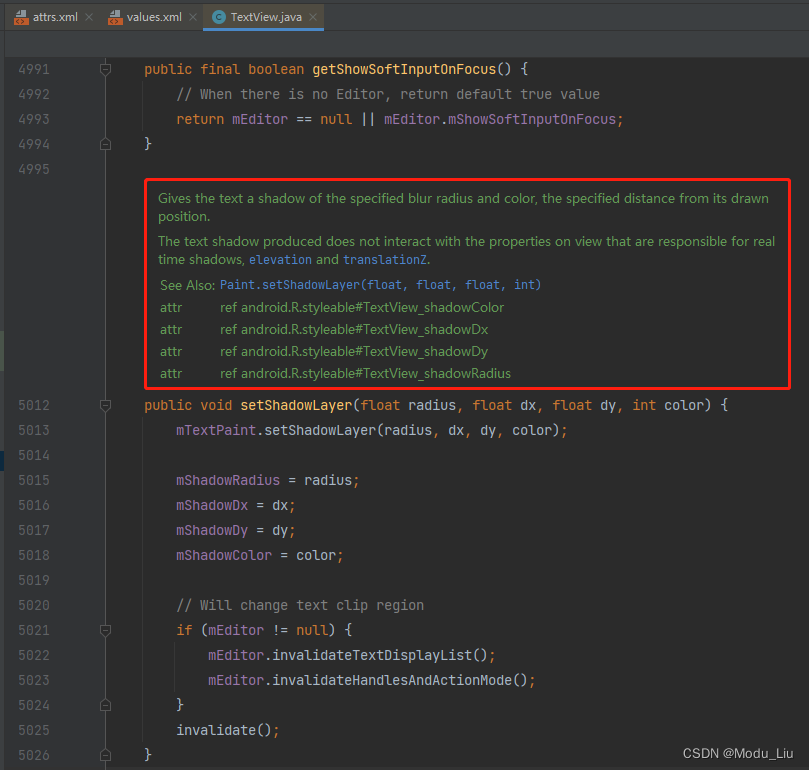
从TextView的自定义属性开始追溯
values 自定义属性
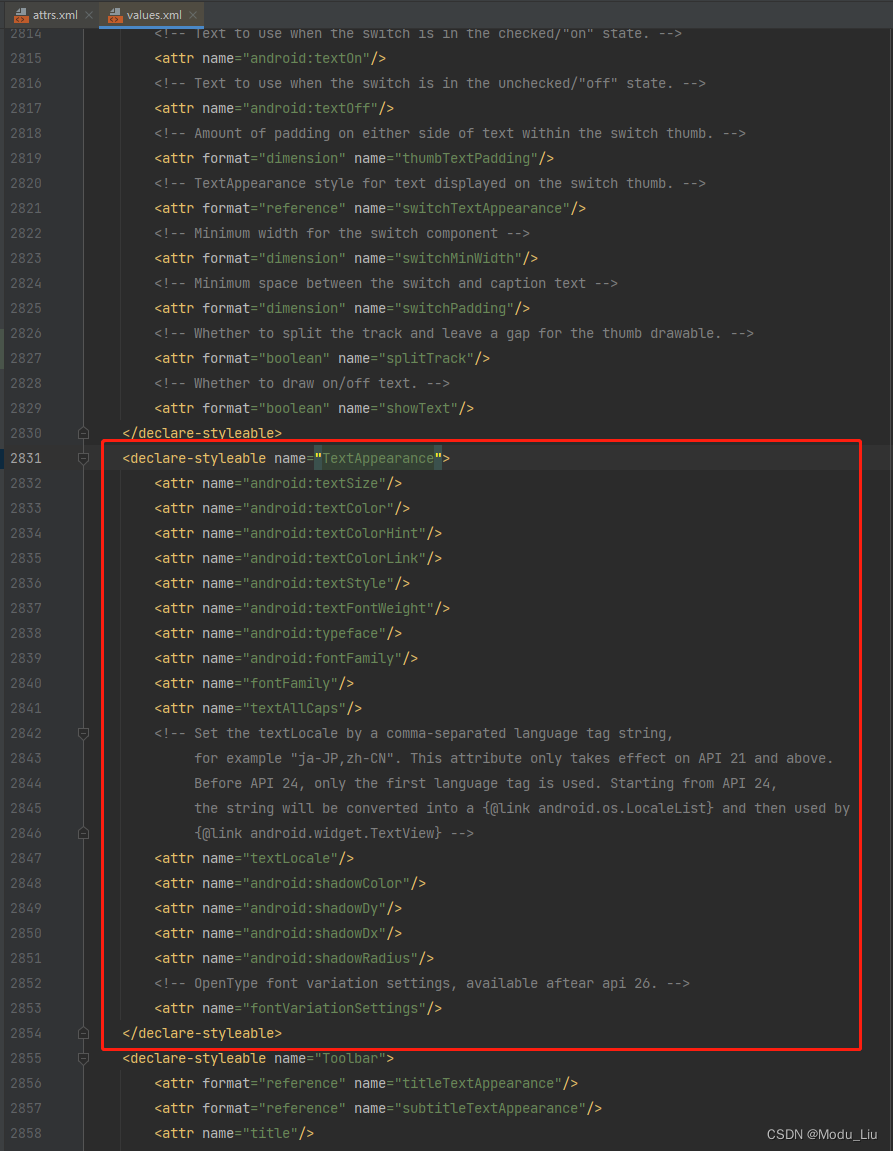
TextView:setShadowLayer 表示将绘制一个阴影,阴影部分不参与交互;同事说明了用到的自定义属性
Paint:setShadowLayer 表示在主层之下将绘制一个阴影层,范围为0就会移除该阴影层
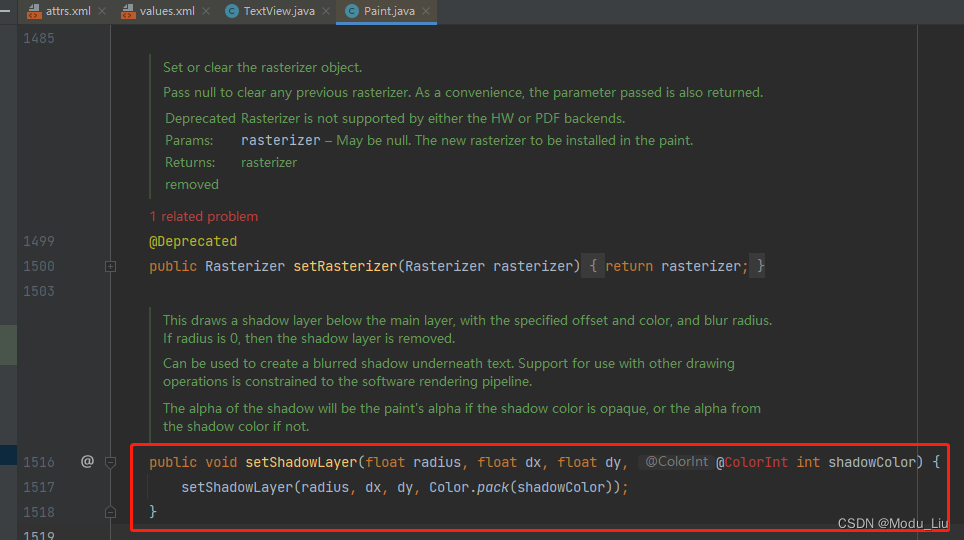
Paint:setShadowLayer具体实现
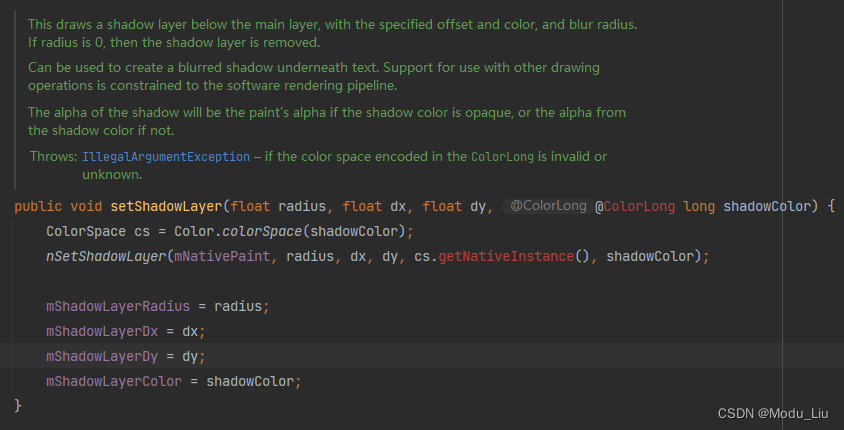
nSetShadowLayer 好像是调C的方法,具体就不往下深究了