OpenVINO(开放式视觉推理和神经网络优化)是英特尔推出的一款用于加速计算机视觉应用开发的软件。它基于英特尔的深度学习技术,提供了一套完整的工具链,包括模型优化器、运行时库等,帮助开发者快速实现高性能的计算机视觉算法。OpenVINO支持多种硬件平台,如CPU、GPU、FPGA等,可以广泛应用于智能安防、工业检测、无人驾驶等领域。通过使用OpenVINO,开发者可以轻松地将深度学习模型部署到各种设备上,实现高效、低功耗的计算机视觉应用。

一、python环境安装
conda create -n vino2021 python=3.8 -y
conda activate vino2021
pip install opencv-python==4.5.4.58
pip install openvino==2021.4.1 # 建议最好使用这个版本为什么这里建议openvino使用版本和本文一致?因为openvino向上向下兼容性很一般。
二、openvino推理流程简介
一般地,模型推理包含三大步骤:
- 图像预处理
- 推理
- 后处理
openvino也遵从上面步骤流程。其中,图像预处理可能包含:图像resize、将BGR转成RGB次序、将CHW转成HWC等等。这些工作,使用opencv可以快速实现。例如:
import cv2
src = cv2.imread("d:/Data/15.jpg")
src_ = cv2.cvtColor(src, cv2.COLOR_BGR2RGB) # 将BGR转成RGB次序
image = cv2.resize(src, (256, 256)) # 图像resize
image = image.transpose(2, 0, 1) # 将CHW转成HWC至于模型推理,其实不管是openvino,还是tensorrt,或者是onnxruntime等,都有推理引擎组件,使用的时候是需要使用模型将推理引擎初始化就OK;然后往引擎里面塞入图像数据就行了。这里举个例子:
# 读取模型
model_xml = "data/face-detection-0200.xml"
model_bin = "data/face-detection-0200.bin"
net = ie.read_network(model=model_xml)
# 加载模型到CPU中
exec_net = ie.load_network(network=net, device_name="CPU")
# 推理(这里相当于将image塞进推理引擎了)
res = exec_net.infer(inputs={input_blob: [image]})最后,推理引擎会输出特征图,也就是推理结果,我们写一个后处理代码就行了。例如:对于目标检测,我需要手写NMS;对于分割,我们需要手写上采样。
res = res[output_blob]
dets = res.reshape(-1, 7)
sh, sw, _ = src.shape
for det in dets:
    conf = det[2]
    if conf > 0.5:
        # calss_id...
        xmin = int(det[3] * sw)
        ymin = int(det[4] * sh)
        xmax = int(det[5] * sw)
ymax = int(det[6] * sh)本文openvino的使用套路其实很固定,上文说道模型推理一般是三大步骤,这里openvino推理给细化成8个步骤。openvino一般完整代码步骤如下:
- Step1:初始化推理引擎
- Step2:从xml文件读取模型网络,从bin文件读取模型参数;或者直接从onnx文件同时读取模 型和参数
- Step3:配置网络的输出、输入(图像预处理)
- Step4:加载模型到设备
- Step5:创建推理请求
- Step6:准备输入
- Step7:推理
- Step8:后处理
上述8个步骤,看似有点啰嗦,其实一般其中几个步骤就够了,以下给一个例子,可以参考下(看看就行不必执行):
import cv2
from openvino.inference_engine import IECore
import numpy as np
from timeit import default_timer as timer

# ---------------------------Step 1. Initialize inference engine core--------------------------------------------------
ie = IECore()
device = "CPU"
# ---------------------------Step 2. Read a model in OpenVINO Intermediate Representation or ONNX format---------------
model_xml = "data/face-detection-0200.xml"
model_bin = "data/face-detection-0200.bin"
net = ie.read_network(model=model_xml)
# ---------------------------Step 3. Configure input & output----------------------------------------------------------
input_blob = next(iter(net.input_info))
output_blob = next(iter(net.outputs))
n, c, h, w = net.inputs[input_blob].shape
print("outputs's shape = ", net.outputs[output_blob].shape)

src = cv2.imread("d:/Data/6.jpg")
#src_ = cv2.cvtColor(src, cv2.COLOR_BGR2RGB)
image = cv2.resize(src, (w, h))
image = image.transpose(2, 0, 1)
# ---------------------------Step 4. Loading model to the device-------------------------------------------------------
exec_net = ie.load_network(network=net, device_name=device)
# ---------------------------Step 5. Create infer request--------------------------------------------------------------
# ---------------------------Step 6. Prepare input---------------------------------------------------------------------
# ---------------------------Step 7. Do inference----------------------------------------------------------------------
tic = timer()
res = exec_net.infer(inputs={input_blob: [image]})
toc = timer()
print("the cost time is(ms): ", 1000*(toc - tic))
print("the latance is:", exec_net.requests[0].latency)
# ---------------------------Step 8. Process output--------------------------------------------------------------------
以上步骤范式比较固定,部署别的模型,你会发现很多代码都一样,复制粘贴而已,需要改的无非就是模型的输入和后处理。
三、人脸检测网络
这个人脸检测模型backbone是mobilev2,人脸检测头是SSD目标检测的head,在此模型的训练期间,训练图像的大小调整为 256x256。上一节我们知道,模型部署只需要三步:图像预处理、推理、后处理;由于推理openvino帮咱们干了,咱们只需要写好模型输入和输出就行了。
输入信息
在模型文件中,输入的名称为: `input`, 输入图像的shape为: `1, 3, 256, 256` 输入图像次序为 `B, C, H, W`, 其中:
- `B` - batch size
- `C` - 图像通道数,一般为3
- `H` - image height
- `W` - image width
输入图像的次序为: `BGR`.
输出信息
网络输出特征图的shape为: `1, 1, 200, 7`,其中200表示候选目标数量.每一个候选目标是一个7维的向量,存储顺序为: [`image_id`, `label`, `conf`, `x_min`, `y_min`, `x_max`, `y_max`], 其中:
- `image_id` - 图像在这个batch中的ID,不用管,因为本文是单batch推理
- `label` - 预测的类别ID(0 - face)
- `conf` - 置信度
- (`x_min`, `y_min`) - 矩形bbox左上角的点坐标
- (`x_max`, `y_max`) - 矩形bbox右下角的点坐标
四、源码测试
下面代码中,需要三个文件:输入图像,模型xml、bin文件,下载方法在文末。
import cv2
from openvino.inference_engine import IECore
import numpy as np
from timeit import default_timer as timer
# ---------------------------Step 1. Initialize inference engine core--------------------------------------------------
ie = IECore()
device = "CPU"
# ---------------------------Step 2. Read a model in OpenVINO Intermediate Representation or ONNX format---------------
model_xml = "data/face-detection-0200.xml"
model_bin = "data/face-detection-0200.bin"
net = ie.read_network(model=model_xml)
# ---------------------------Step 3. Configure input & output----------------------------------------------------------
input_blob = next(iter(net.input_info))
output_blob = next(iter(net.outputs))
n, c, h, w = net.inputs[input_blob].shape
print("outputs's shape = ", net.outputs[output_blob].shape)
src = cv2.imread("d:/Data/15.jpg")
#src_ = cv2.cvtColor(src, cv2.COLOR_BGR2RGB)
image = cv2.resize(src, (w, h))
image = image.transpose(2, 0, 1)
# ---------------------------Step 4. Loading model to the device-------------------------------------------------------
exec_net = ie.load_network(network=net, device_name=device)
# ---------------------------Step 5. Create infer request--------------------------------------------------------------
# ---------------------------Step 6. Prepare input---------------------------------------------------------------------
# ---------------------------Step 7. Do inference----------------------------------------------------------------------
tic = timer()
res = exec_net.infer(inputs={input_blob: [image]})
toc = timer()
print("the cost time is(ms): ", 1000*(toc - tic))
print("the latance is:", exec_net.requests[0].latency)
# ---------------------------Step 8. Process output--------------------------------------------------------------------
res = res[output_blob]
dets = res.reshape(-1, 7)
sh, sw, _ = src.shape
for det in dets:
conf = det[2]
if conf > 0.5:
# calss_id...
xmin = int(det[3] * sw)
ymin = int(det[4] * sh)
xmax = int(det[5] * sw)
ymax = int(det[6] * sh)
cv2.putText(src, str(round(conf, 3)), (xmin, ymin), cv2.FONT_HERSHEY_SIMPLEX, 1.0, (0, 0, 255), 1, 7)
cv2.rectangle(src, (xmin, ymin), (xmax, ymax), (0, 255, 0), 2)
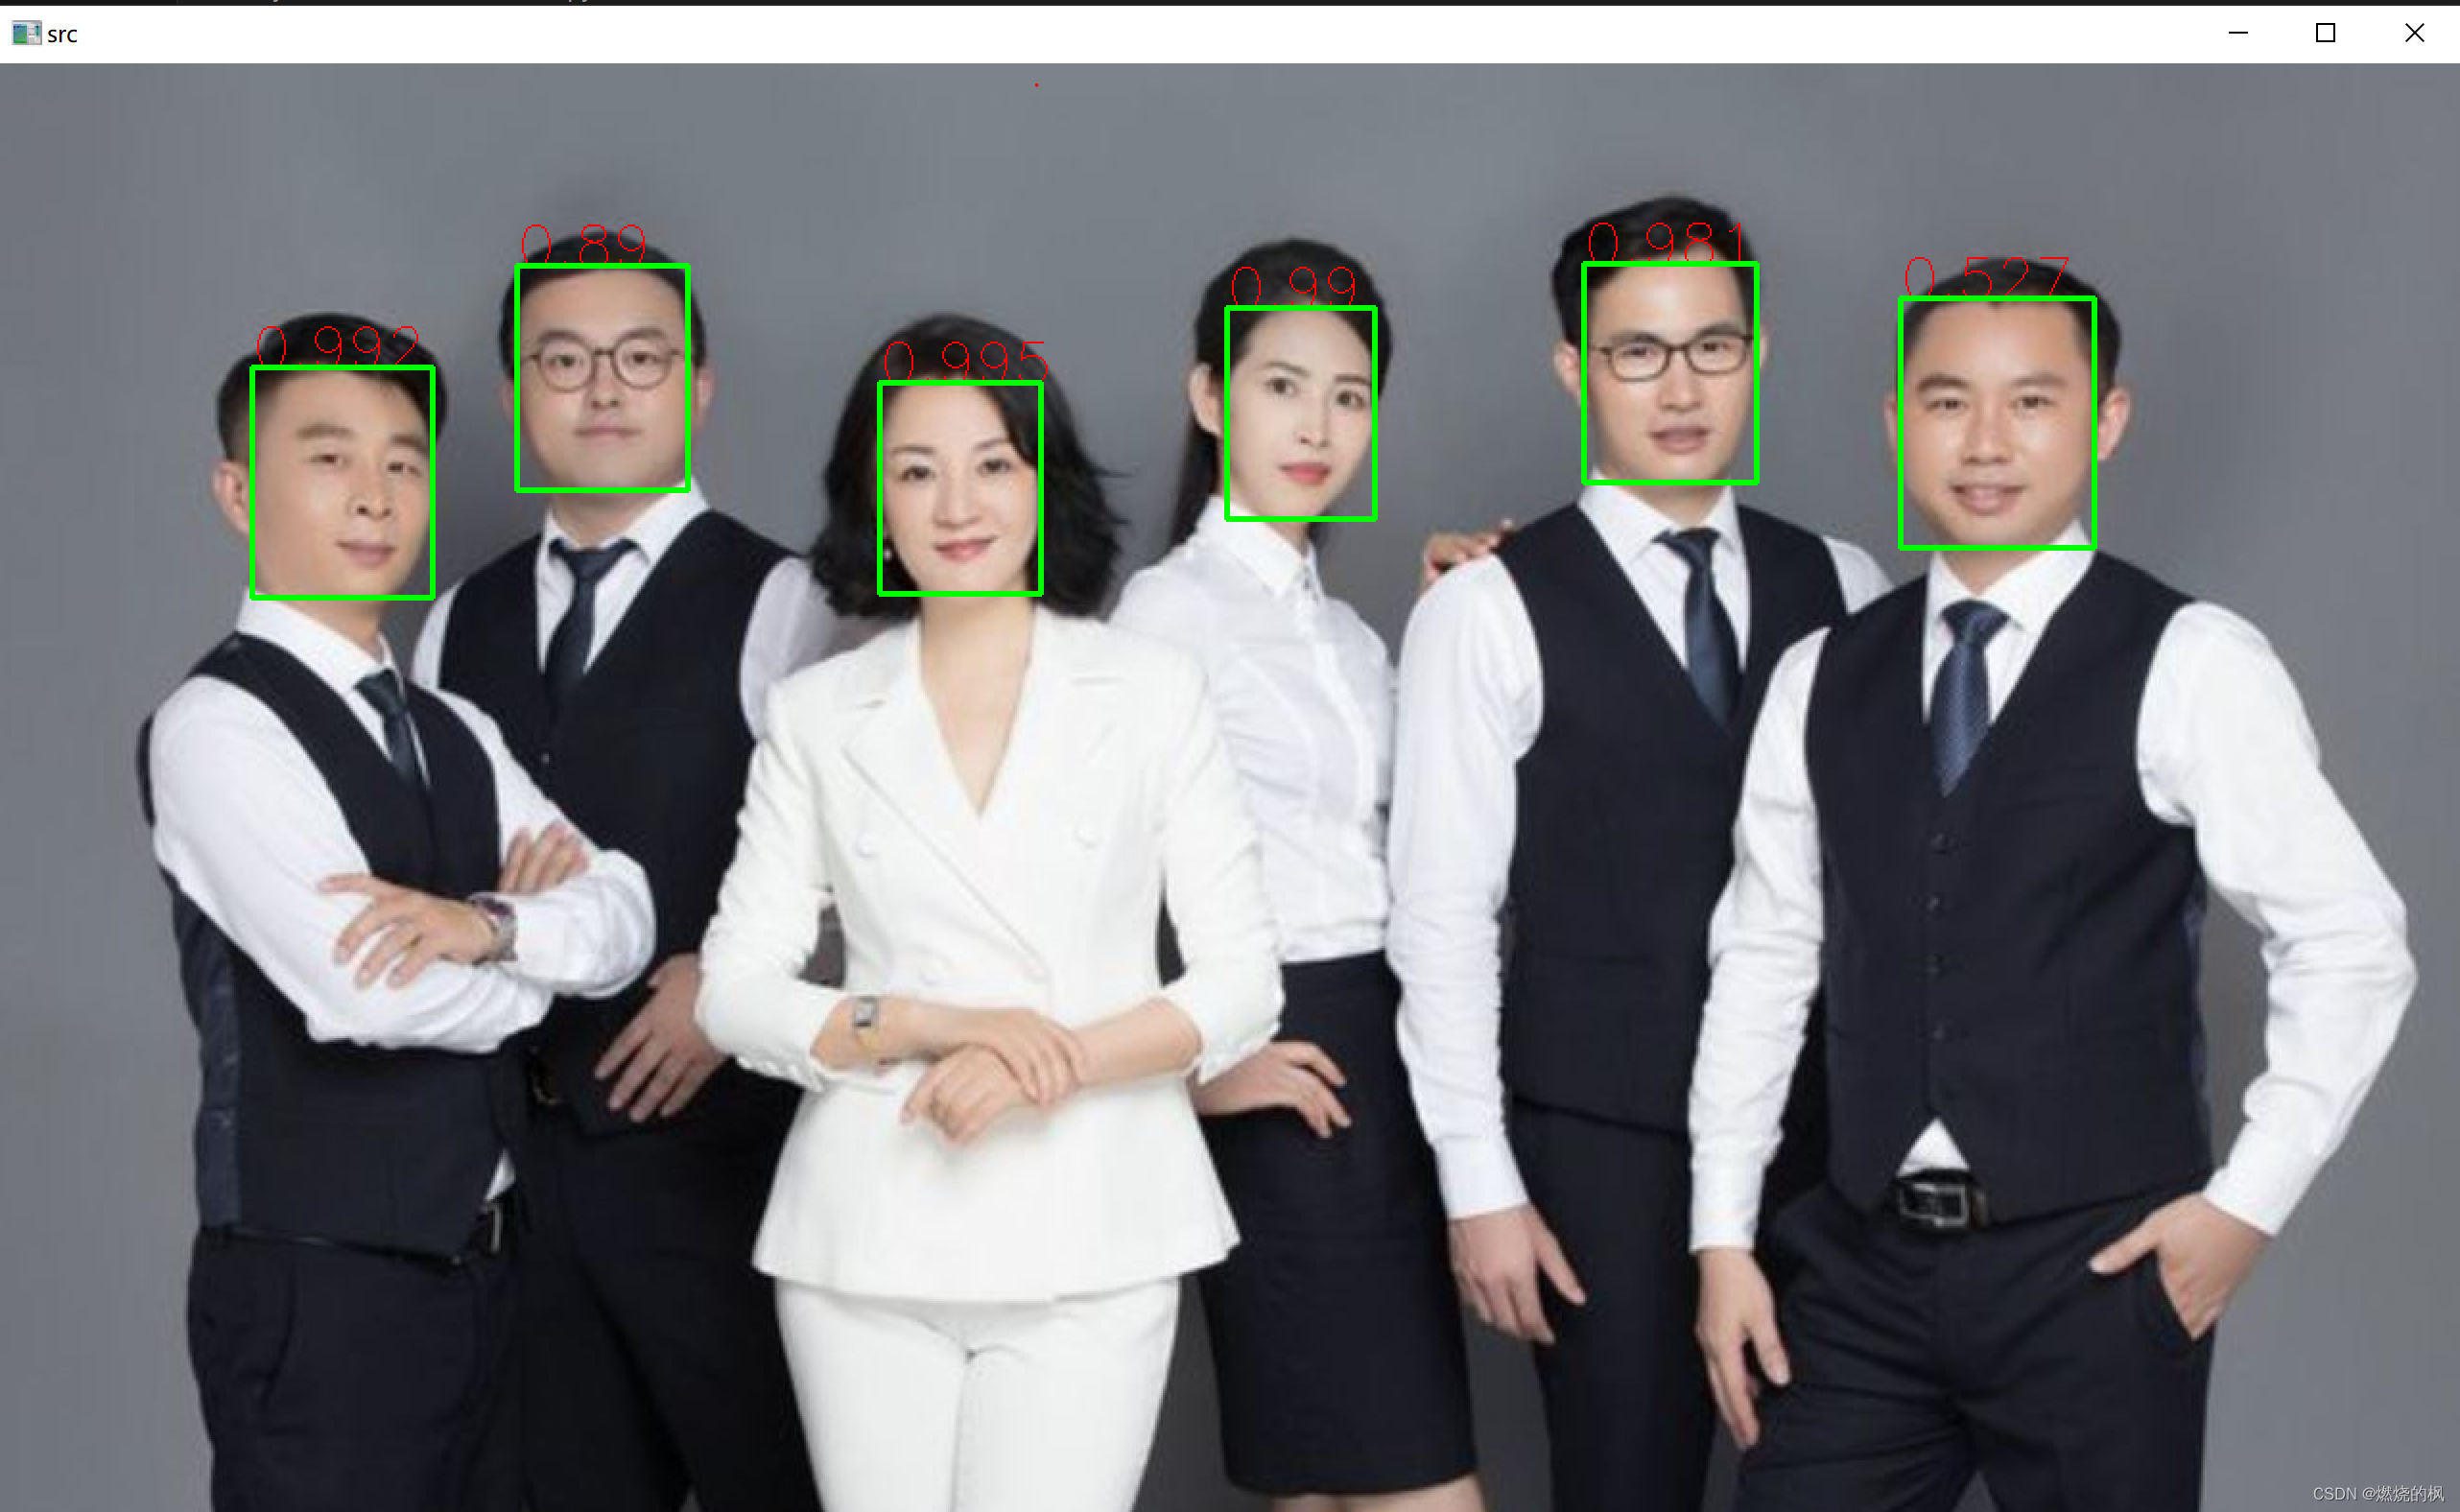
cv2.imshow("src", src)
cv2.waitKey(0)
cv2.destroyAllWindows()效果图如图:
模型数据+图片:链接:https://pan.baidu.com/s/1srtz0WUr9liwyTb55hZv_w?pwd=1234
提取码:1234