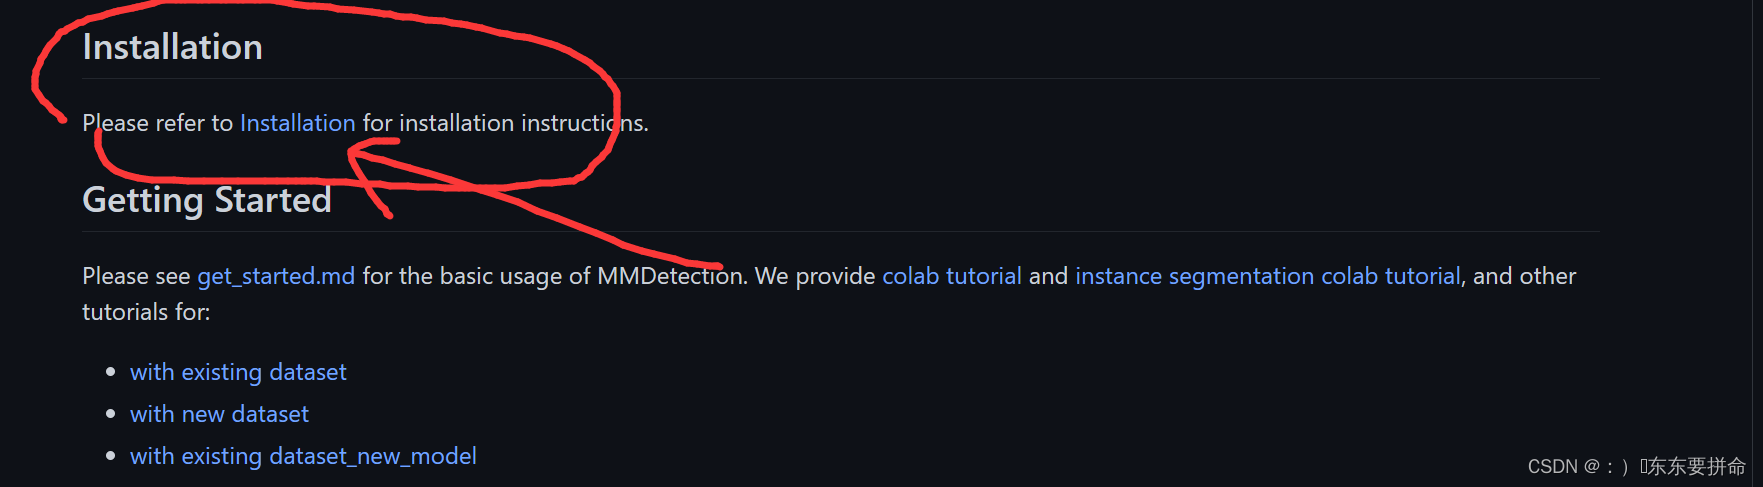
mmdetection/README.md at master · open-mmlab/mmdetection (github.com)
这个链接指向MMDetection
 就是对英语不是很棒的小伙子 小姐妹很友好
先装个环境
哈哈哈 大家不用装了 都别装好吧 我之前以为就我一个人菜 装什么环境都出问题
都得记录,很难有没有问题的
但是我摊牌了 这个MMdetection 一个不过也没有

不过嘞 还是得回溯一下这个不心酸而又不曲折的过程
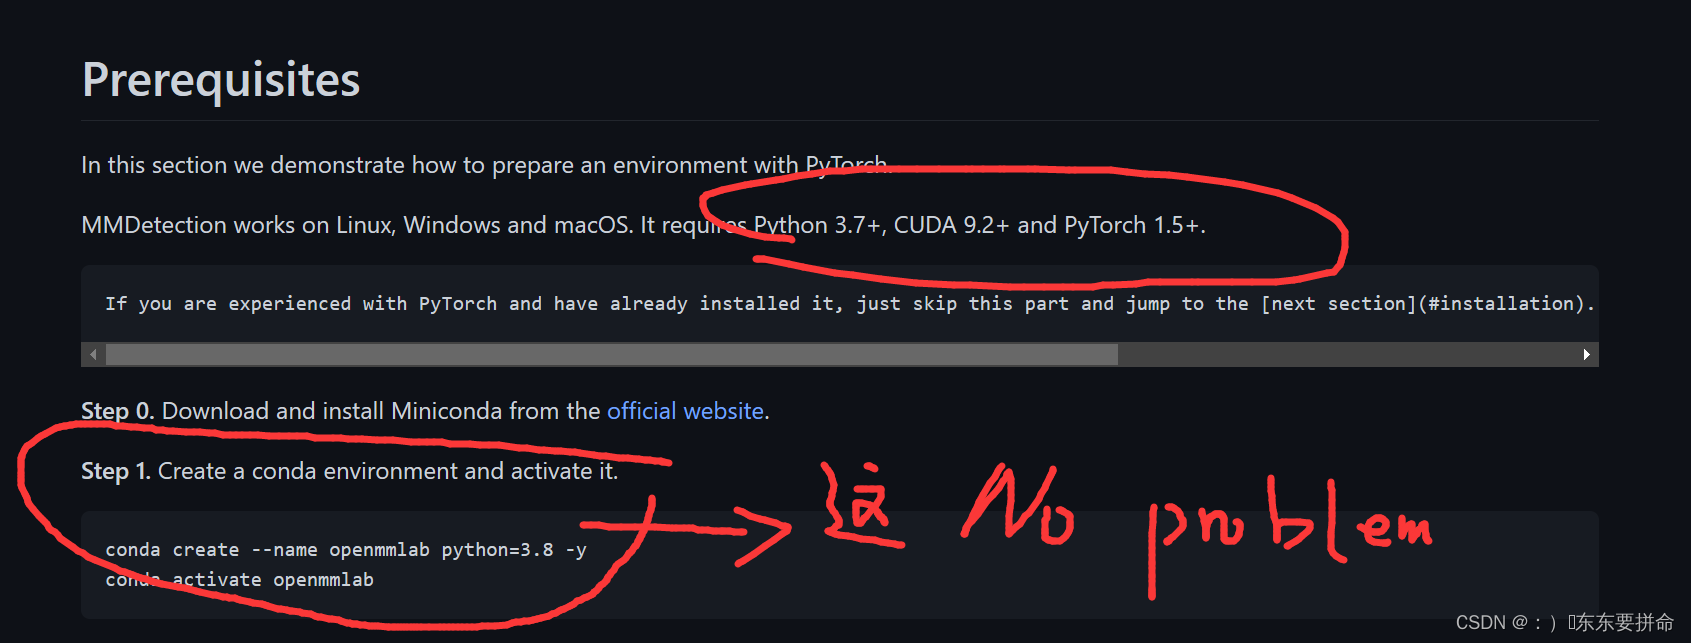
这个唯一要注意一下的是版本问题
创建虚拟环境 网上教程都打烂了 相信大家也敲了好多次 anaconda 就是好用

但是这里还是有两个小细节的
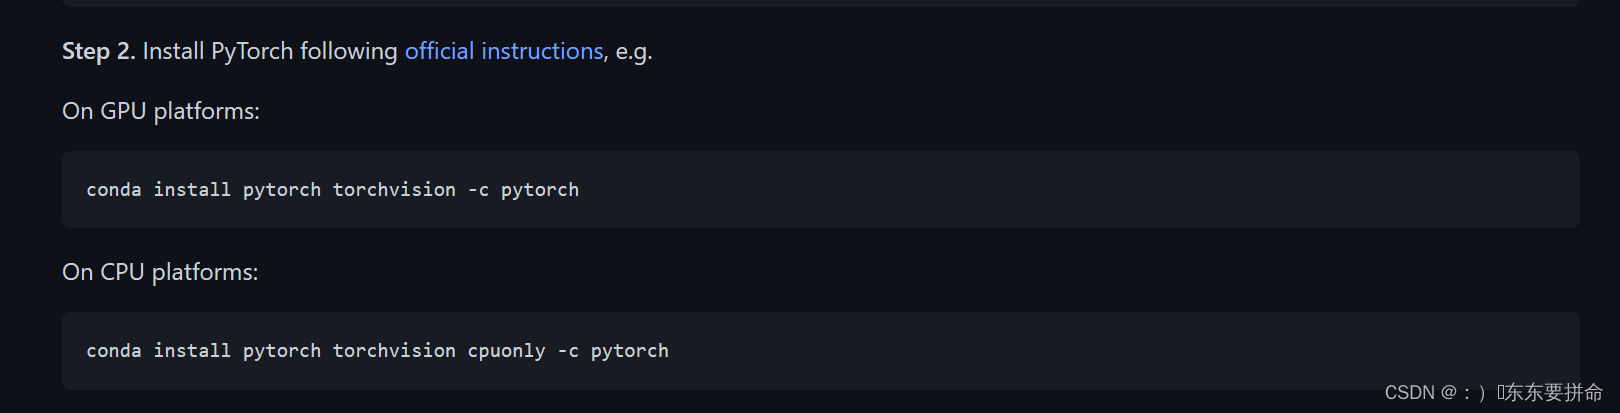
1.pytorch的安装
进入
PyTorch 这里是链接直接点
进去之后往下滑

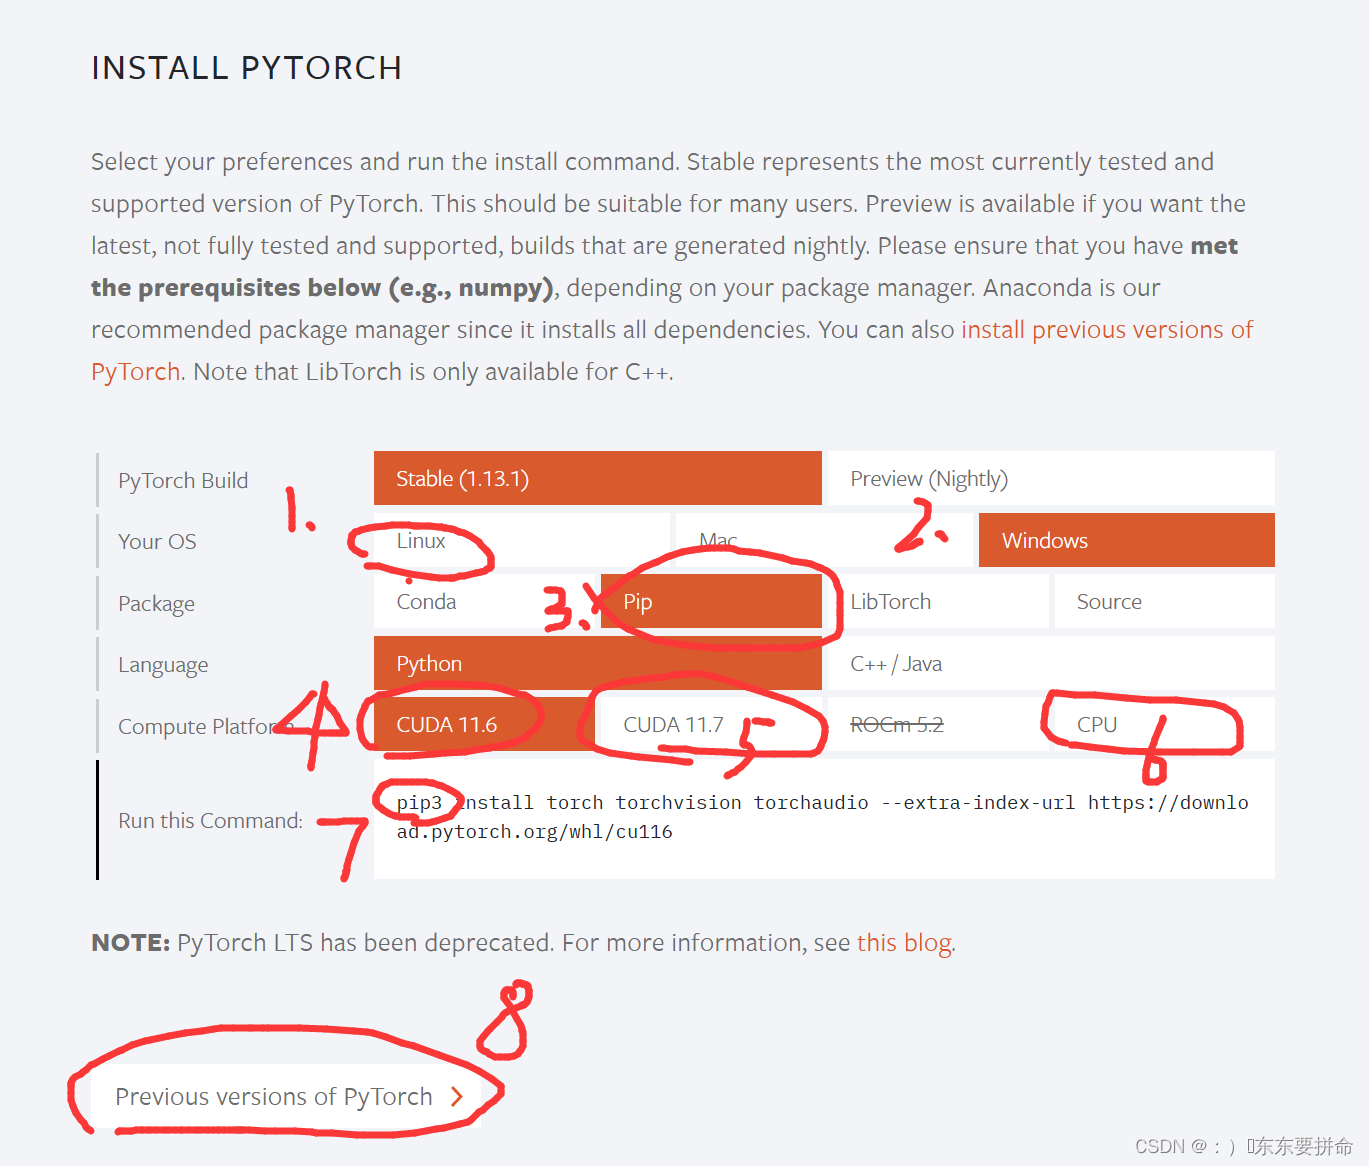
1.强烈推荐 LInux服务器 (拿刚买的4060 天选4,我直接train爆了c盘(毕竟只有512比较穷))
2.window 只是 意思一下 点到为止啊
3.个人比较推荐pip 但是7. 这个pip3 不知道有人出问题没有 好像装不进自己的虚拟环境,给出解决方案是改一下pip3安装包路劲
4.11.611.7 还是新出的12.0完全是看需要 看清楚一点要求 基本上目前都是11.6
8.这个可以找到之前的10.几的版本 越老越稳定吧 但是 缺点肯定也很明显的
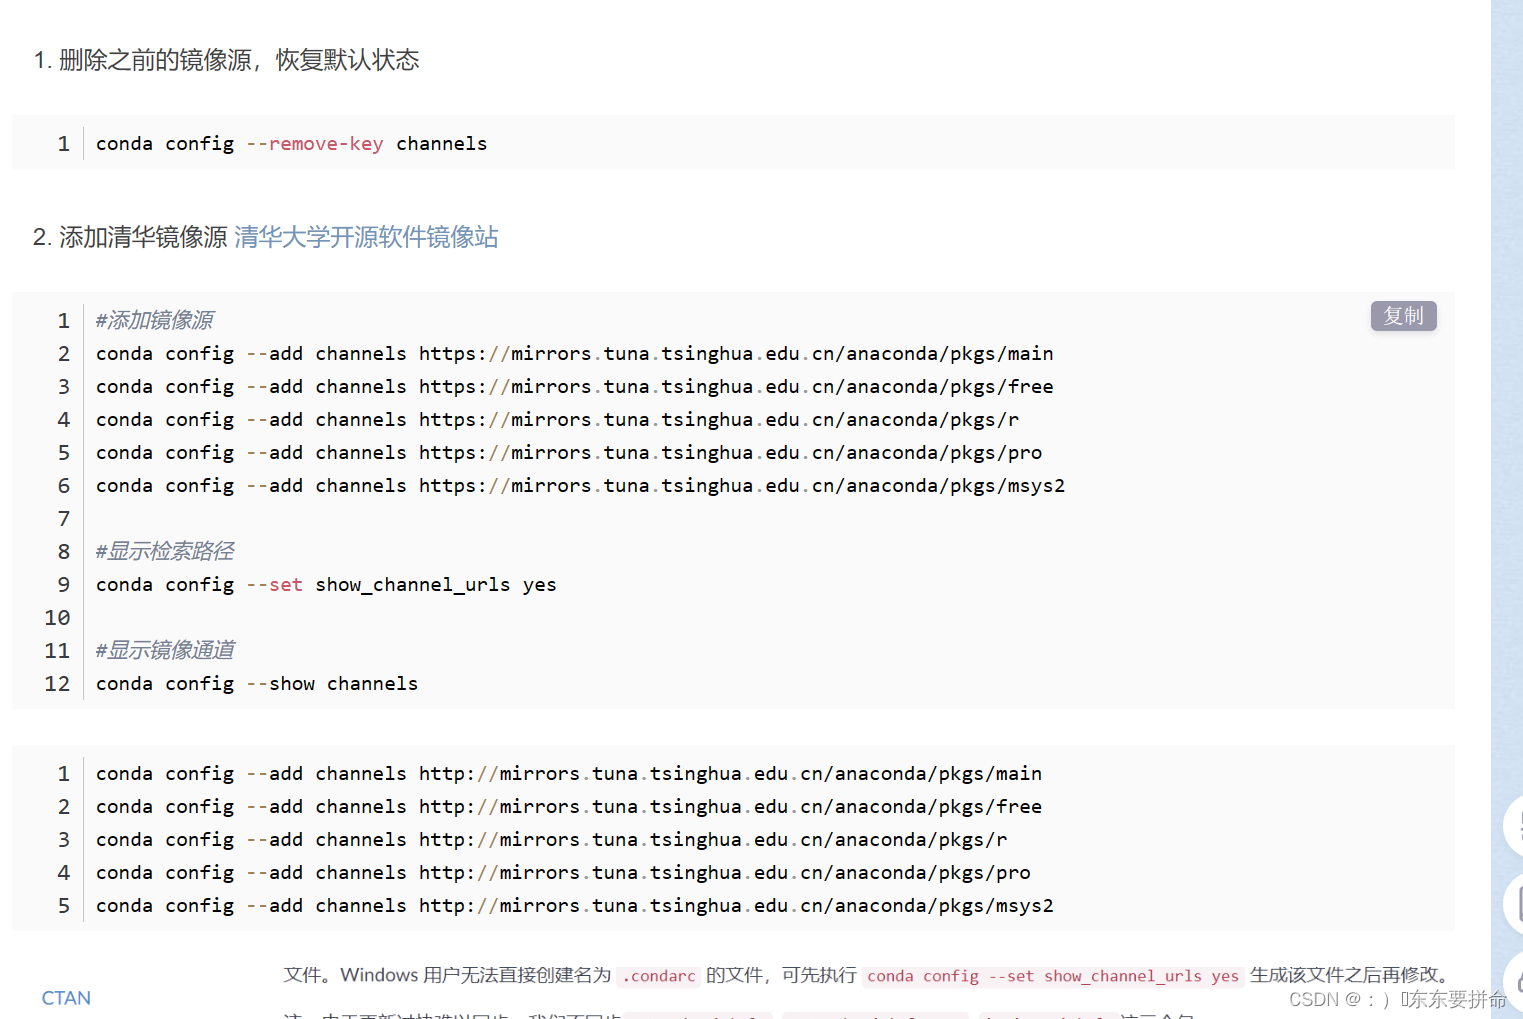
再加一点小细节 就是镜像源的问题
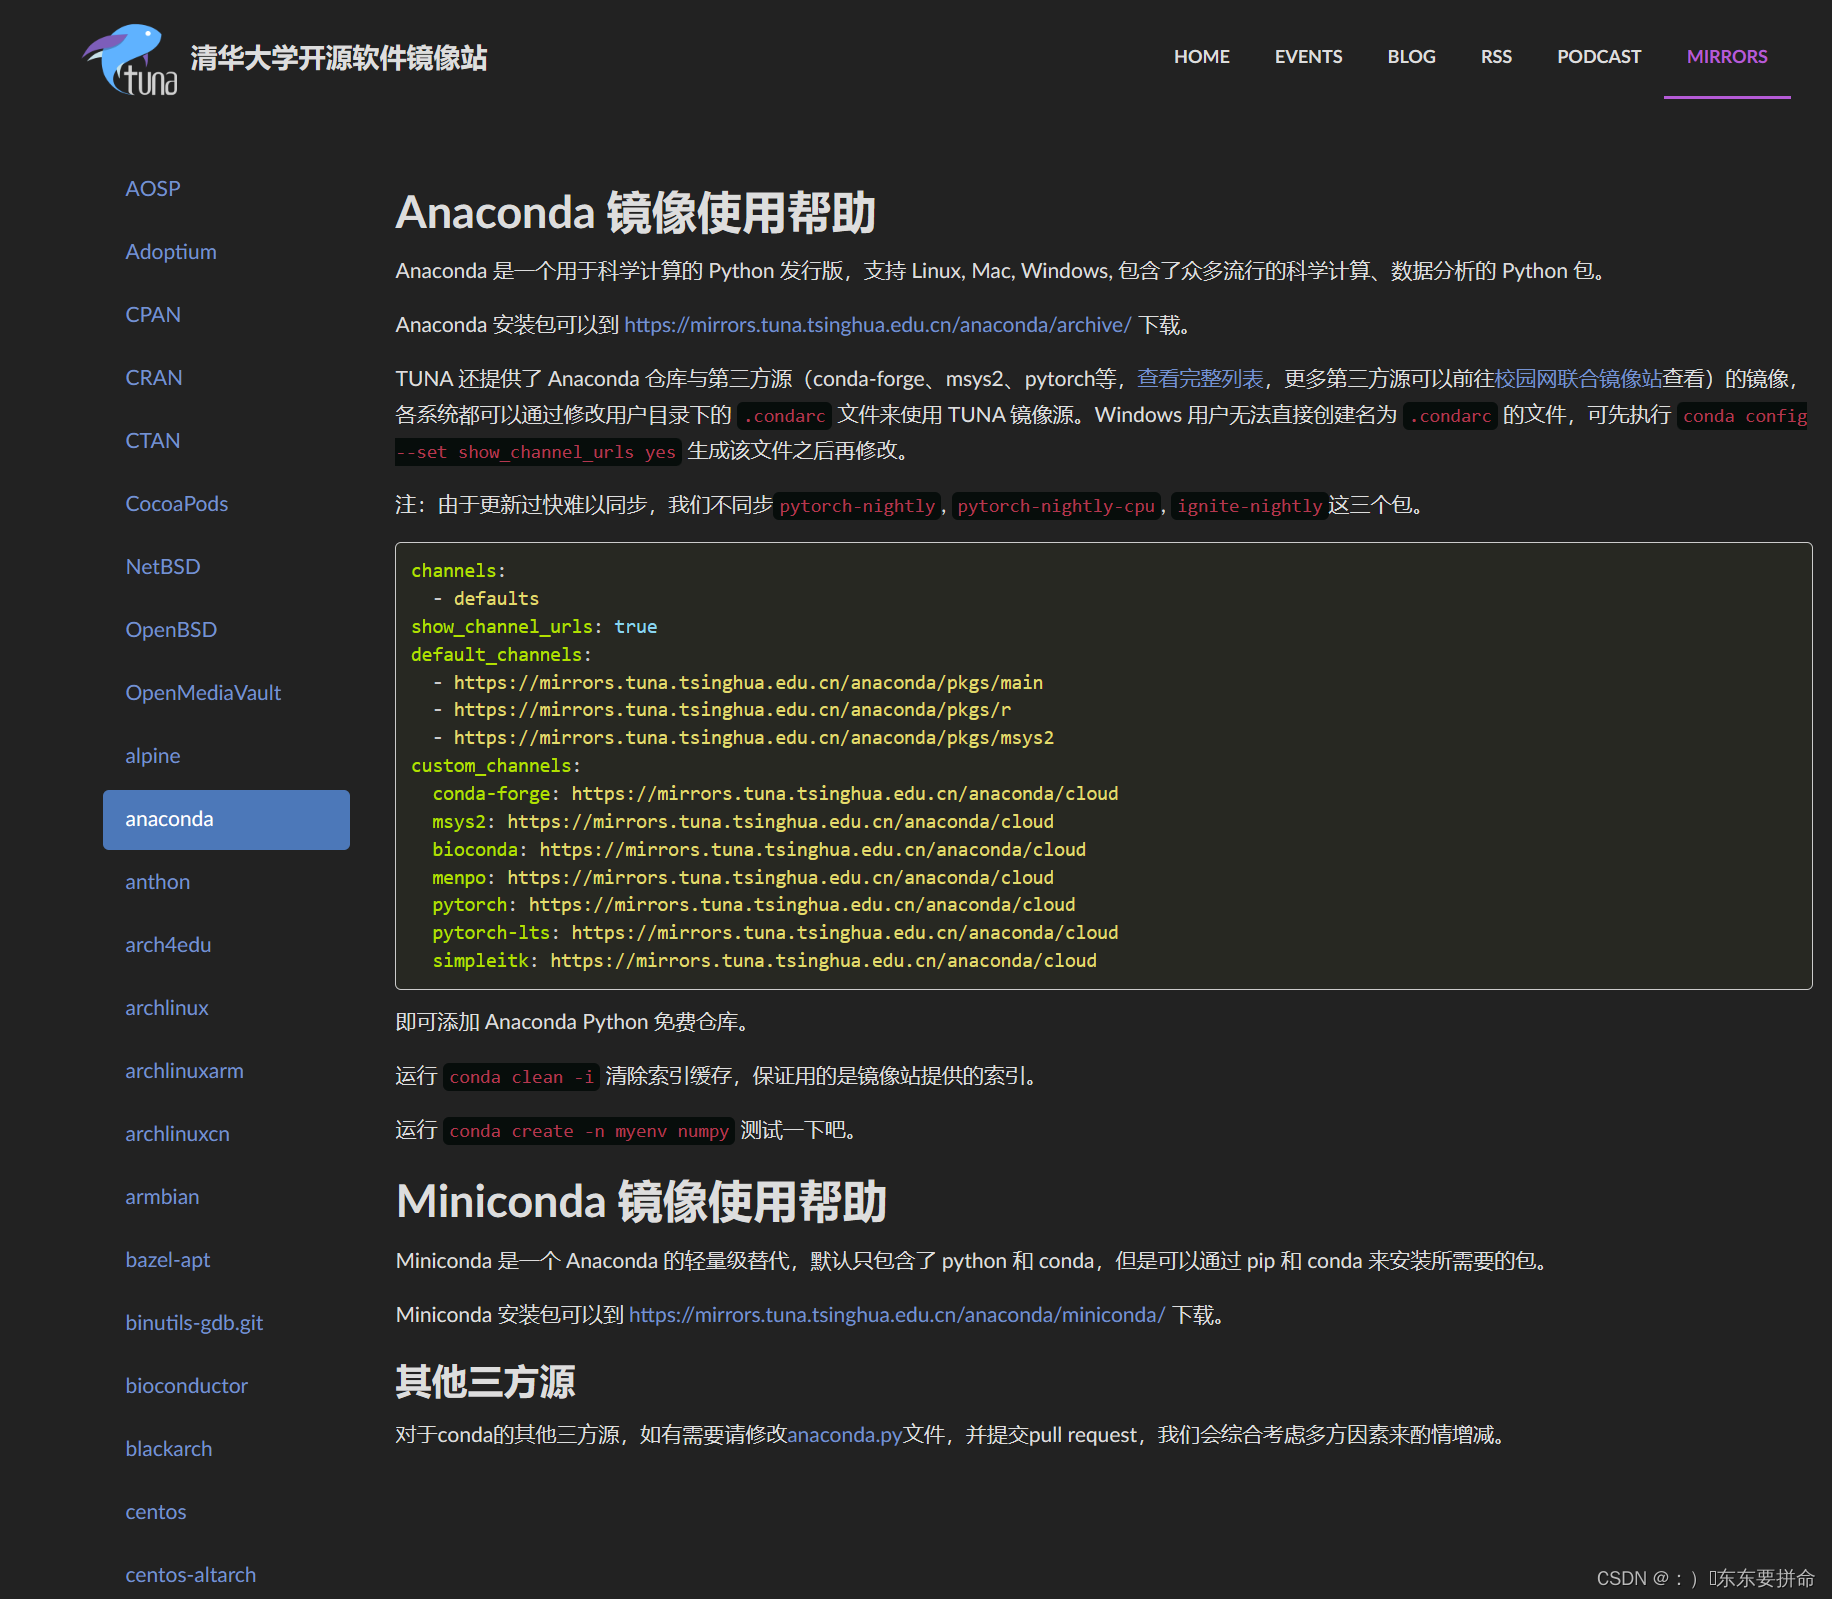
清华就是牛啊 最最最稳妥的方式 是 进去下好
就是我们一般比较懒
pip install -i https://pypi.tuna.tsinghua.edu.cn/simple onnxruntime
哎呀 这个也不想输入
嘿嘿 我也是
这个小伙子给你安排好了
(2条消息) Anaconda 添加清华镜像源_anaconda清华镜像_小金~~的博客-CSDN博客
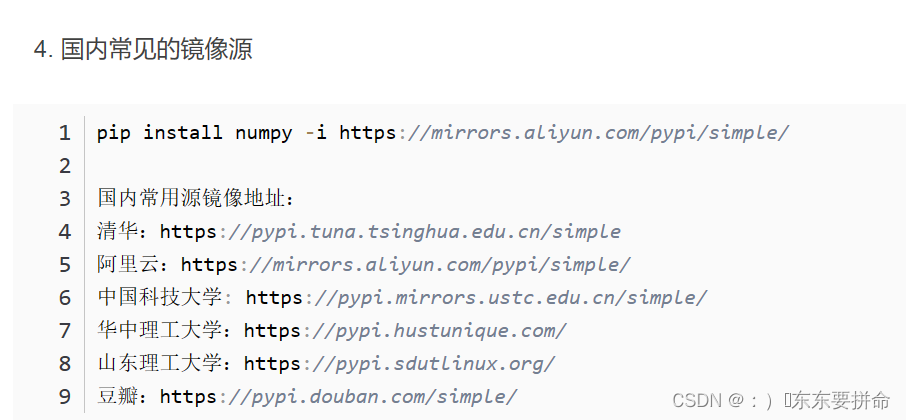
我一直都在用的是 豆瓣 感觉还挺不错的
pip install XXXXX -i https://pypi.doubanio.com/simple/
我默写出来的哈哈
我们继续MM detection的安装啊
可以改用pip
然后 pip 加镜像 可以先不加 有时候还是挺快的 (推荐加啊)
还有一个小细节是 你那个vpn啊 有时候会改网络的 出问题的时候关掉就可以了
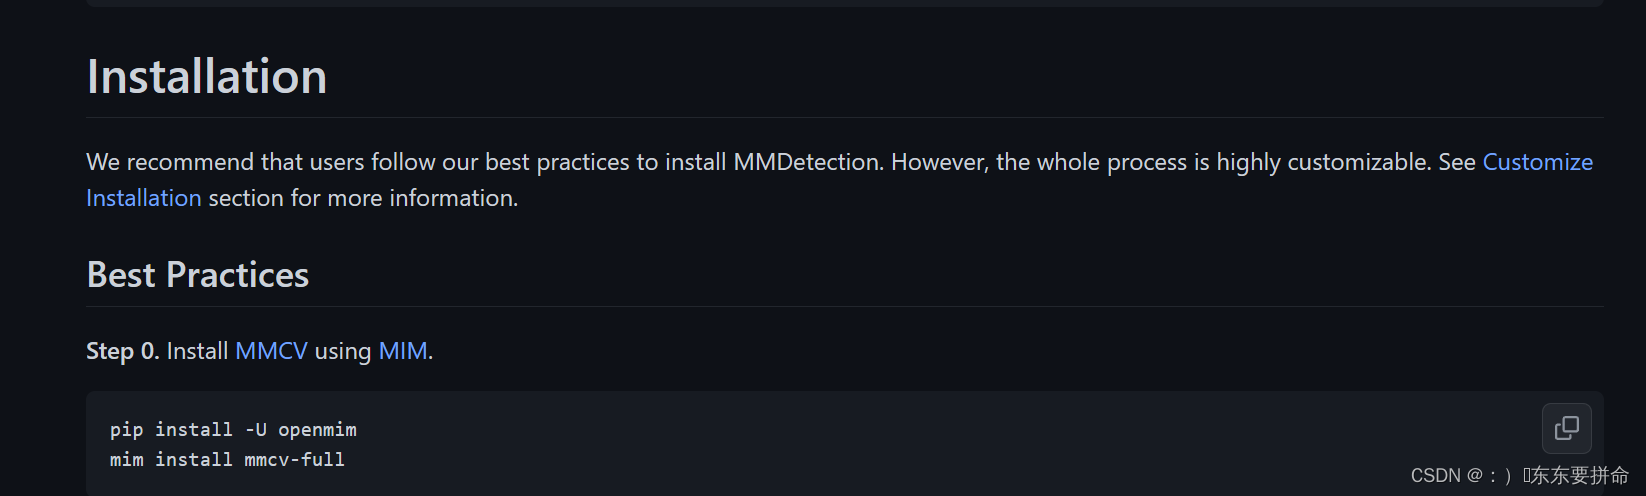
pip install -U openmim
mim install mmcv-full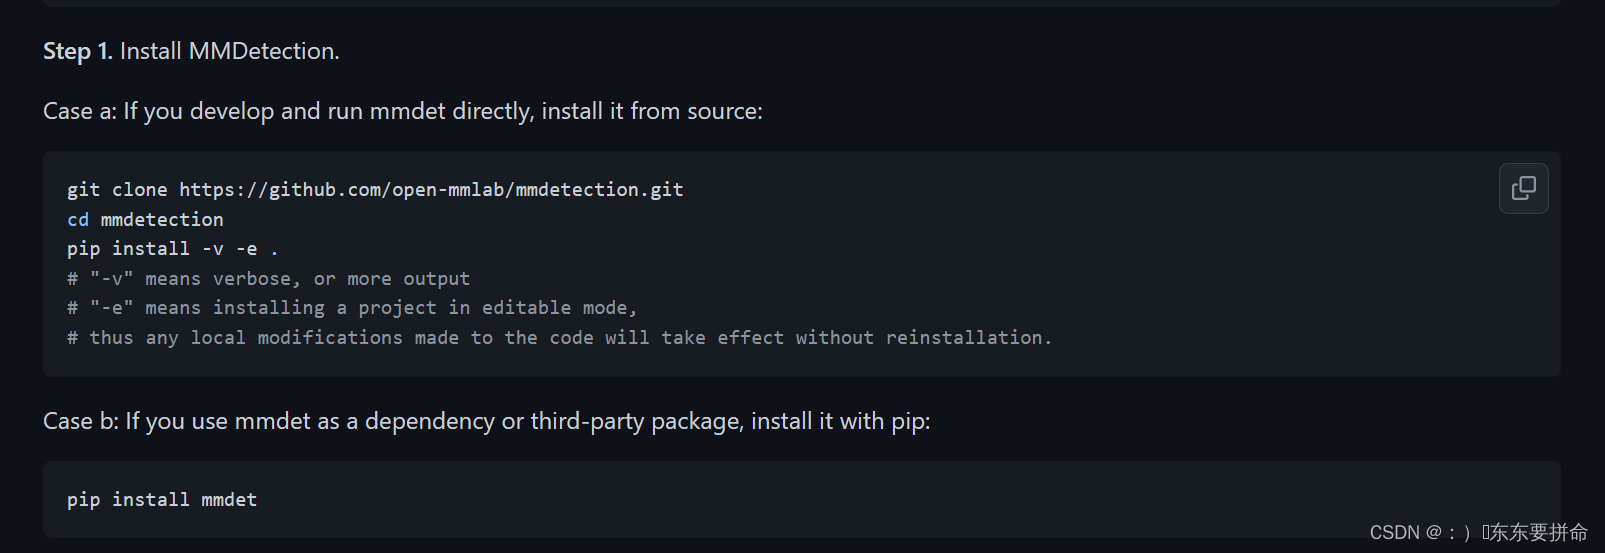
git clone https://github.com/open-mmlab/mmdetection.git
cd mmdetection
pip install -v -e .
# "-v" means verbose, or more output
# "-e" means installing a project in editable mode,
# thus any local modifications made to the code will take effect without reinstallation.
pip install -v -e .(这个有些人会出问题,但是别慌问题不大)
我们有PlanB

pip install mmdet
真的 很推荐 加上有镜像 快的飞起
pip install mmdet -i https://pypi.doubanio.com/simple/
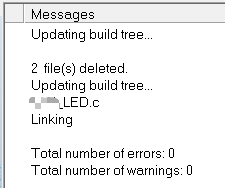
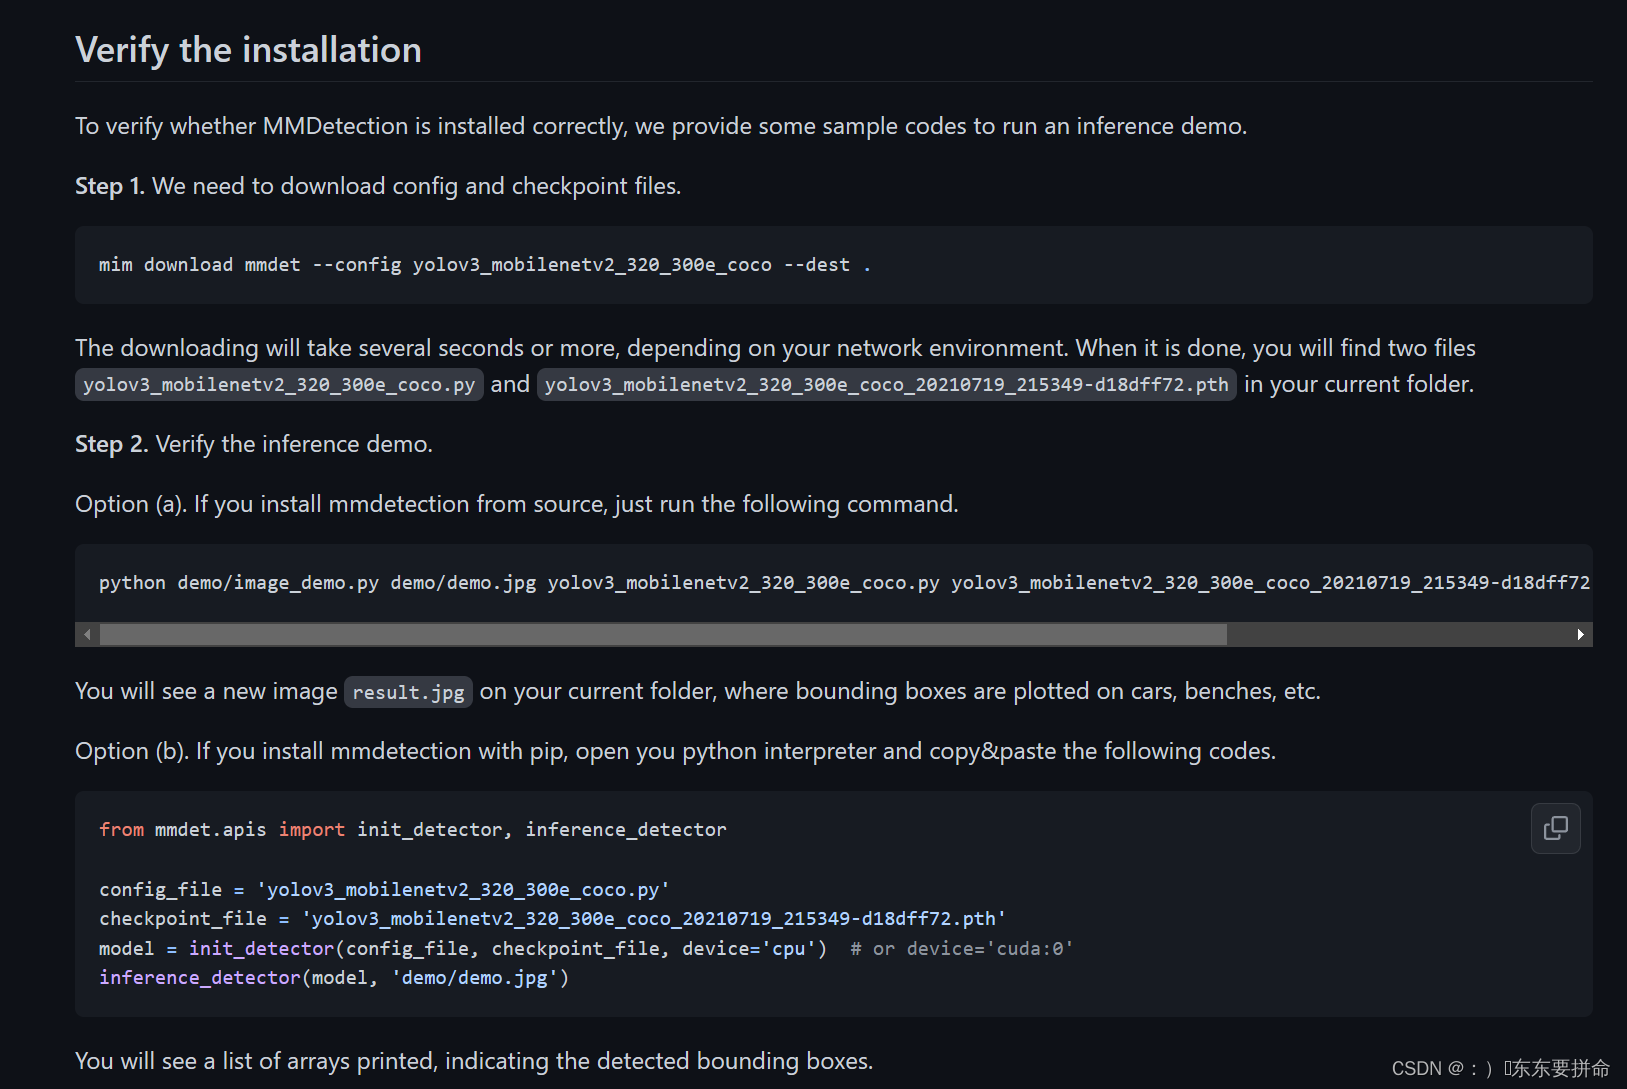 这个是来验证一下安装好了没有
mim download mmdet --config yolov3_mobilenetv2_320_300e_coco --dest .
直接在终端输入就行
等一小会 就能看见两个东东

 这个是得在文件夹找的
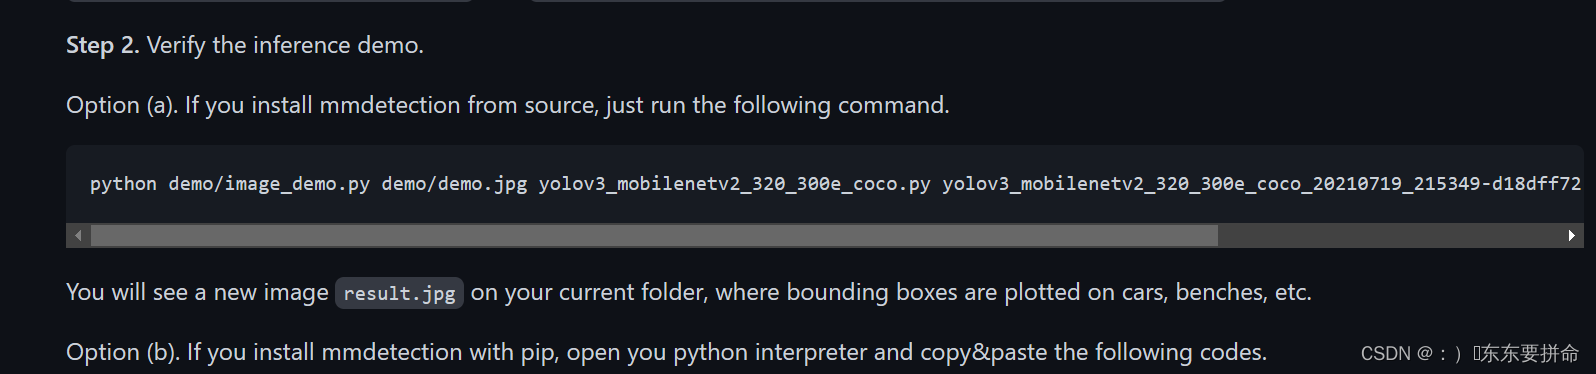
还有就是 userwarning 不是报错 不要害怕!!!!
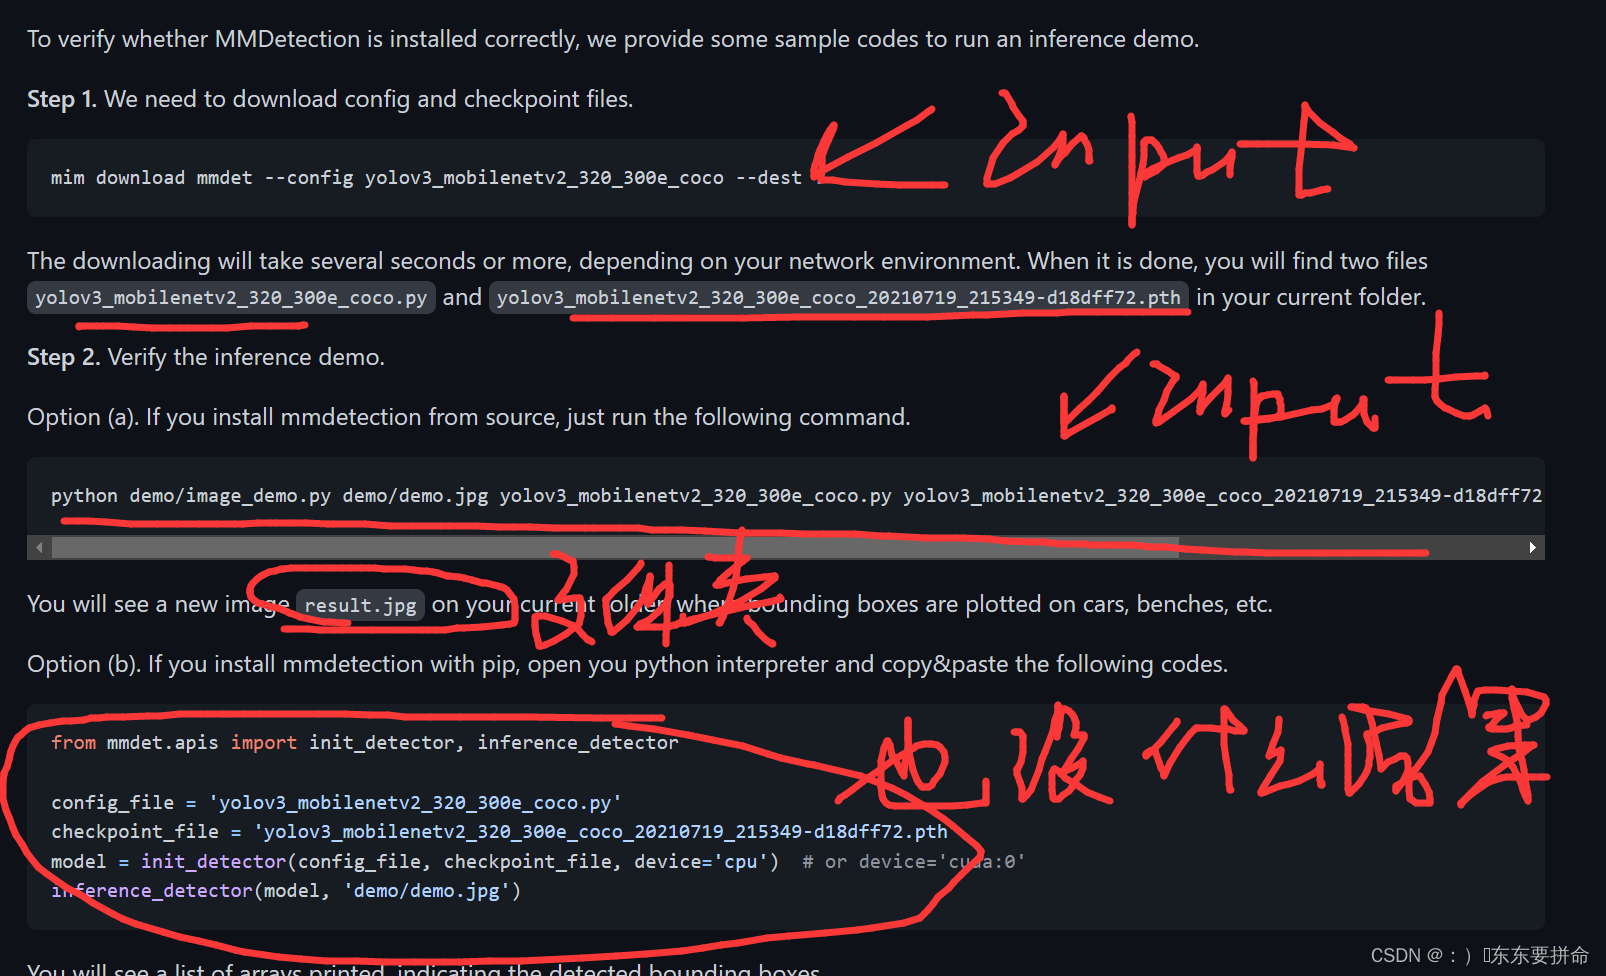
还没完别走
 这两个
这两个
教程很重要
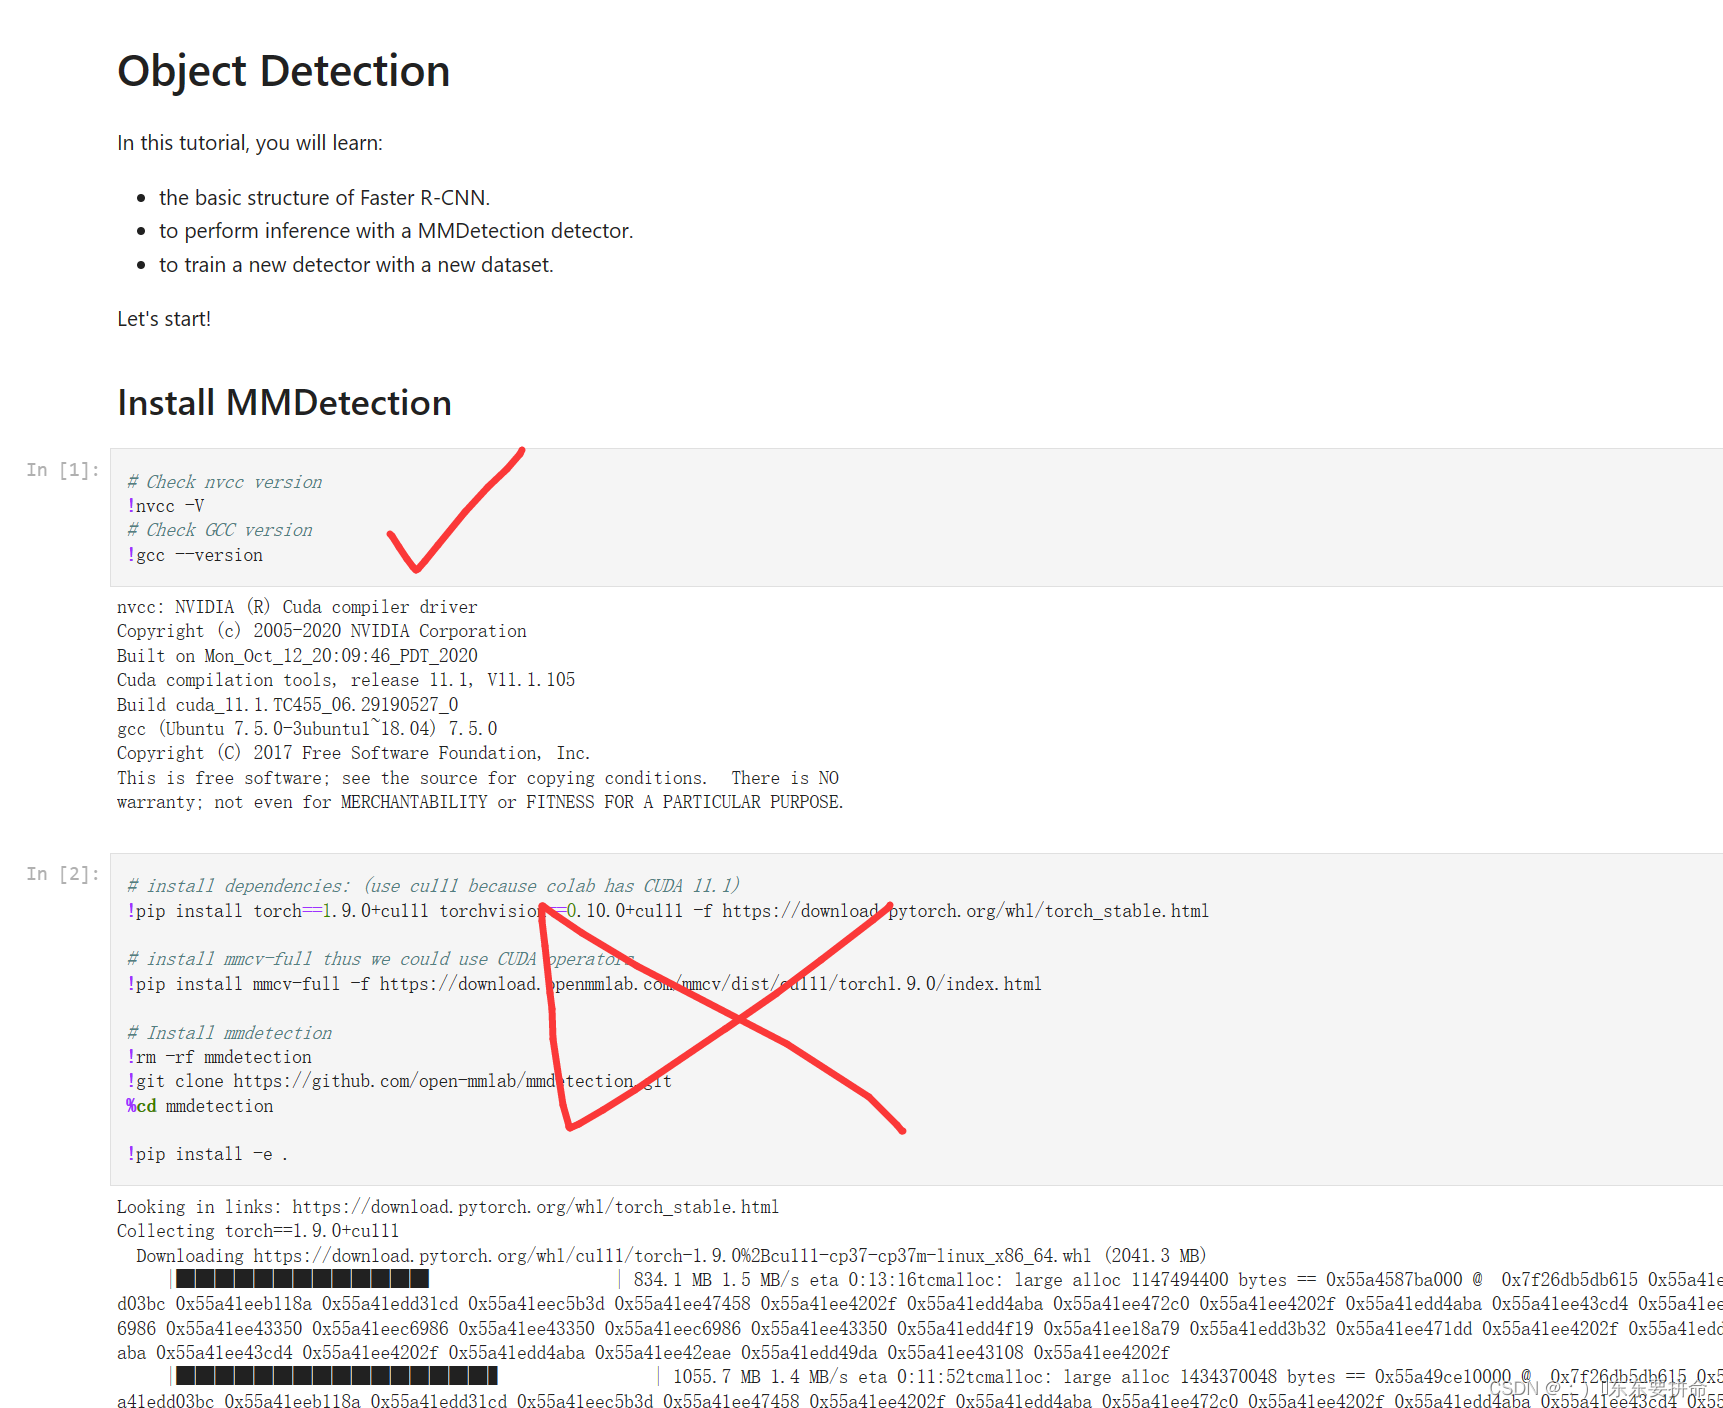
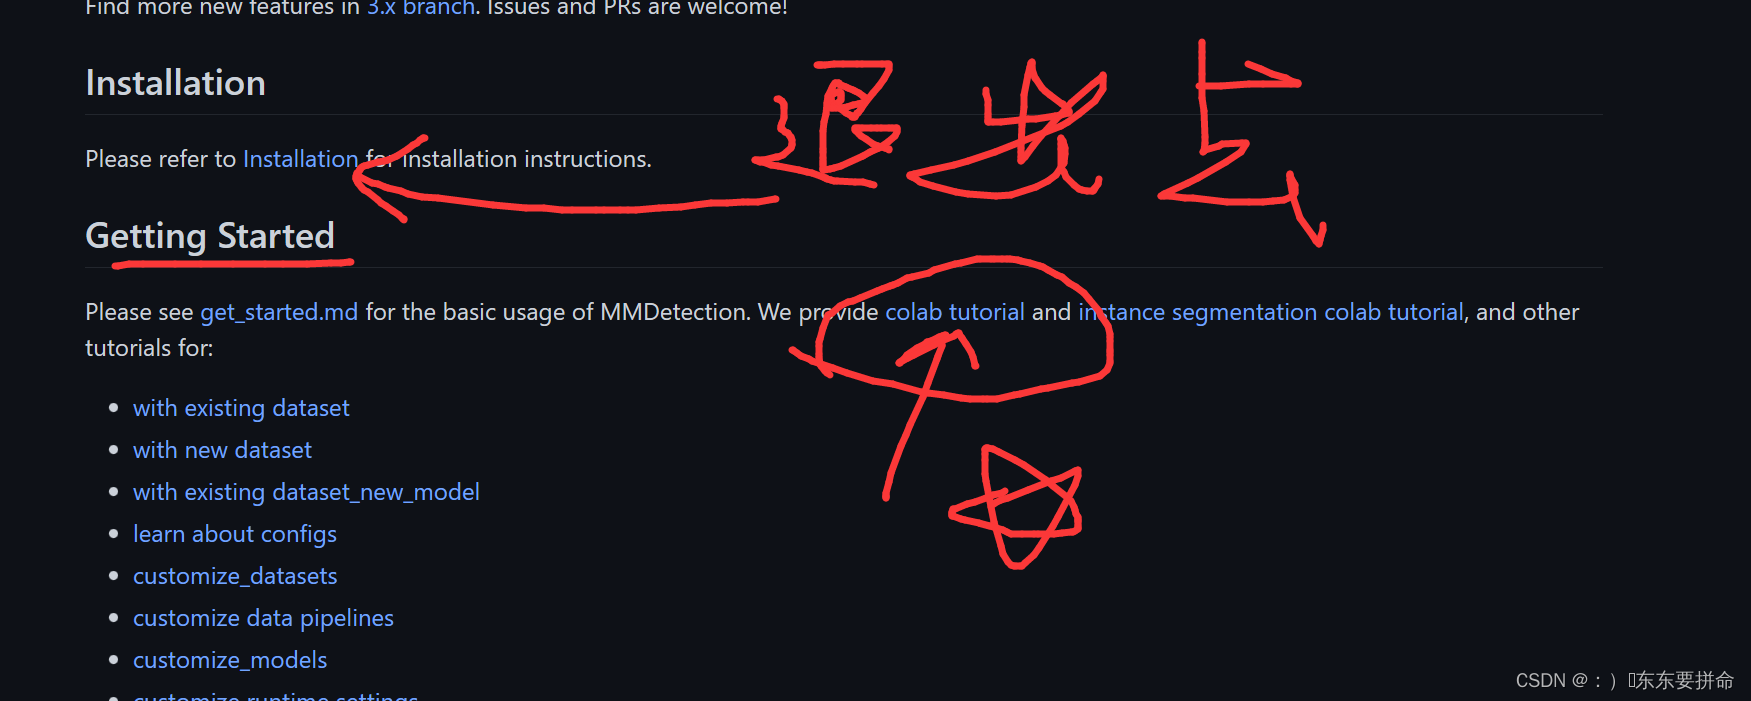
打叉的不用装了 之前就装好了
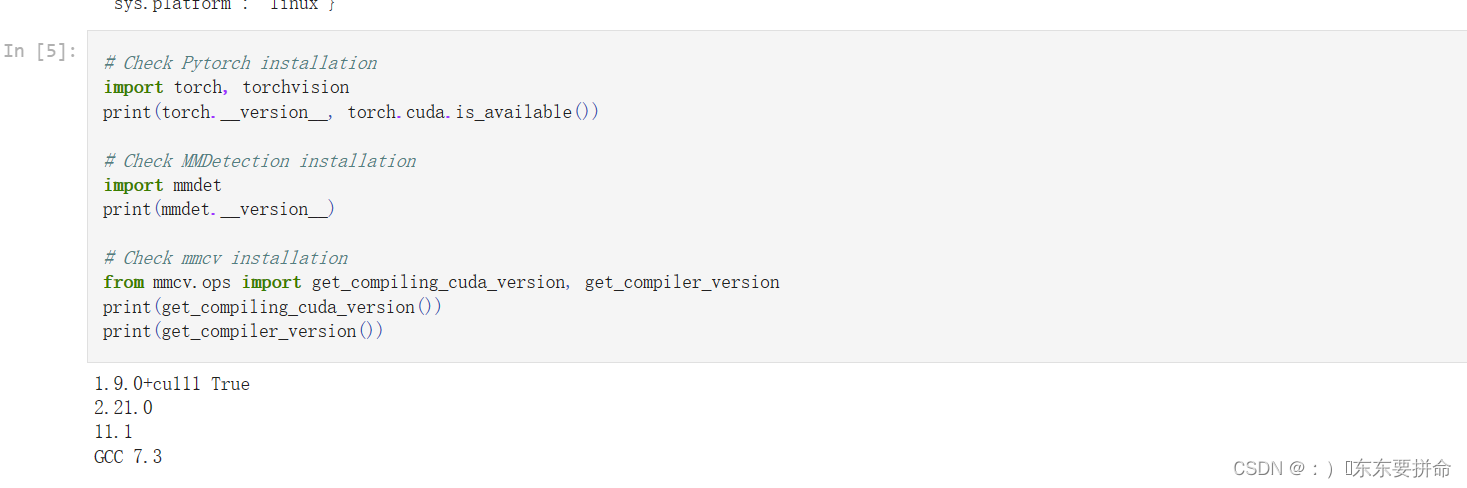
这些是检查环境的 我不相信 你们也没问题 到时候回溯 或者 CSDN一下就行啊
但是我还是衷心祝大家运气爆表 没什么问题 一路走到黑
然后就是 开始双阶段faster——rcnn 的教程了
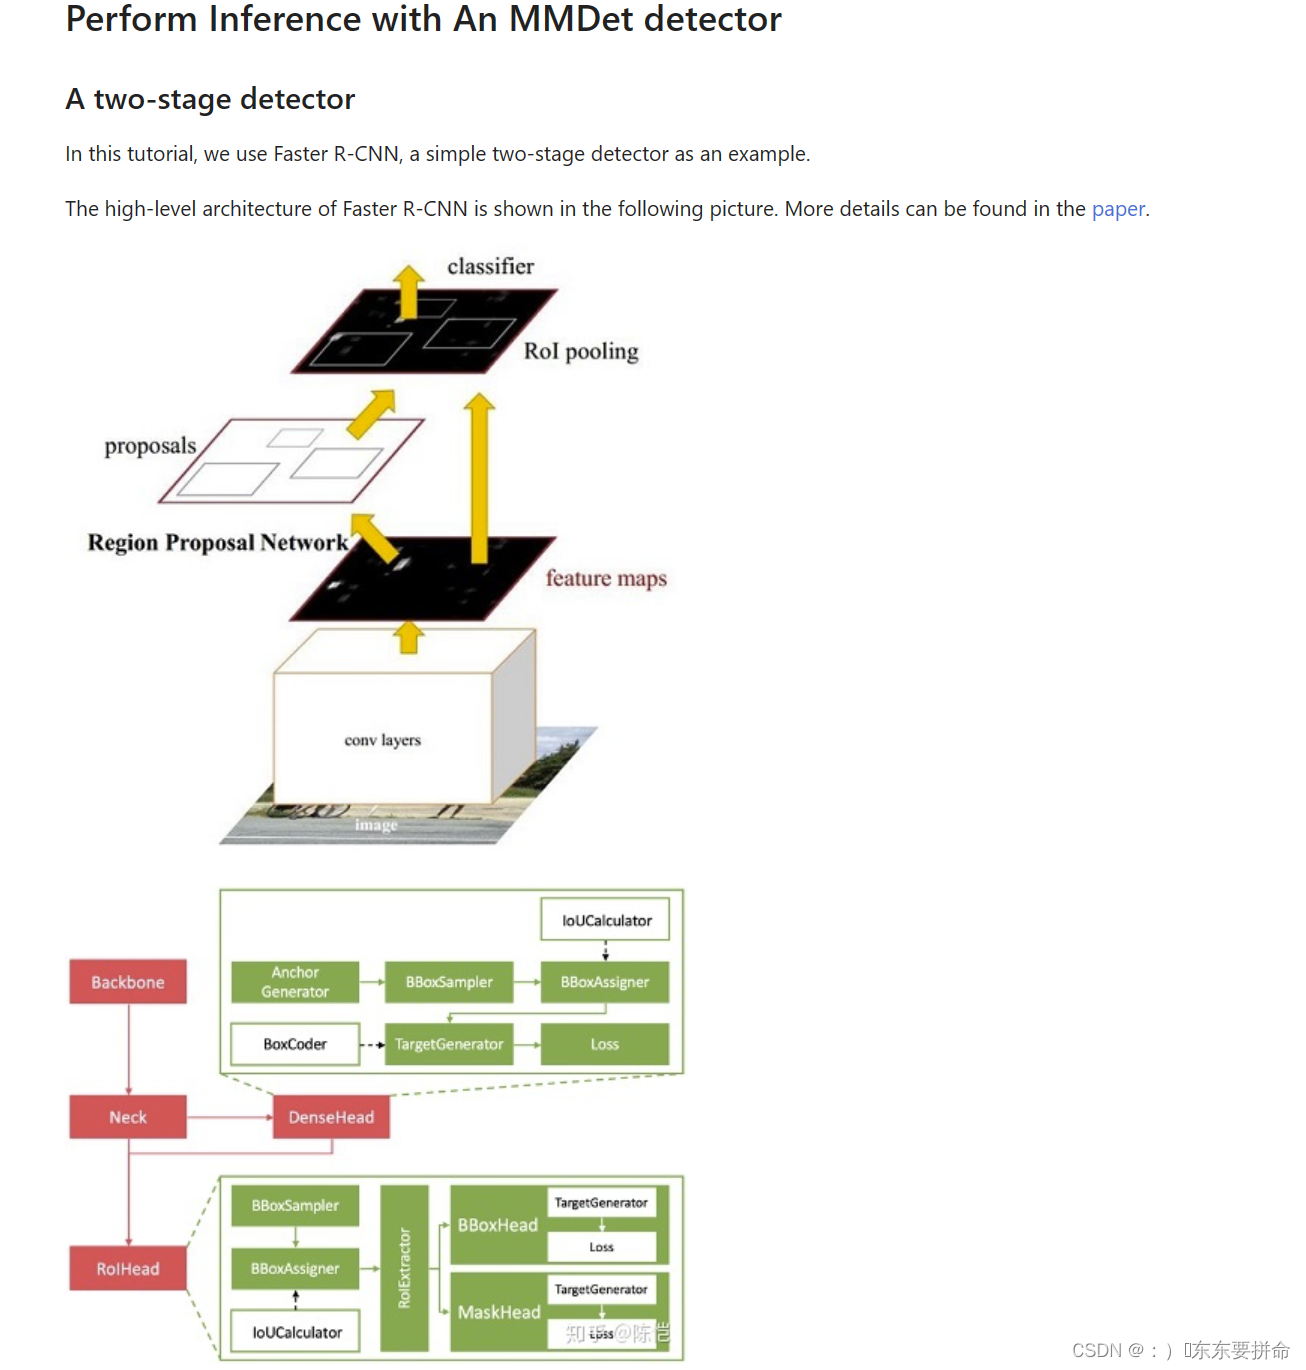
浅浅的欣赏一下啊
真的能让你懂的让我导师来教你
1.2Faster RCNN源码解析(pytorch)_哔哩哔哩_bilibili
大家到这里了 发现这个教程好像是 一个叫jupyter的一个什么东东
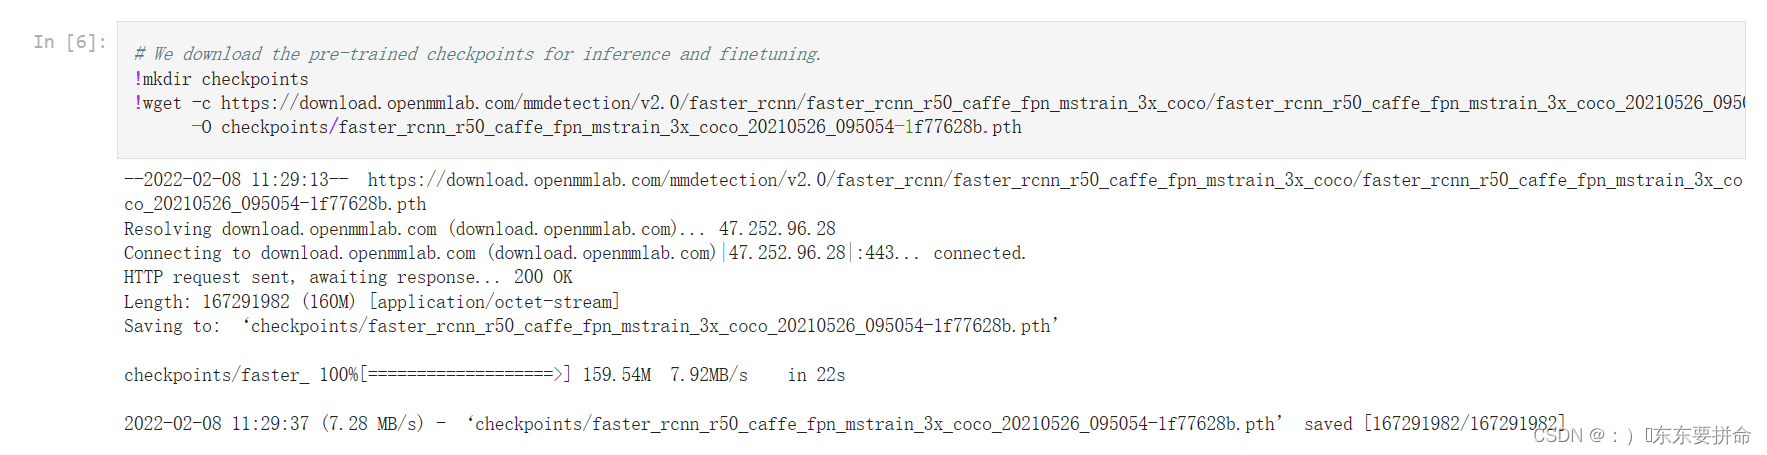
要是 我们用的是pycharm 就在目录下建一个checkpoints的文件夹即可
然后
复制这个链接去浏览器直接download即可然后放进去就行
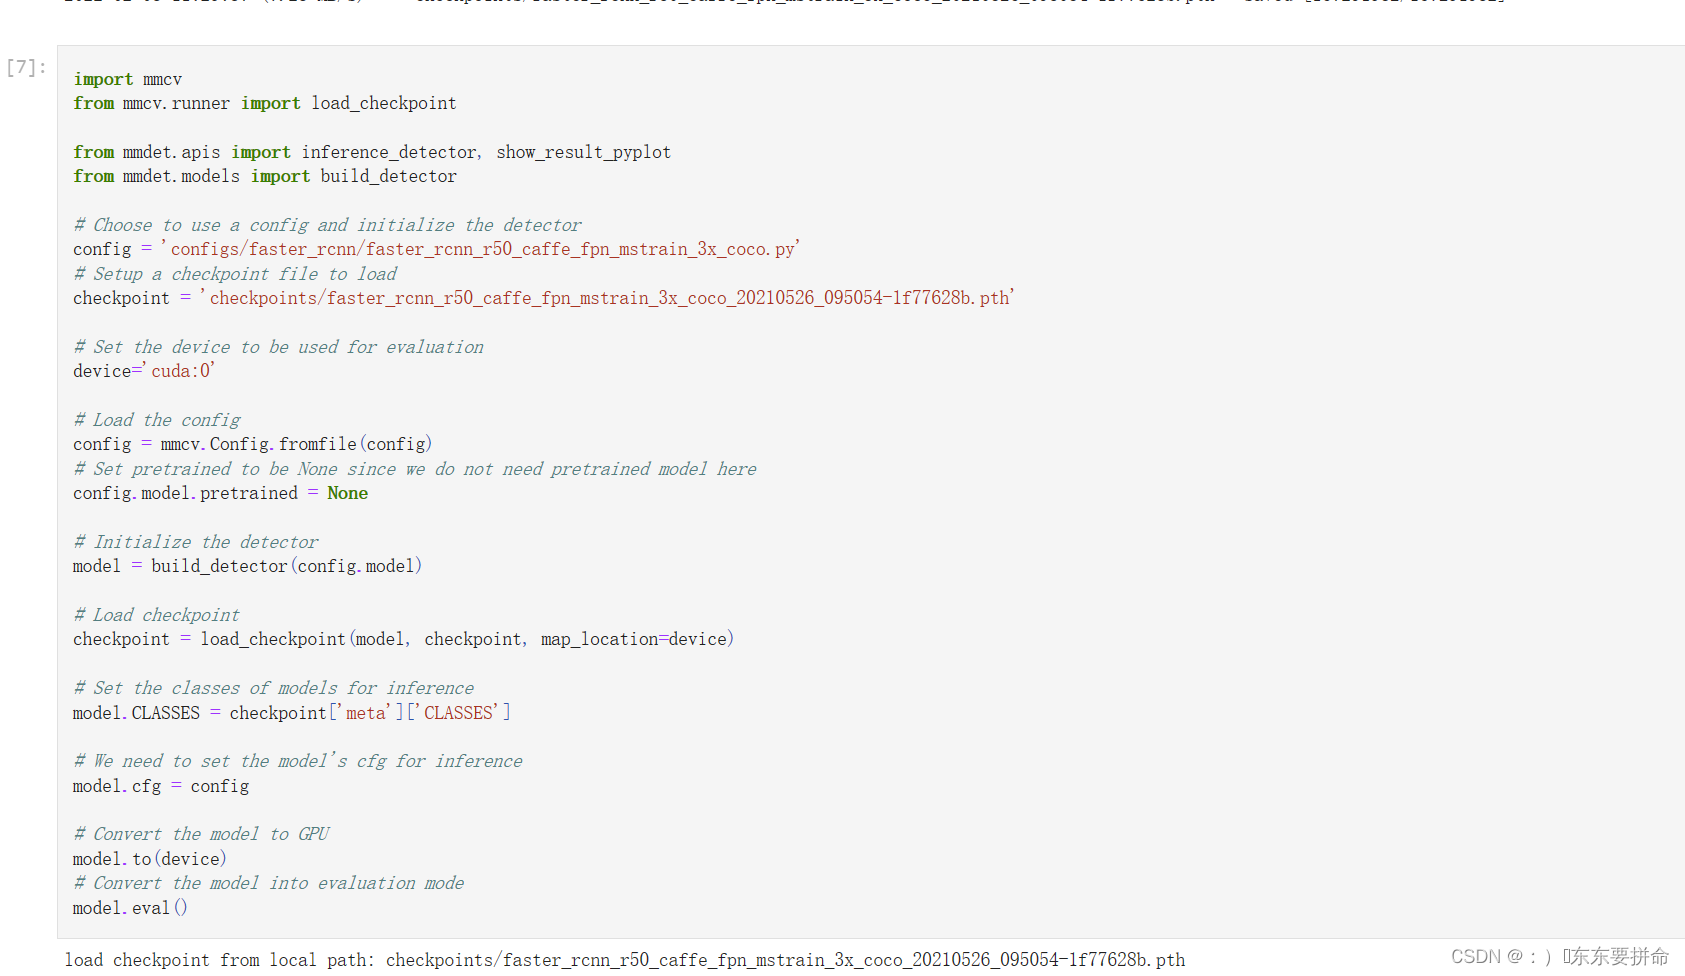
如果是在pycharm上跑是看不见的,只需要print(model.eval())就行
如果要是新建了.py 是缺少包的 这个教程建议在一个py文件下完成 就当是熟悉一下MMdetection 而且也能学蛮多的
这个在终端上实行

上面一些展示图画的 就注释掉继续就行 这些就复制镍铁仔细看看
讲的很清楚
如果不在一个py下是有可能报错的,可以解决
还有就是 注意路径问题
我拿我的技术担保 这个官方的教程 代码没有问题 出错都有可能是格式 和路径问题
还有就是包的问题
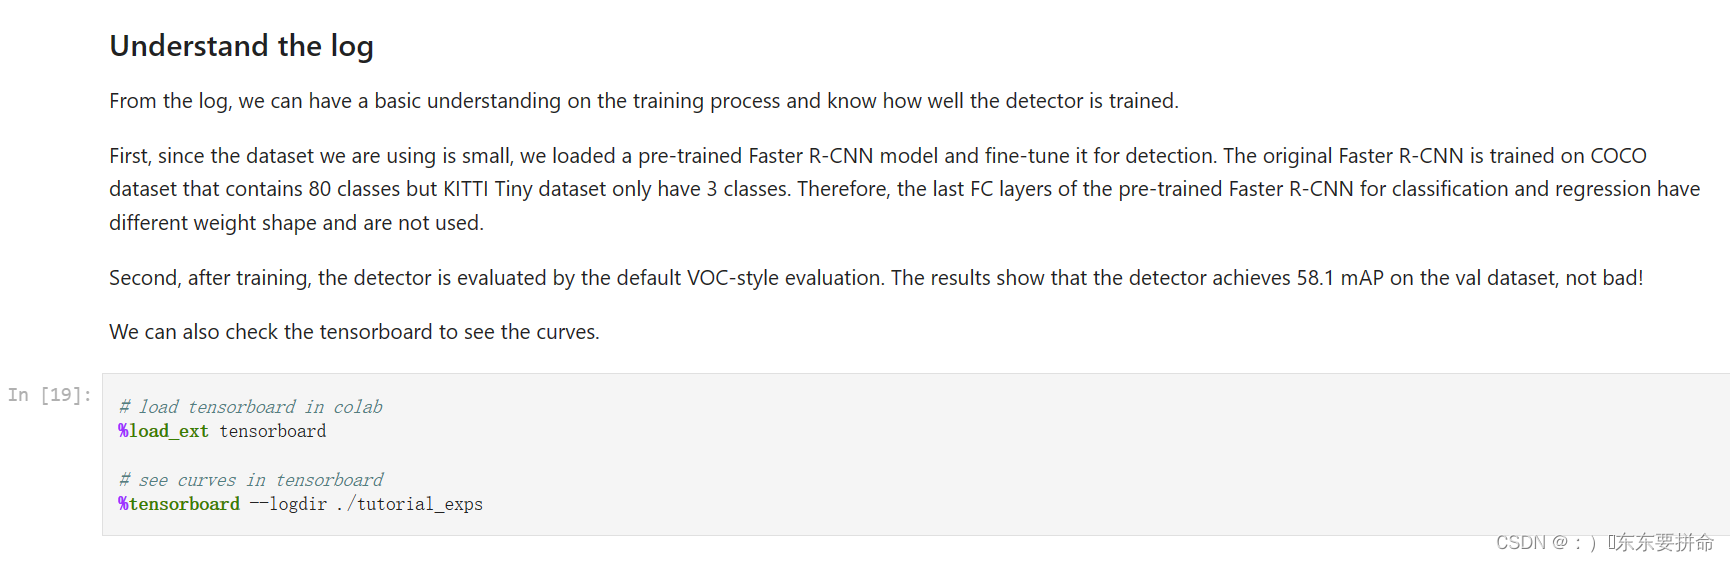
然后这个东西 之前的环境如果有tensorboard 那就没事了
没有的话 去pip install future tensorboard -i https://pypi.doubanio.com/simple/
没有 用goole 的那个什么cablog的东西我乱打的啊

https://colab.research.google.com/
就是这个东西 有兴趣去点开看看 要goole账号的 这个就不多说了
没有也没有关系的 第一行我们不输入了 找到终端直接输入第二行的东西

tensorboard --logdir ./tutorial_exps
这个 tensorboard 和wandb有点像 都是可视化结果的 和loss lr 什么的
然后最后给出源码
import copy
import os.path as osp
import mmcv
import numpy as np
from mmdet.datasets.builder import DATASETS
from mmdet.datasets.custom import CustomDataset
@DATASETS.register_module()
class KittiTinyDataset(CustomDataset):
CLASSES = ('Car', 'Pedestrian', 'Cyclist')
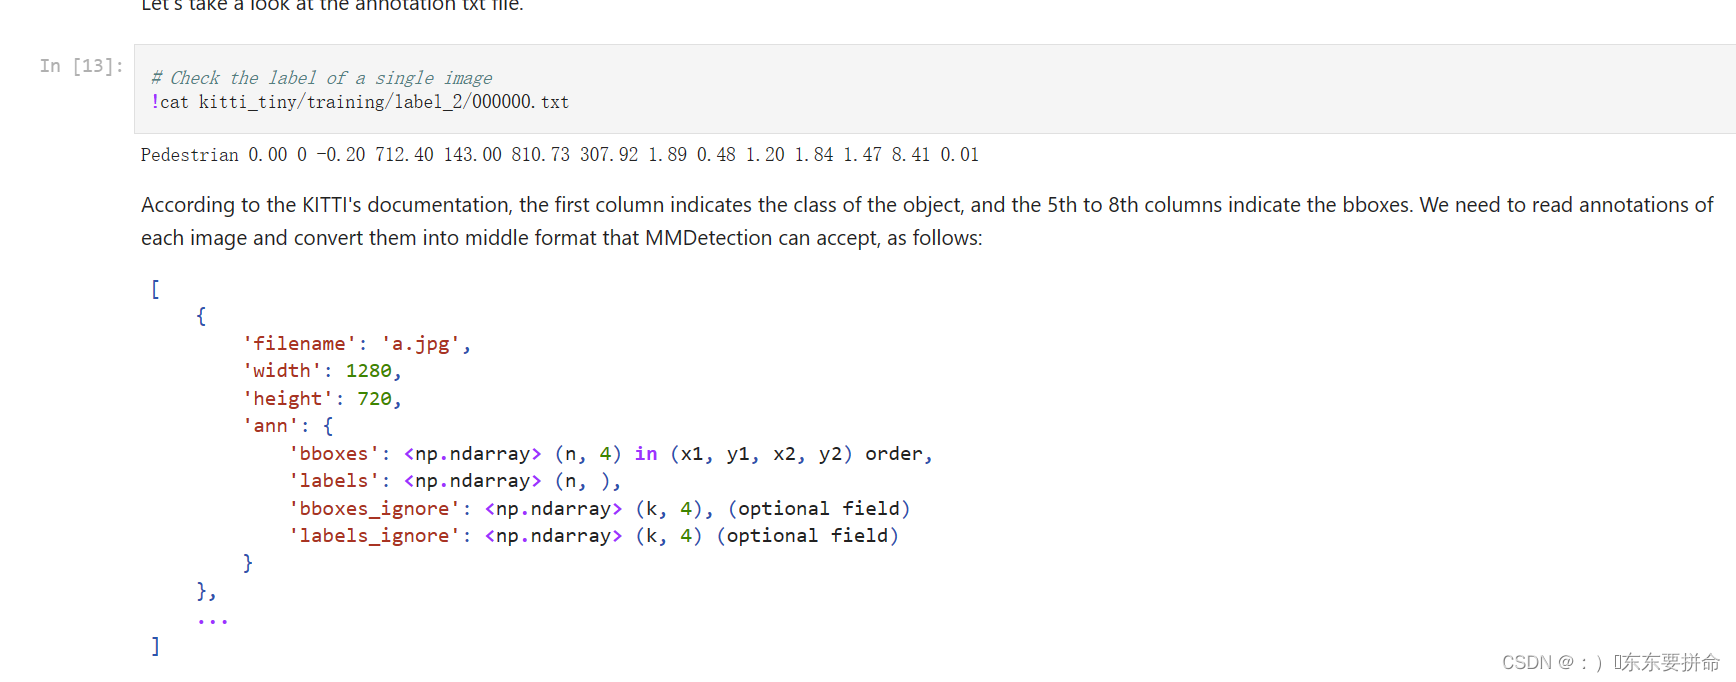
def load_annotations(self, ann_file):
cat2label = {k: i for i, k in enumerate(self.CLASSES)}
# load image list from file
image_list = mmcv.list_from_file(self.ann_file)
data_infos = []
# convert annotations to middle format
for image_id in image_list:
filename = f'{self.img_prefix}/{image_id}.jpeg'
image = mmcv.imread(filename)
height, width = image.shape[:2]
data_info = dict(filename=f'{image_id}.jpeg', width=width, height=height)
# load annotations
label_prefix = self.img_prefix.replace('image_2', 'label_2')
lines = mmcv.list_from_file(osp.join(label_prefix, f'{image_id}.txt'))
content = [line.strip().split(' ') for line in lines]
bbox_names = [x[0] for x in content]
bboxes = [[float(info) for info in x[4:8]] for x in content]
gt_bboxes = []
gt_labels = []
gt_bboxes_ignore = []
gt_labels_ignore = []
# filter 'DontCare'
for bbox_name, bbox in zip(bbox_names, bboxes):
if bbox_name in cat2label:
gt_labels.append(cat2label[bbox_name])
gt_bboxes.append(bbox)
else:
gt_labels_ignore.append(-1)
gt_bboxes_ignore.append(bbox)
data_anno = dict(
bboxes=np.array(gt_bboxes, dtype=np.float32).reshape(-1, 4),
labels=np.array(gt_labels, dtype=np.long),
bboxes_ignore=np.array(gt_bboxes_ignore,
dtype=np.float32).reshape(-1, 4),
labels_ignore=np.array(gt_labels_ignore, dtype=np.long))
data_info.update(ann=data_anno)
data_infos.append(data_info)
return data_infos
from mmcv import Config
cfg = Config.fromfile('/media/image/7FEE64F823ECD143/cauchychen/mmdetection-master/mmdetection/configs/faster_rcnn/faster_rcnn_r50_caffe_fpn_1x_coco.py')
from mmdet.apis import set_random_seed
# Modify dataset type and path
cfg.dataset_type = 'KittiTinyDataset'
cfg.data_root = 'kitti_tiny/'
# cfg.data_root = '/media/image/7FEE64F823ECD143/cauchychen/mmdetection-master/mmdetection/data/kitti_tiny'
cfg.data.test.type = 'KittiTinyDataset'
cfg.data.test.data_root = 'kitti_tiny/'
cfg.data.test.ann_file = 'train.txt'
cfg.data.test.img_prefix = 'training/image_2'
cfg.data.train.type = 'KittiTinyDataset'
cfg.data.train.data_root = 'kitti_tiny/'
cfg.data.train.ann_file = 'train.txt'
cfg.data.train.img_prefix = 'training/image_2'
cfg.data.val.type = 'KittiTinyDataset'
cfg.data.val.data_root = 'kitti_tiny/'
cfg.data.val.ann_file = 'val.txt'
cfg.data.val.img_prefix = 'training/image_2'
# modify num classes of the model in box head
cfg.model.roi_head.bbox_head.num_classes = 3
# If we need to finetune a model based on a pre-trained detector, we need to
# use load_from to set the path of checkpoints.
cfg.load_from = '/media/image/7FEE64F823ECD143/cauchychen/mmdetection-master/checkpoints/faster_rcnn_r50_caffe_fpn_mstrain_3x_coco_20210526_095054-1f77628b.pth'
# Set up working dir to save files and logs.
cfg.work_dir = './tutorial_exps'
# The original learning rate (LR) is set for 8-GPU training.
# We divide it by 8 since we only use one GPU.
cfg.optimizer.lr = 0.02 / 8
cfg.lr_config.warmup = None
cfg.log_config.interval = 10
# Change the evaluation metric since we use customized dataset.
cfg.evaluation.metric = 'mAP'
# We can set the evaluation interval to reduce the evaluation times
cfg.evaluation.interval = 12
# We can set the checkpoint saving interval to reduce the storage cost
cfg.checkpoint_config.interval = 12
# Set seed thus the results are more reproducible
cfg.seed = 0
set_random_seed(0, deterministic=False)
cfg.device = 'cuda'
cfg.gpu_ids = range(1)
# We can also use tensorboard to log the training process
cfg.log_config.hooks = [
dict(type='TextLoggerHook'),
dict(type='TensorboardLoggerHook')]
# We can initialize the logger for training and have a look# at the final config used for training
# print(f'Config:\n{cfg.pretty_text}')
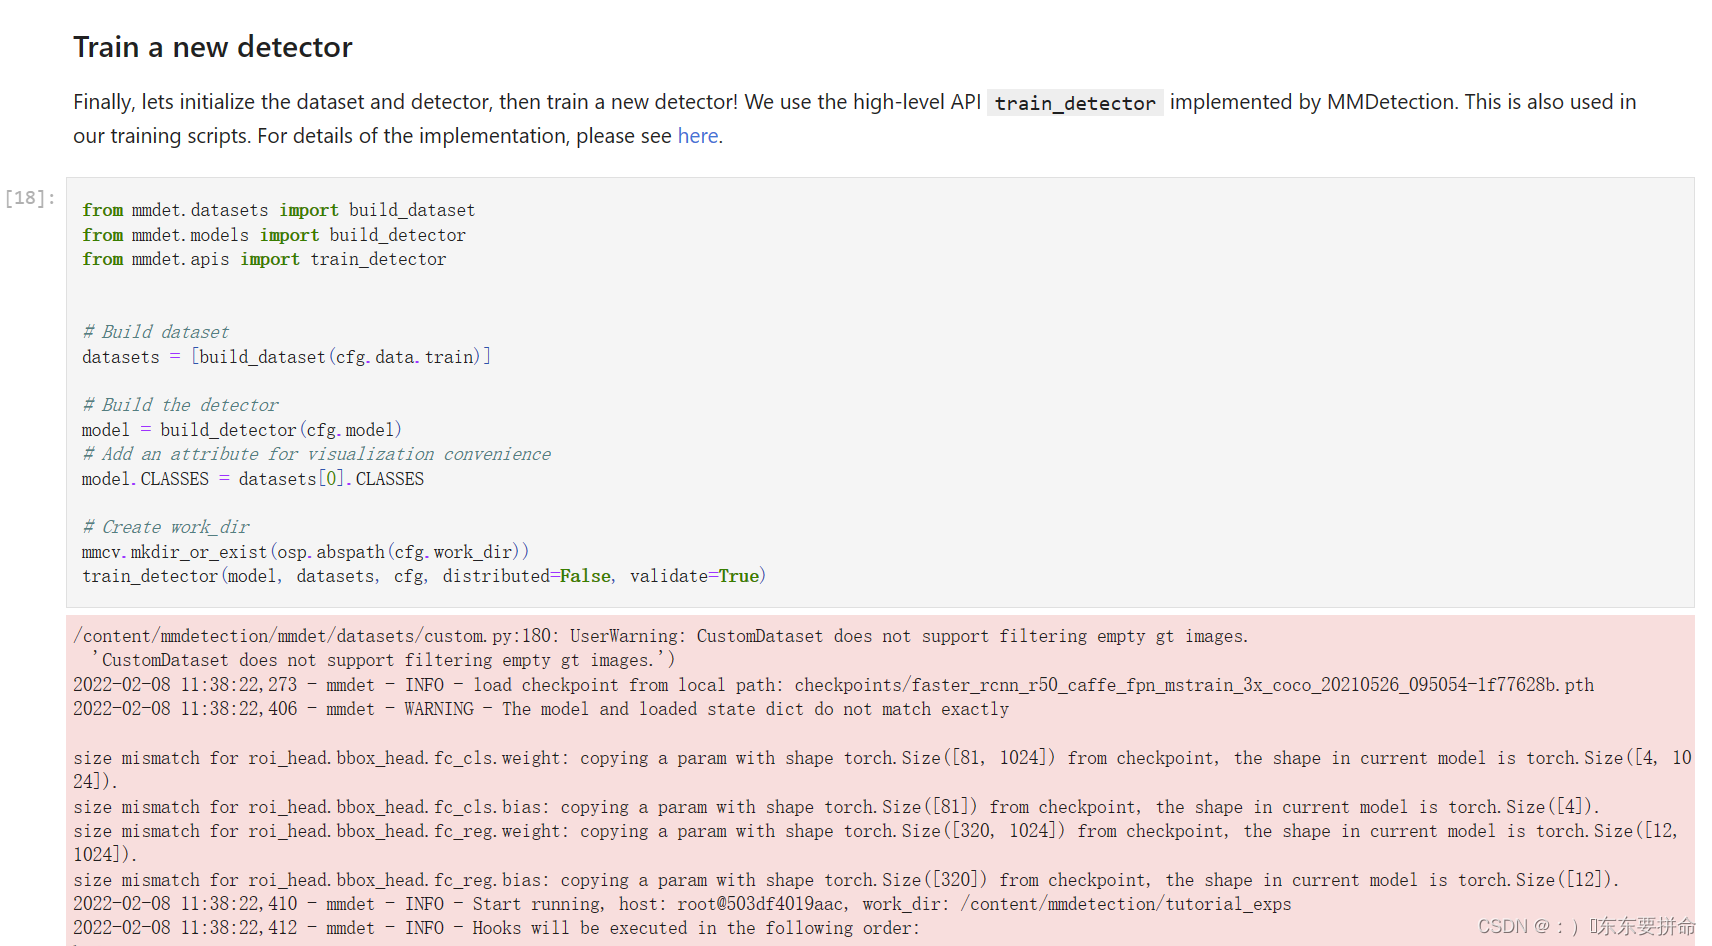
from mmdet.datasets import build_dataset
from mmdet.models import build_detector
from mmdet.apis import train_detector
datasets = [build_dataset(cfg.data.train)]
# Build the detector
model = build_detector(cfg.model)
# Add an attribute for visualization convenience
model.CLASSES = datasets[0].CLASSES
# Create work_dir
mmcv.mkdir_or_exist(osp.abspath(cfg.work_dir))
train_detector(model, datasets, cfg, distributed=False, validate=True)
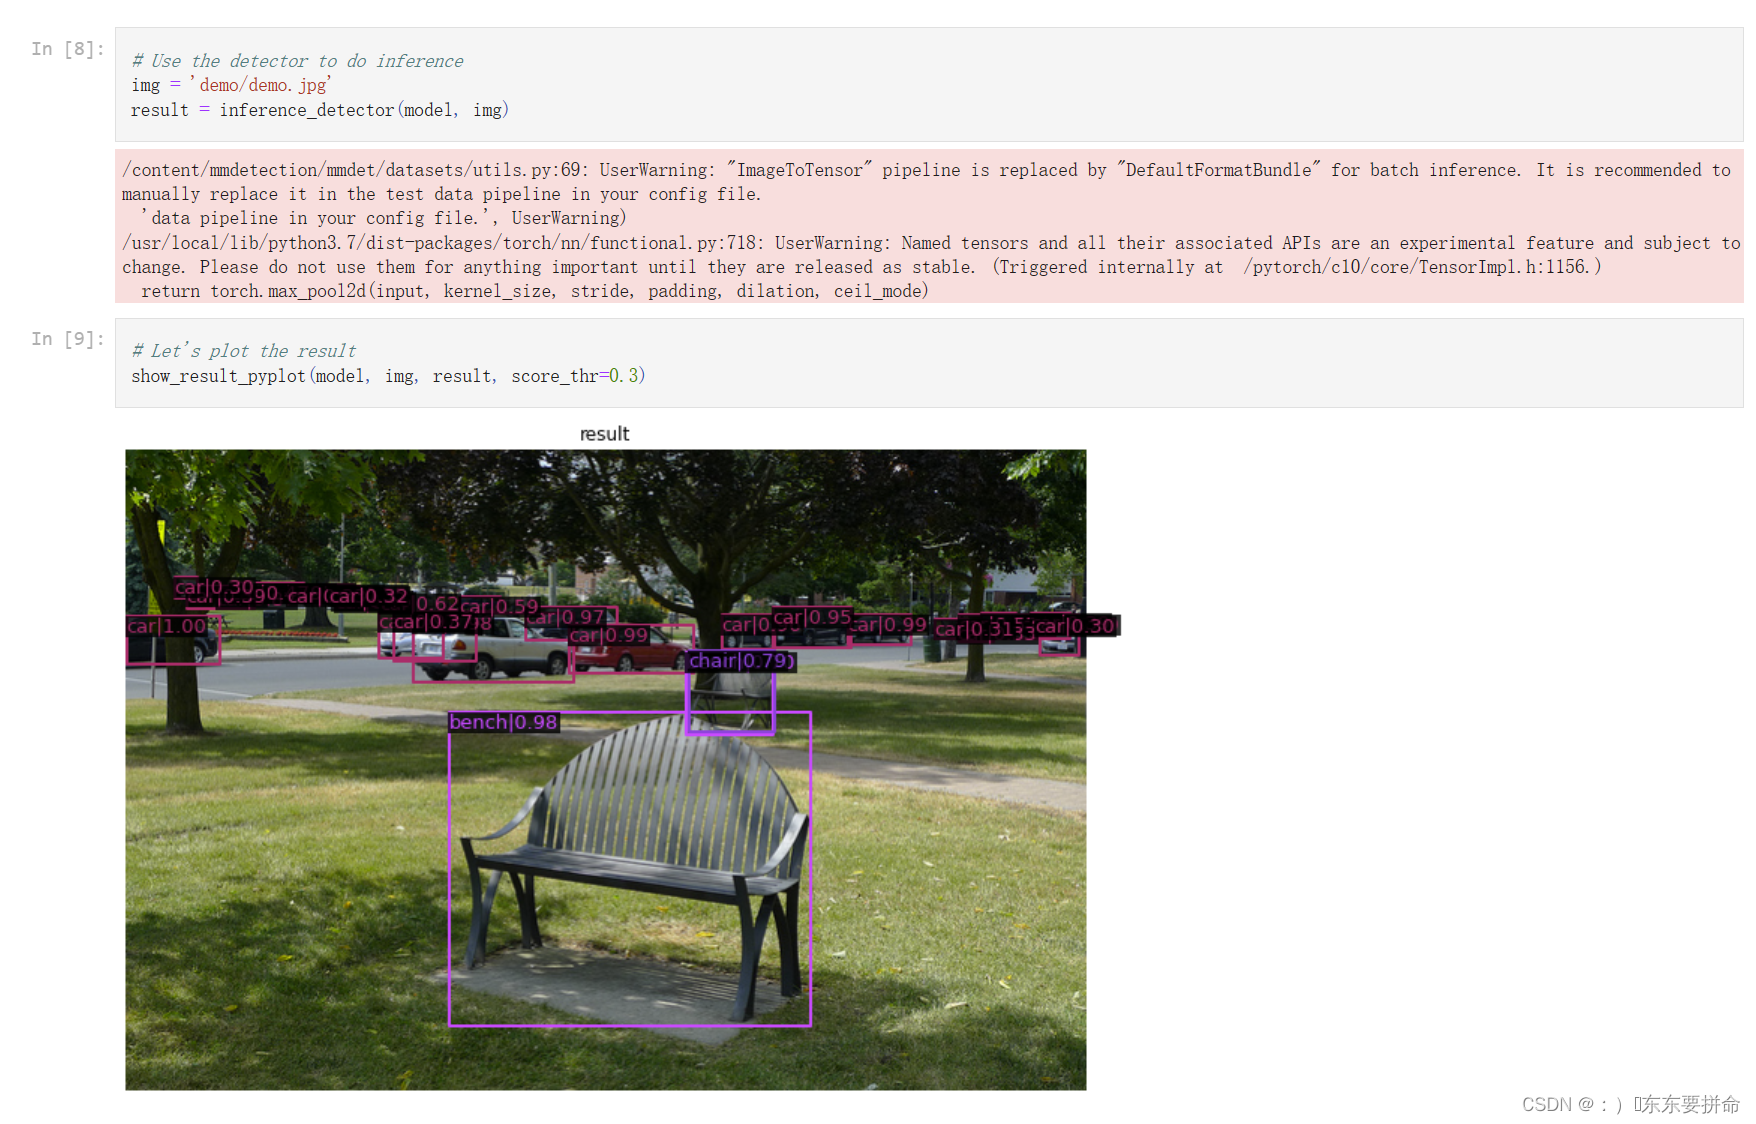
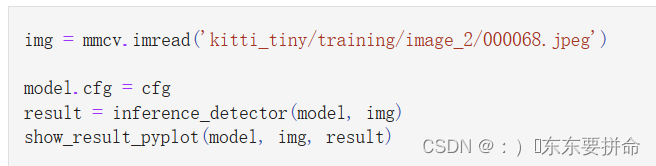
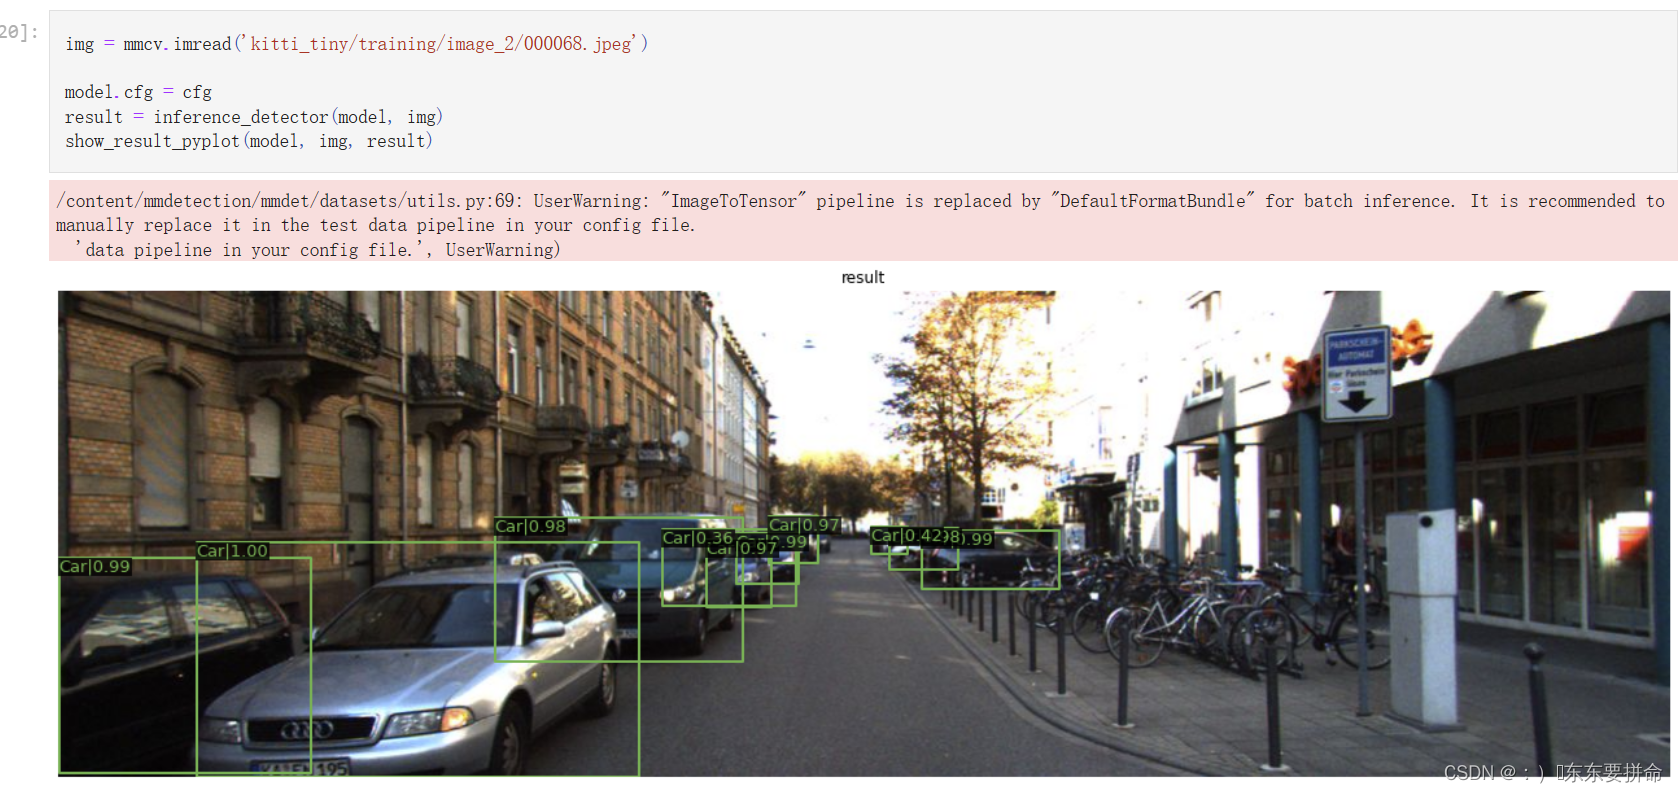
from mmdet.apis import inference_detector , show_result_pyplot
img = mmcv.imread('kitti_tiny/training/image_2/000068.jpeg')
model.cfg = cfg
result = inference_detector(model, img)
show_result_pyplot(model, img, result)
但是一定要下好东西
这里能不能直接给啊(私信吧 新电脑没有百度网盘啦啦啦啦啦)